Introduction
ZimaBoard 2 — Hack Out New Rules
A Hyper-Performance Single-Board Server designed for makers and creators. Compact yet powerful, it can be your mini NAS, home server, self-hosted platform, or software router, and it’s capable of local AI inference and cluster deployments.
With dual 2.5GbE, a PCIe slot, dual SATA 3.0, and USB 3.1 expansion, ZimaBoard 2 lets you build your own private, high-performance digital hub.
Features
- Intel® N150 quad-core CPU, up to 3.6 GHz for responsive performance.
- 8GB or 16GB LPDDR5x memory to handle multitasking.
- 32GB or** 64GB eMMC** for fast system boot.
- 2 × 2.5GbE LAN ports for high-speed networking.
- 2 × SATA 3.0 with power to connect 2.5”/3.5” HDDs/SSDs directly.
- 2 × USB 3.1 for high-speed peripherals and external drives.
- 1 × PCIe 3.0 slot for a 10GbE NIC,** NVMe adapter**, or a GPU.
-** 1 × Mini DisplayPort 1.4**, supports 4K@60Hz output. - Fanless passive cooling for silent, stable operation.
Interface
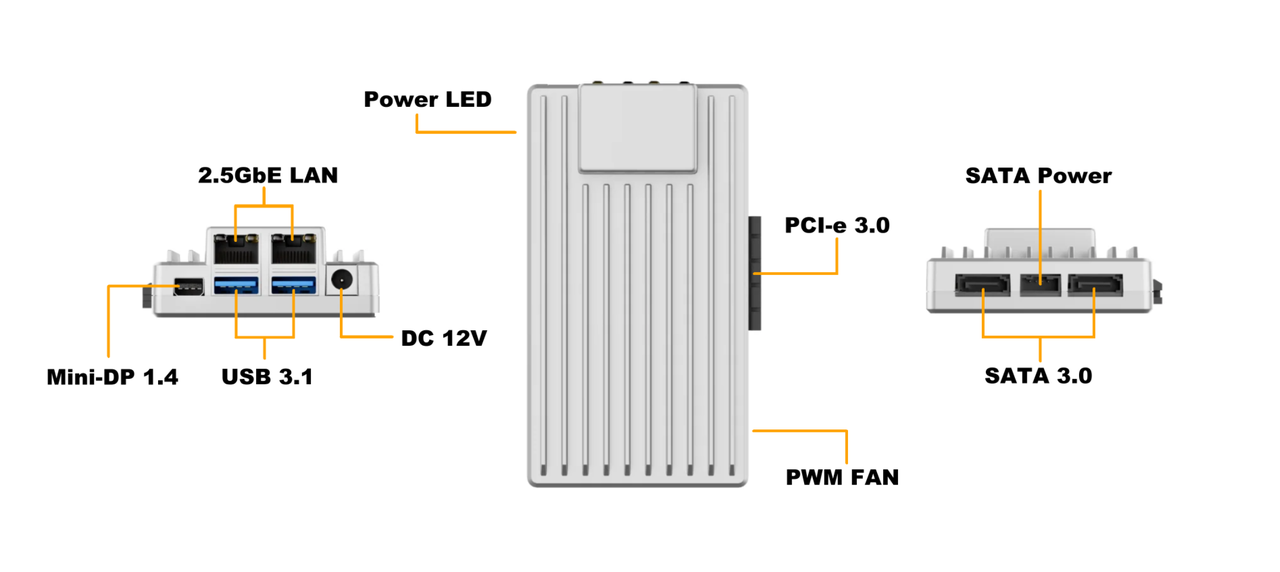
Connect Storage & PCIe Devices
2.5”/3.5” SATA HDD/SSD
- Use the included SATA data cable + power cable to connect the drive to the board’s SATA port.
- Mount the drive in a suitable NAS bracket or external tray.
Tip: Dual 3.5” drives require higher spin-up current—ensure a stable 12V/5A power supply.
PCIe Expansion Cards
- Install a 10GbE NIC , an NVMe adapter , or a low-power discrete GPU (Learn more with GPU Compatibility List).
- If the GPU requires external power, prepare the proper cables and ensure PSU capacity (see the same compatibility doc).
First Boot & Network
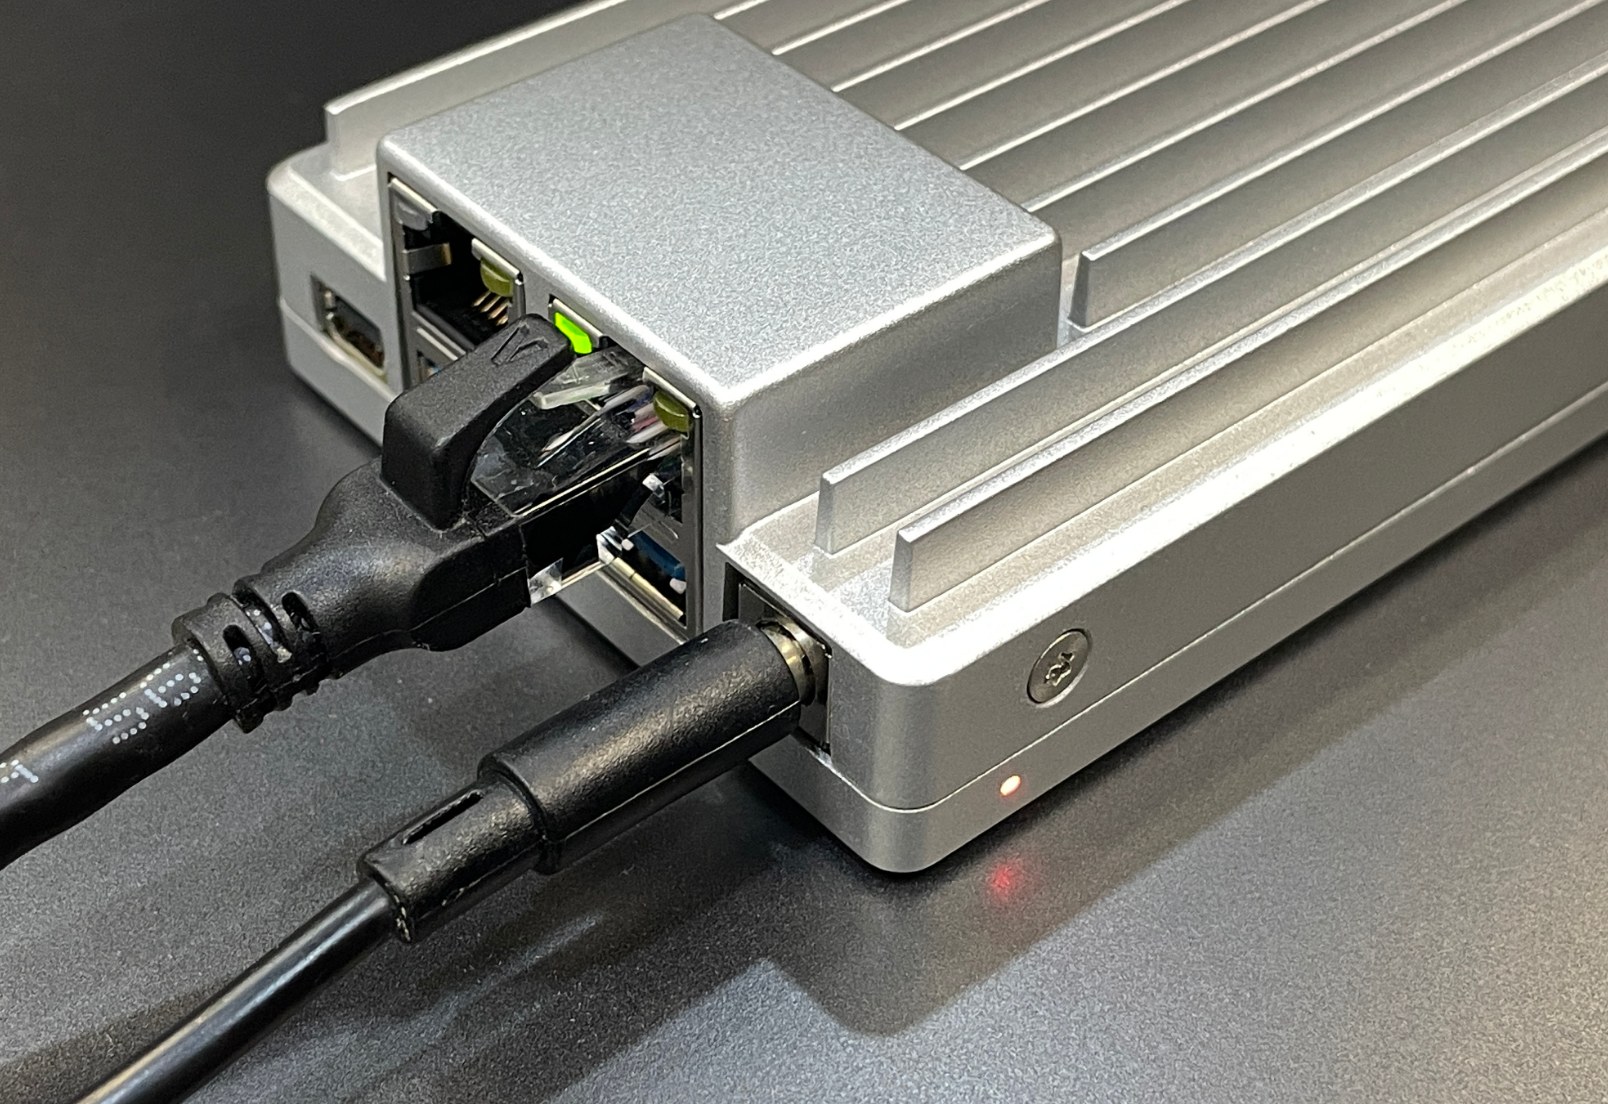
- Connect the power adapter to ZimaBoard 2.
- Plug in an Ethernet cable to your router or switch.
- ZimaBoard 2 auto-boots with pre-installed ZimaOS and obtains an IP address automatically.
- Find the IP in your router’s DHCP list or on a connected display.
- Or visit https://find.zimaspace.com/ to download ZimaClient, scan, and open the device page directly.
- Zima App is also available now for easier device discovery and management.
Sign In & Use ZimaOS
- Open the login page (via device IP, ZimaClient, or the app).
- Create your account and complete the initial setup (language, time zone, network).
- Update the system to the latest ZimaOS for best stability and app compatibility.
More Advanced Options
- Install third-party OS: Linux distributions, OpenWrt, UnRAID, and more.
- Enable WOL (Wake on LAN): Turn on in BIOS and OS (see Tutorial:enable WOL).
- Use a Wi-Fi module: Follow the driver/setup guide for ZimaOS or your chosen OS (Tutorial:AX210 user guide).
- Add a cooling module: See the Cooling Module Installation guide if you plan heavy workloads.
FAQ
- How do I recover or reinstall ZimaOS?
See the ZimaOS Recovery/Reinstall Guide to create a bootable media and run the installer. - How do I clear/initialize CMOS?
Power off, Press the reset button (or remove the battery for several seconds), then restore power and load BIOS defaults. See the CMOS Initialization Guide for details.