I. Overview
Arch Linux has long been favored by developers and advanced users for its minimalist design, rolling release model, and high degree of customizability.
ZimaBoard 2 is an x86-based single-board server that balances performance and expandability, making it an excellent platform for deploying Arch Linux in scenarios such as home servers, self-hosted services, and development or testing environments.
This article provides a complete walkthrough of installing Arch Linux on ZimaBoard 2 and performing basic system configuration. The steps are presented clearly and are designed to be reproducible, serving as a practical reference for users deploying Arch Linux on this platform for the first time.
II. Preparation
ZimaBoard 2 main board
⚠️ In this guide, the system is installed on the onboard eMMC. The installation process will partition and format the eMMC. Please ensure there is no important data stored on it.
HDMI monitor + USB keyboard
USB flash drive (≥ 8 GB) (for creating the bootable installer)
⚠️ The USB drive will be formatted during the creation of the bootable media. All existing data will be erased. Be sure to back up any important files in advance.
Wired network connection (recommended, as an internet connection is required during installation)
A computer for creating the bootable USB (Windows, macOS, or Linux)
Bootable USB creation tool (choose one):
balenaEtcher (cross-platform, graphical interface, recommended)
Rufus (for Windows users)
III. Creating the Bootable USB (Using balenaEtcher as an Example)
⚠️ Creating the bootable USB drive will format the flash drive and erase all existing data. Be sure to back up any important files in advance.
Insert the USB flash drive.
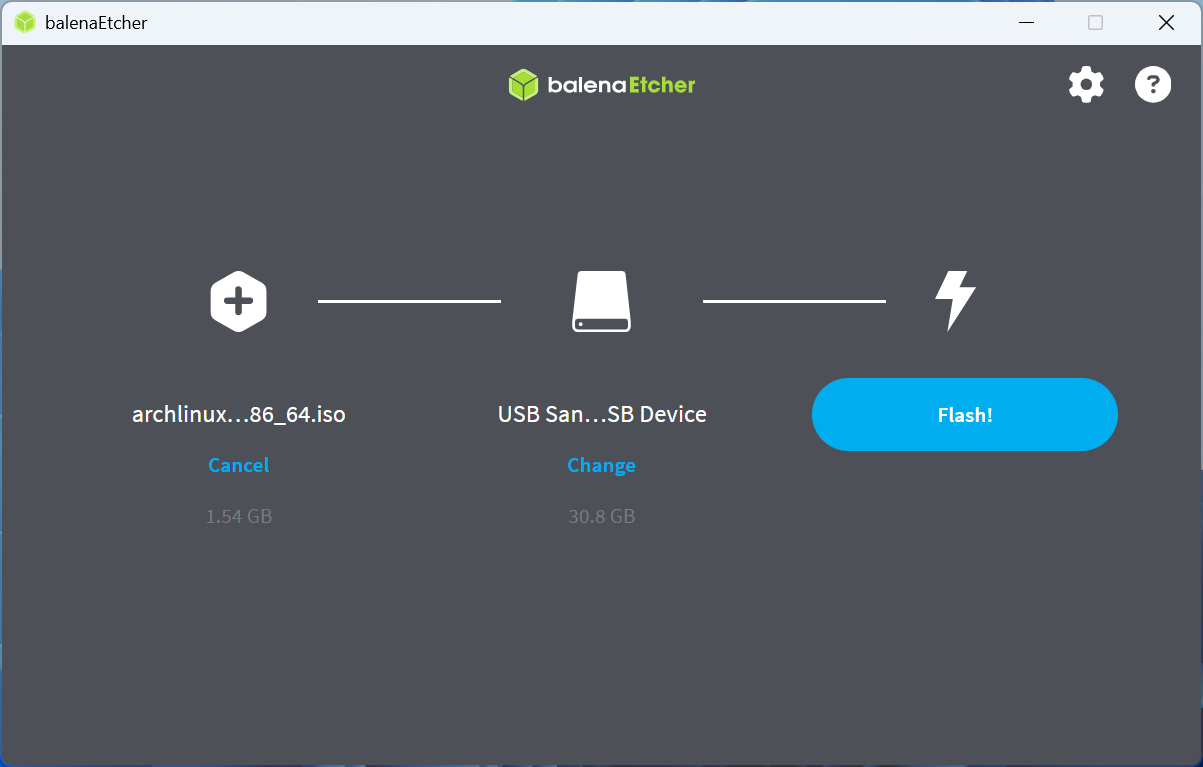
Launch balenaEtcher.
Click “Flash from file” and select the downloaded
archlinux-2025.12.01-x86_64.iso.Click “Select target” and choose your USB flash drive (make sure not to select the wrong device).
Click “Flash!” and wait for the writing process to complete.
Safely eject the USB flash drive.

IV. Booting ZimaBoard 2 from the USB Drive
Insert the prepared Arch Linux bootable USB drive into a USB port on the ZimaBoard 2.
Connect the HDMI monitor, keyboard, and Ethernet cable.
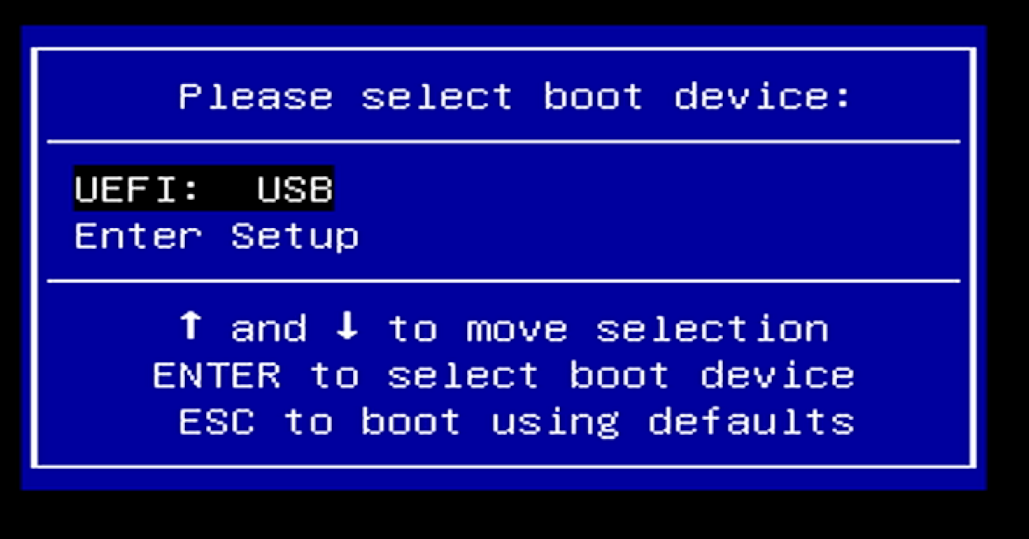
Power on the device. When the ZIMA logo appears, repeatedly press F11 to enter the Boot Menu.
Use the arrow keys to select your USB flash drive.
Press Enter to confirm and boot from the USB drive.
V. Entering the Installation Environment and Performing Initial Configuration
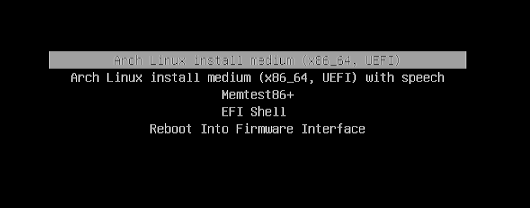
From the boot menu, select the first option:
Arch Linux install medium (x86_64)
After the boot process completes, you will be dropped into a root shell:
root@archiso ~ #
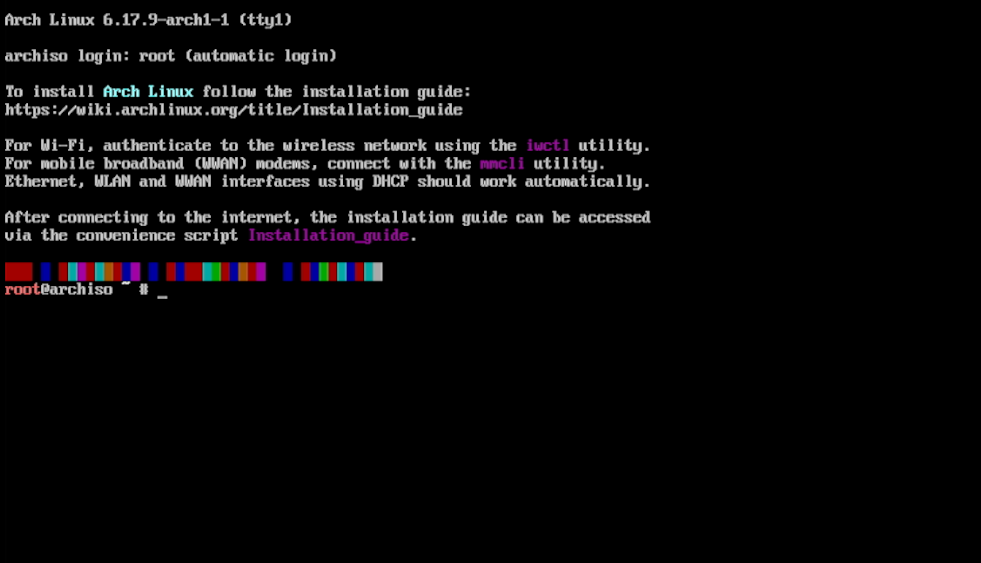
This means you are now in the Arch Linux installation environment.
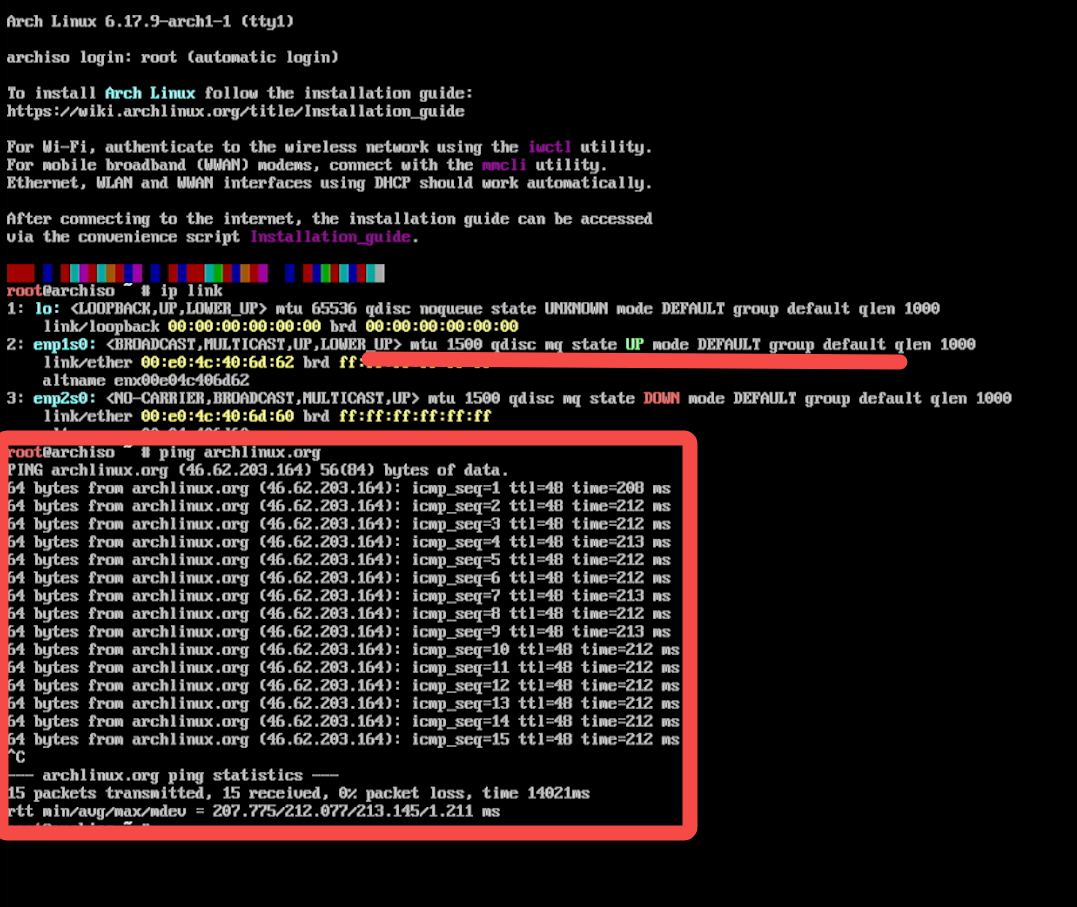
First, check whether the system has detected a network interface:
ip link
If you can see an interface such as enp*, this indicates that the network interface card has been successfully detected.
Next, test the network connection:
ping archlinux.org
If the ping succeeds, the network connection is working properly. PressCtrl + C to stop the test.
Before proceeding with the installation, it is recommended to enable network time synchronization to ensure accurate system time.
Enable NTP to allow automatic time synchronization:
timedatectl set-ntp true
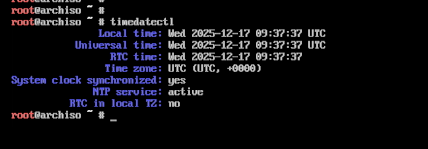
Check the synchronization status:
timedatectl
If the time is displayed correctly, the system time synchronization is complete.
This guide assumes that the system will be installed on the onboard eMMC device.
⚠️ The installation process will partition and format the onboard eMMC. Please ensure that there is no important data stored on the eMMC before proceeding.
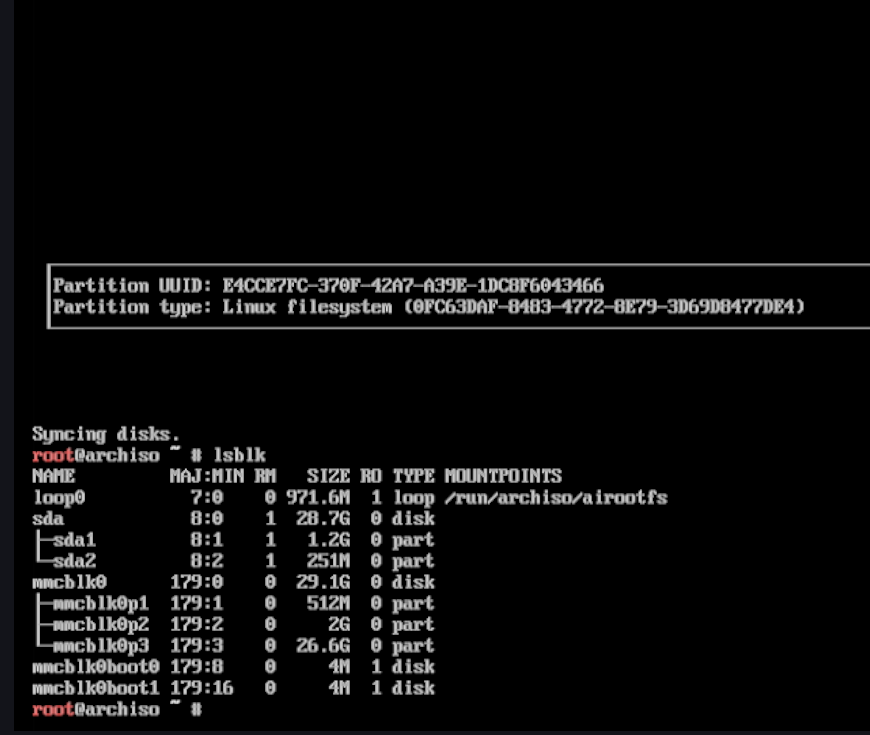
View Disk Information
lsblk
Run the following command to view disk and partition information in a tree structure:

Create a GPT Partition Table Using cfdisk
Launch the partitioning tool:
cfdisk /dev/mmcblk0

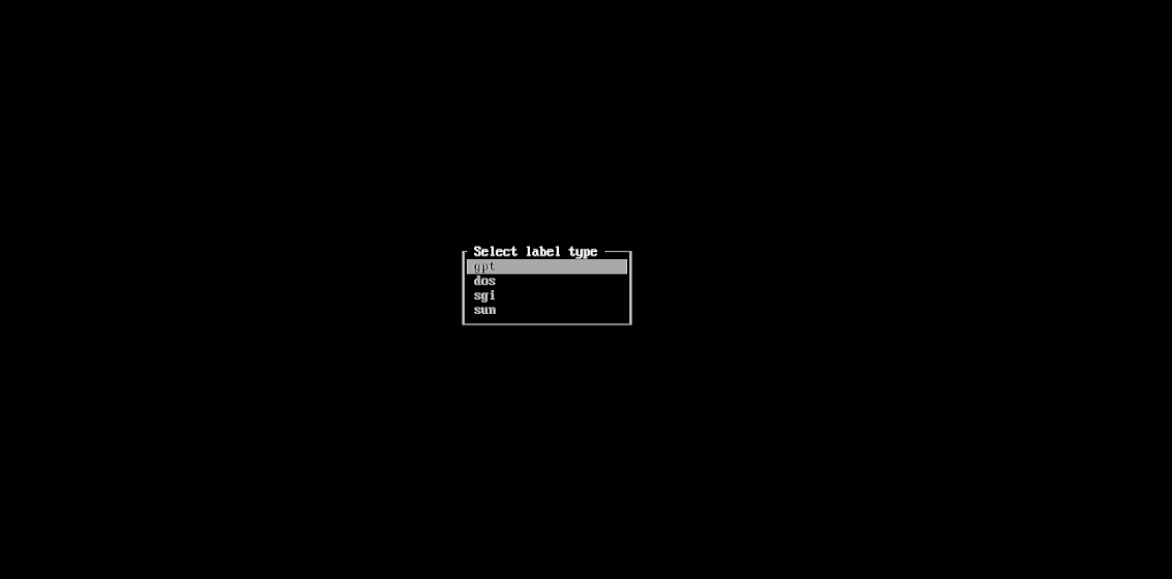
Select the Partition Table Type
When entering cfdisk for the first time, you will be prompted to choose a partition table type. Select:GPT
Create the First Partition (EFI System)
① Create a New Partition
In the main cfdisk interface, perform the following steps:
Use the right arrow key (→).
Move the cursor to the bottom menu and select [NEW].
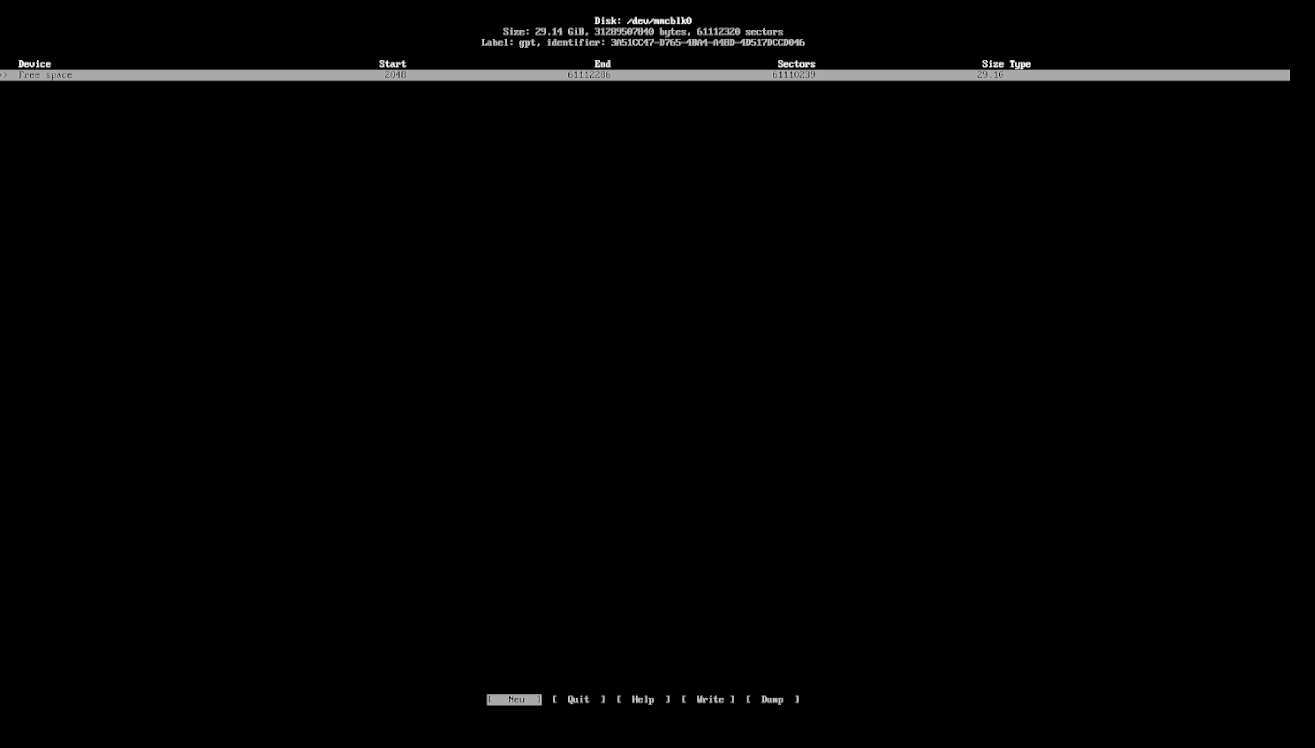
- Press Enter to create a new partition.
② Specify the Partition Size
When prompted for the partition size, enter:512M

Then press Enter.
③ Set the Partition Type
After the new partition is created:
Ensure the newly created partition is selected.
Use the right arrow key (→) to move to the bottom menu.
Select [Type].
Press Enter.

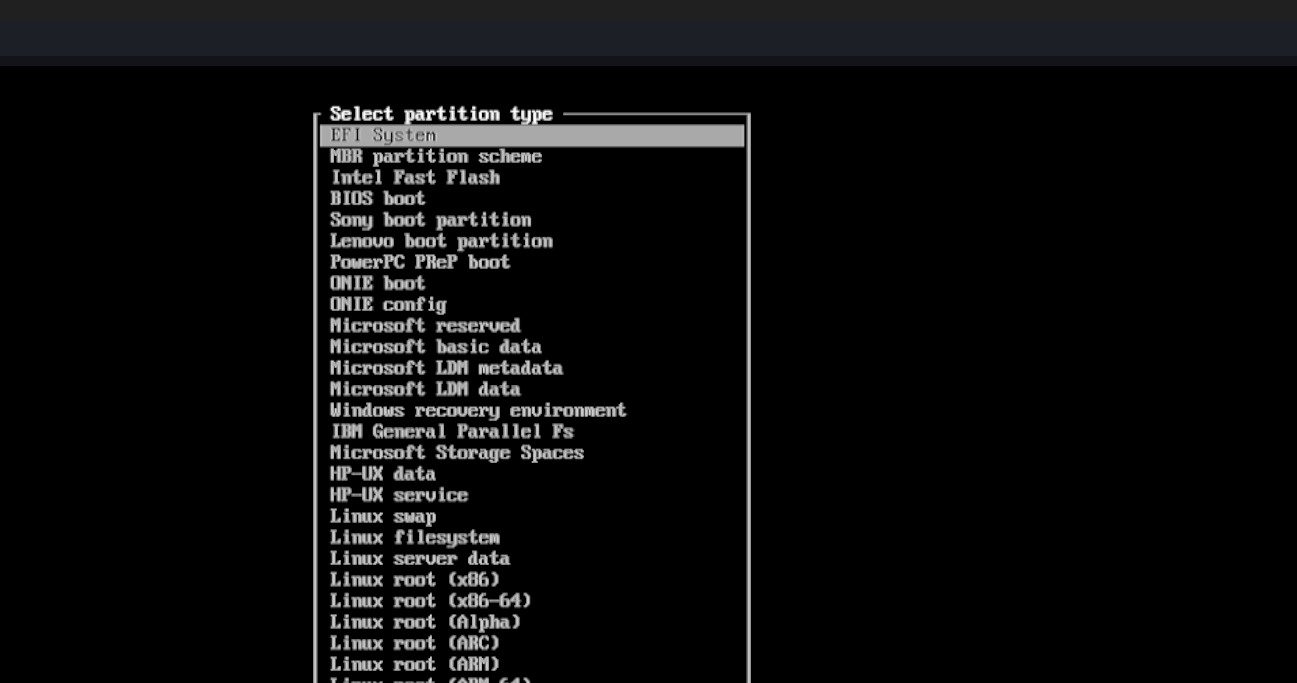
④ Choose the EFI System Type
From the list of partition types:
Use the ↑ / ↓ arrow keys.
Locate EFI System.
Press Enter to confirm.
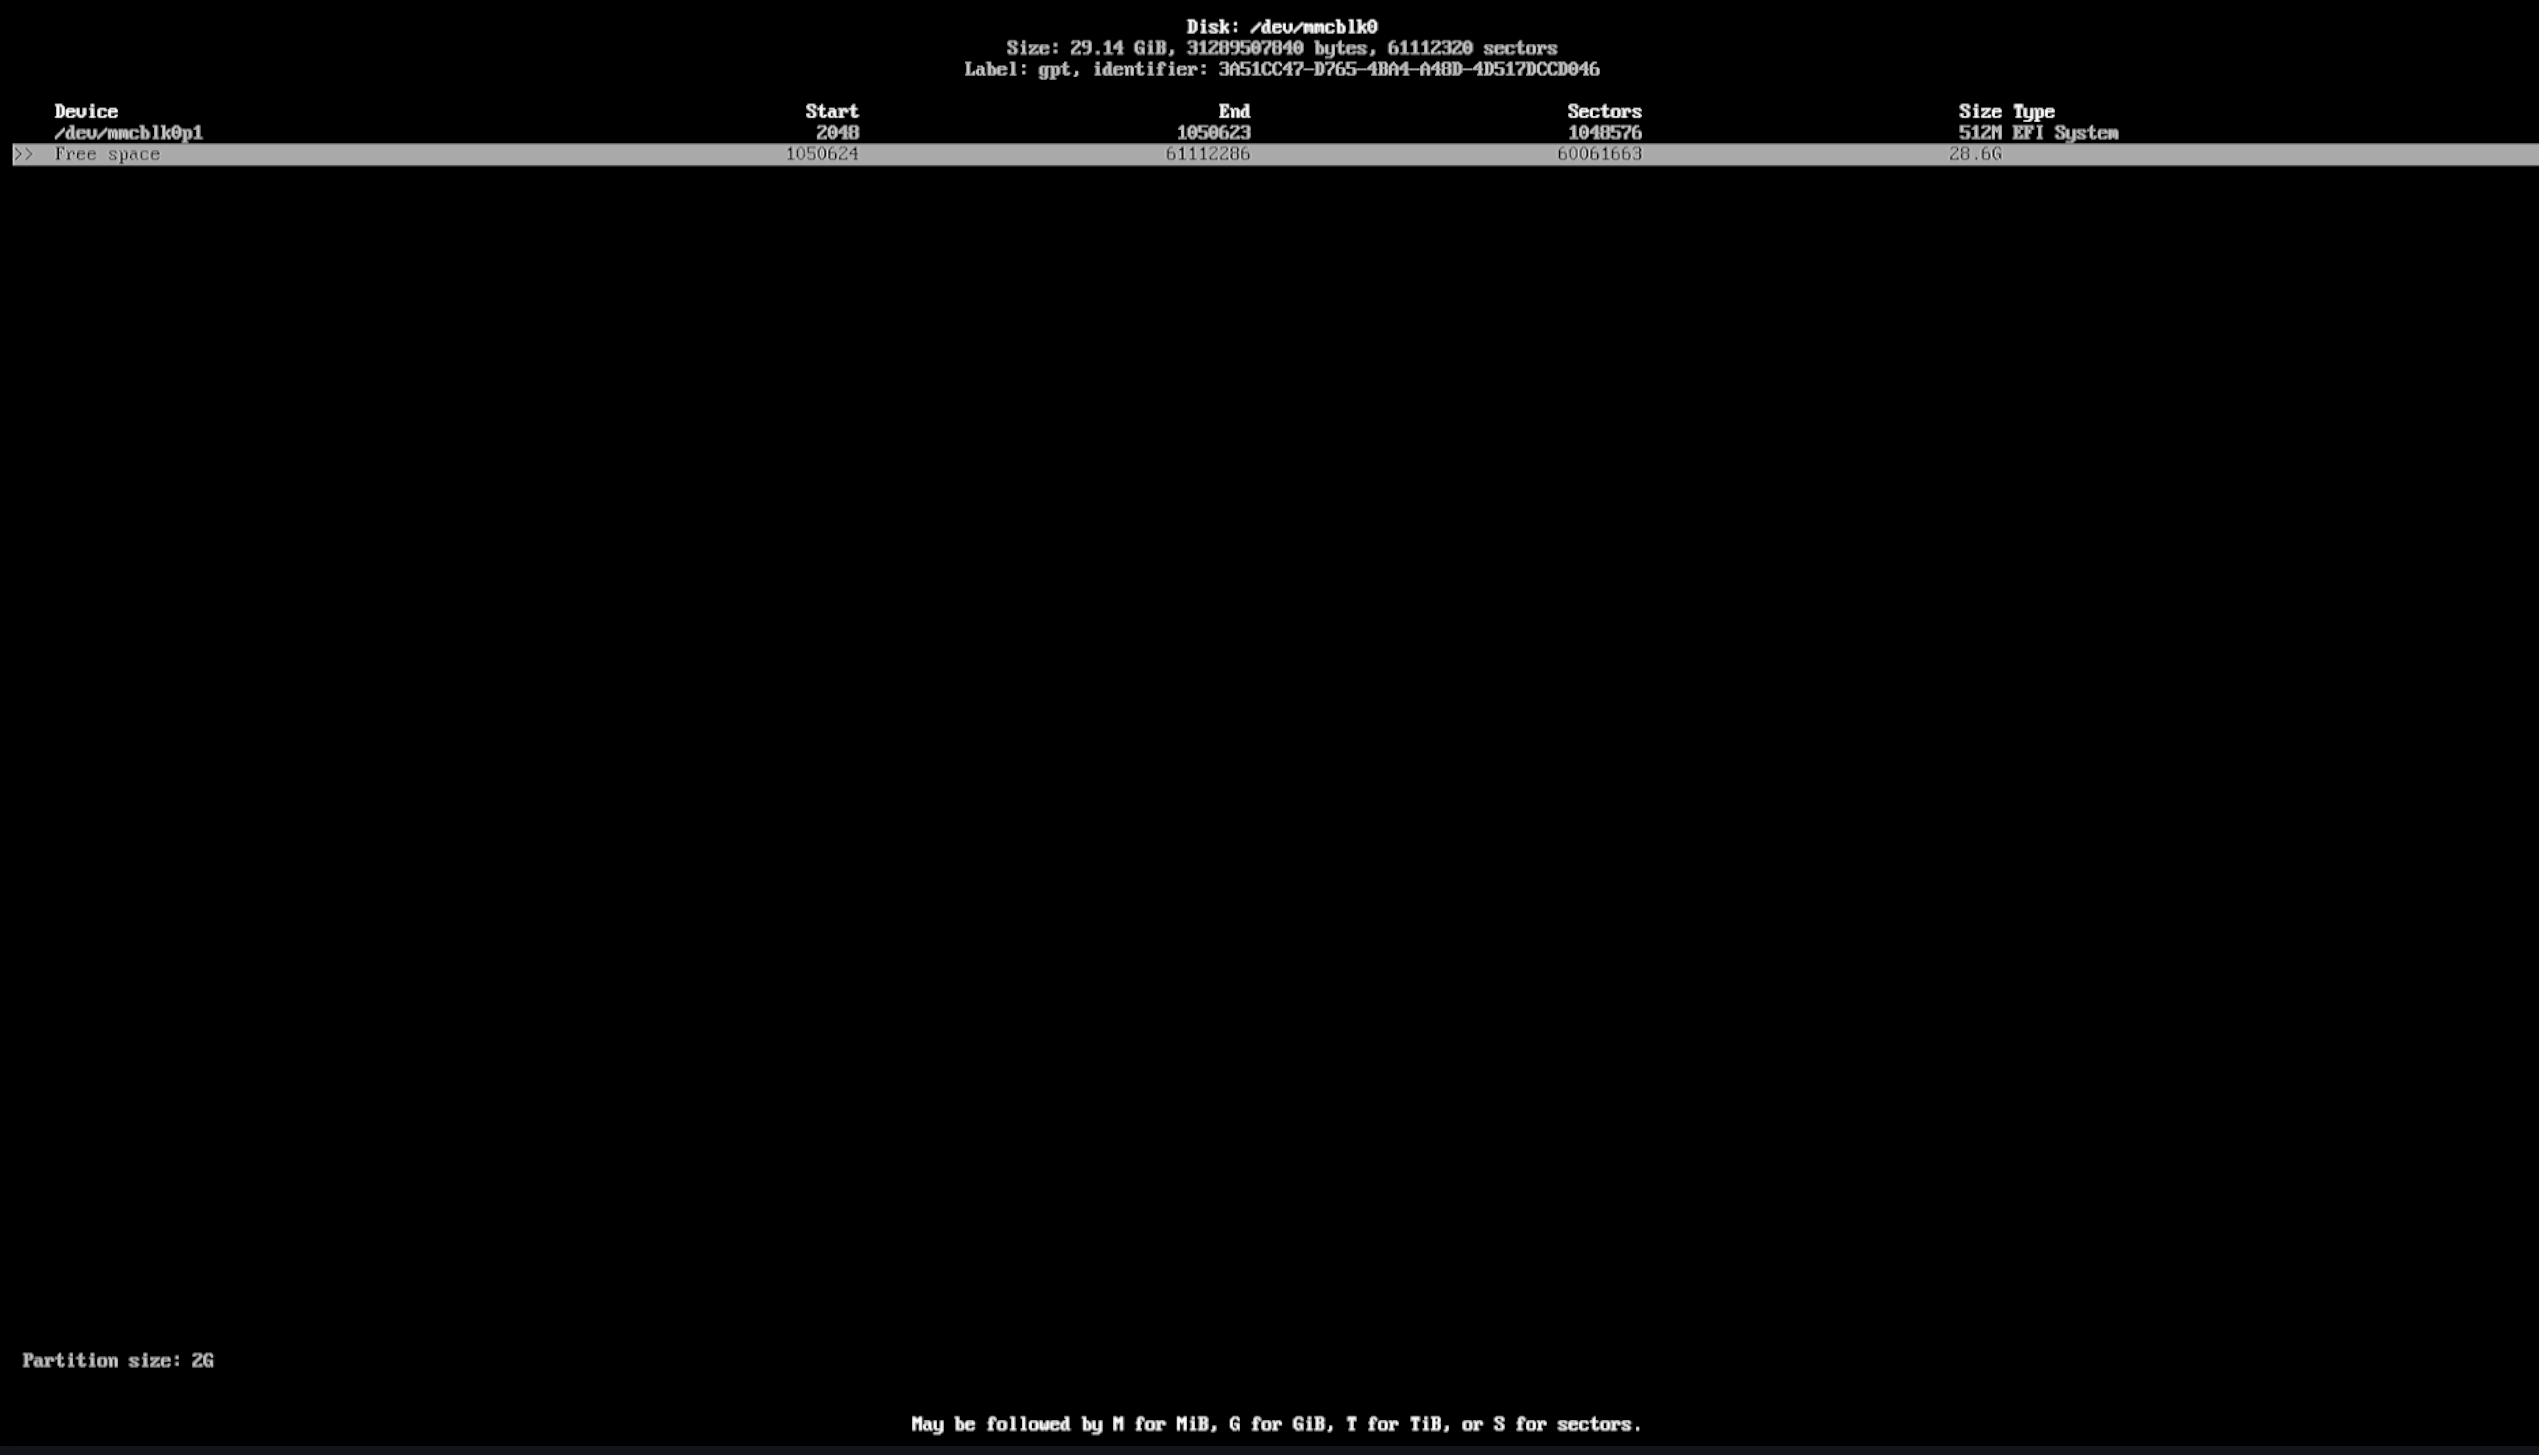
⑤ Verify the Result
Back at the main interface, you should see an entry similar to:
/dev/mmcblk0p1 512M EFI System

Create the Second Partition (Swap)
① Select the Free Space
Use the ↓ arrow key to select:Free space 28.6G
② Create a New Partition
Use the right arrow key (→) to move to the bottom menu.
Highlight [NEW].
Press Enter.
③ Specify the Partition Size
When prompted for the size, enter:2G
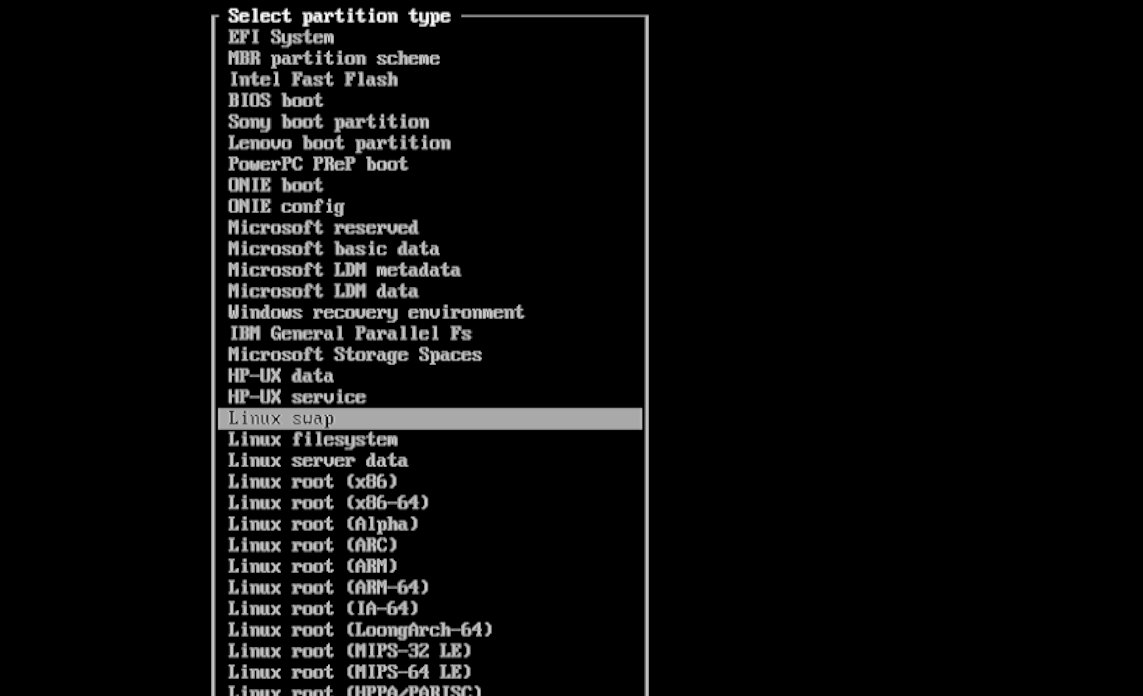
④ Set the Partition Type to Linux Swap
Select the newly created ~2 GB partition.
Enter [Type].
Choose Linux swap.
Create the Third Partition (Root)
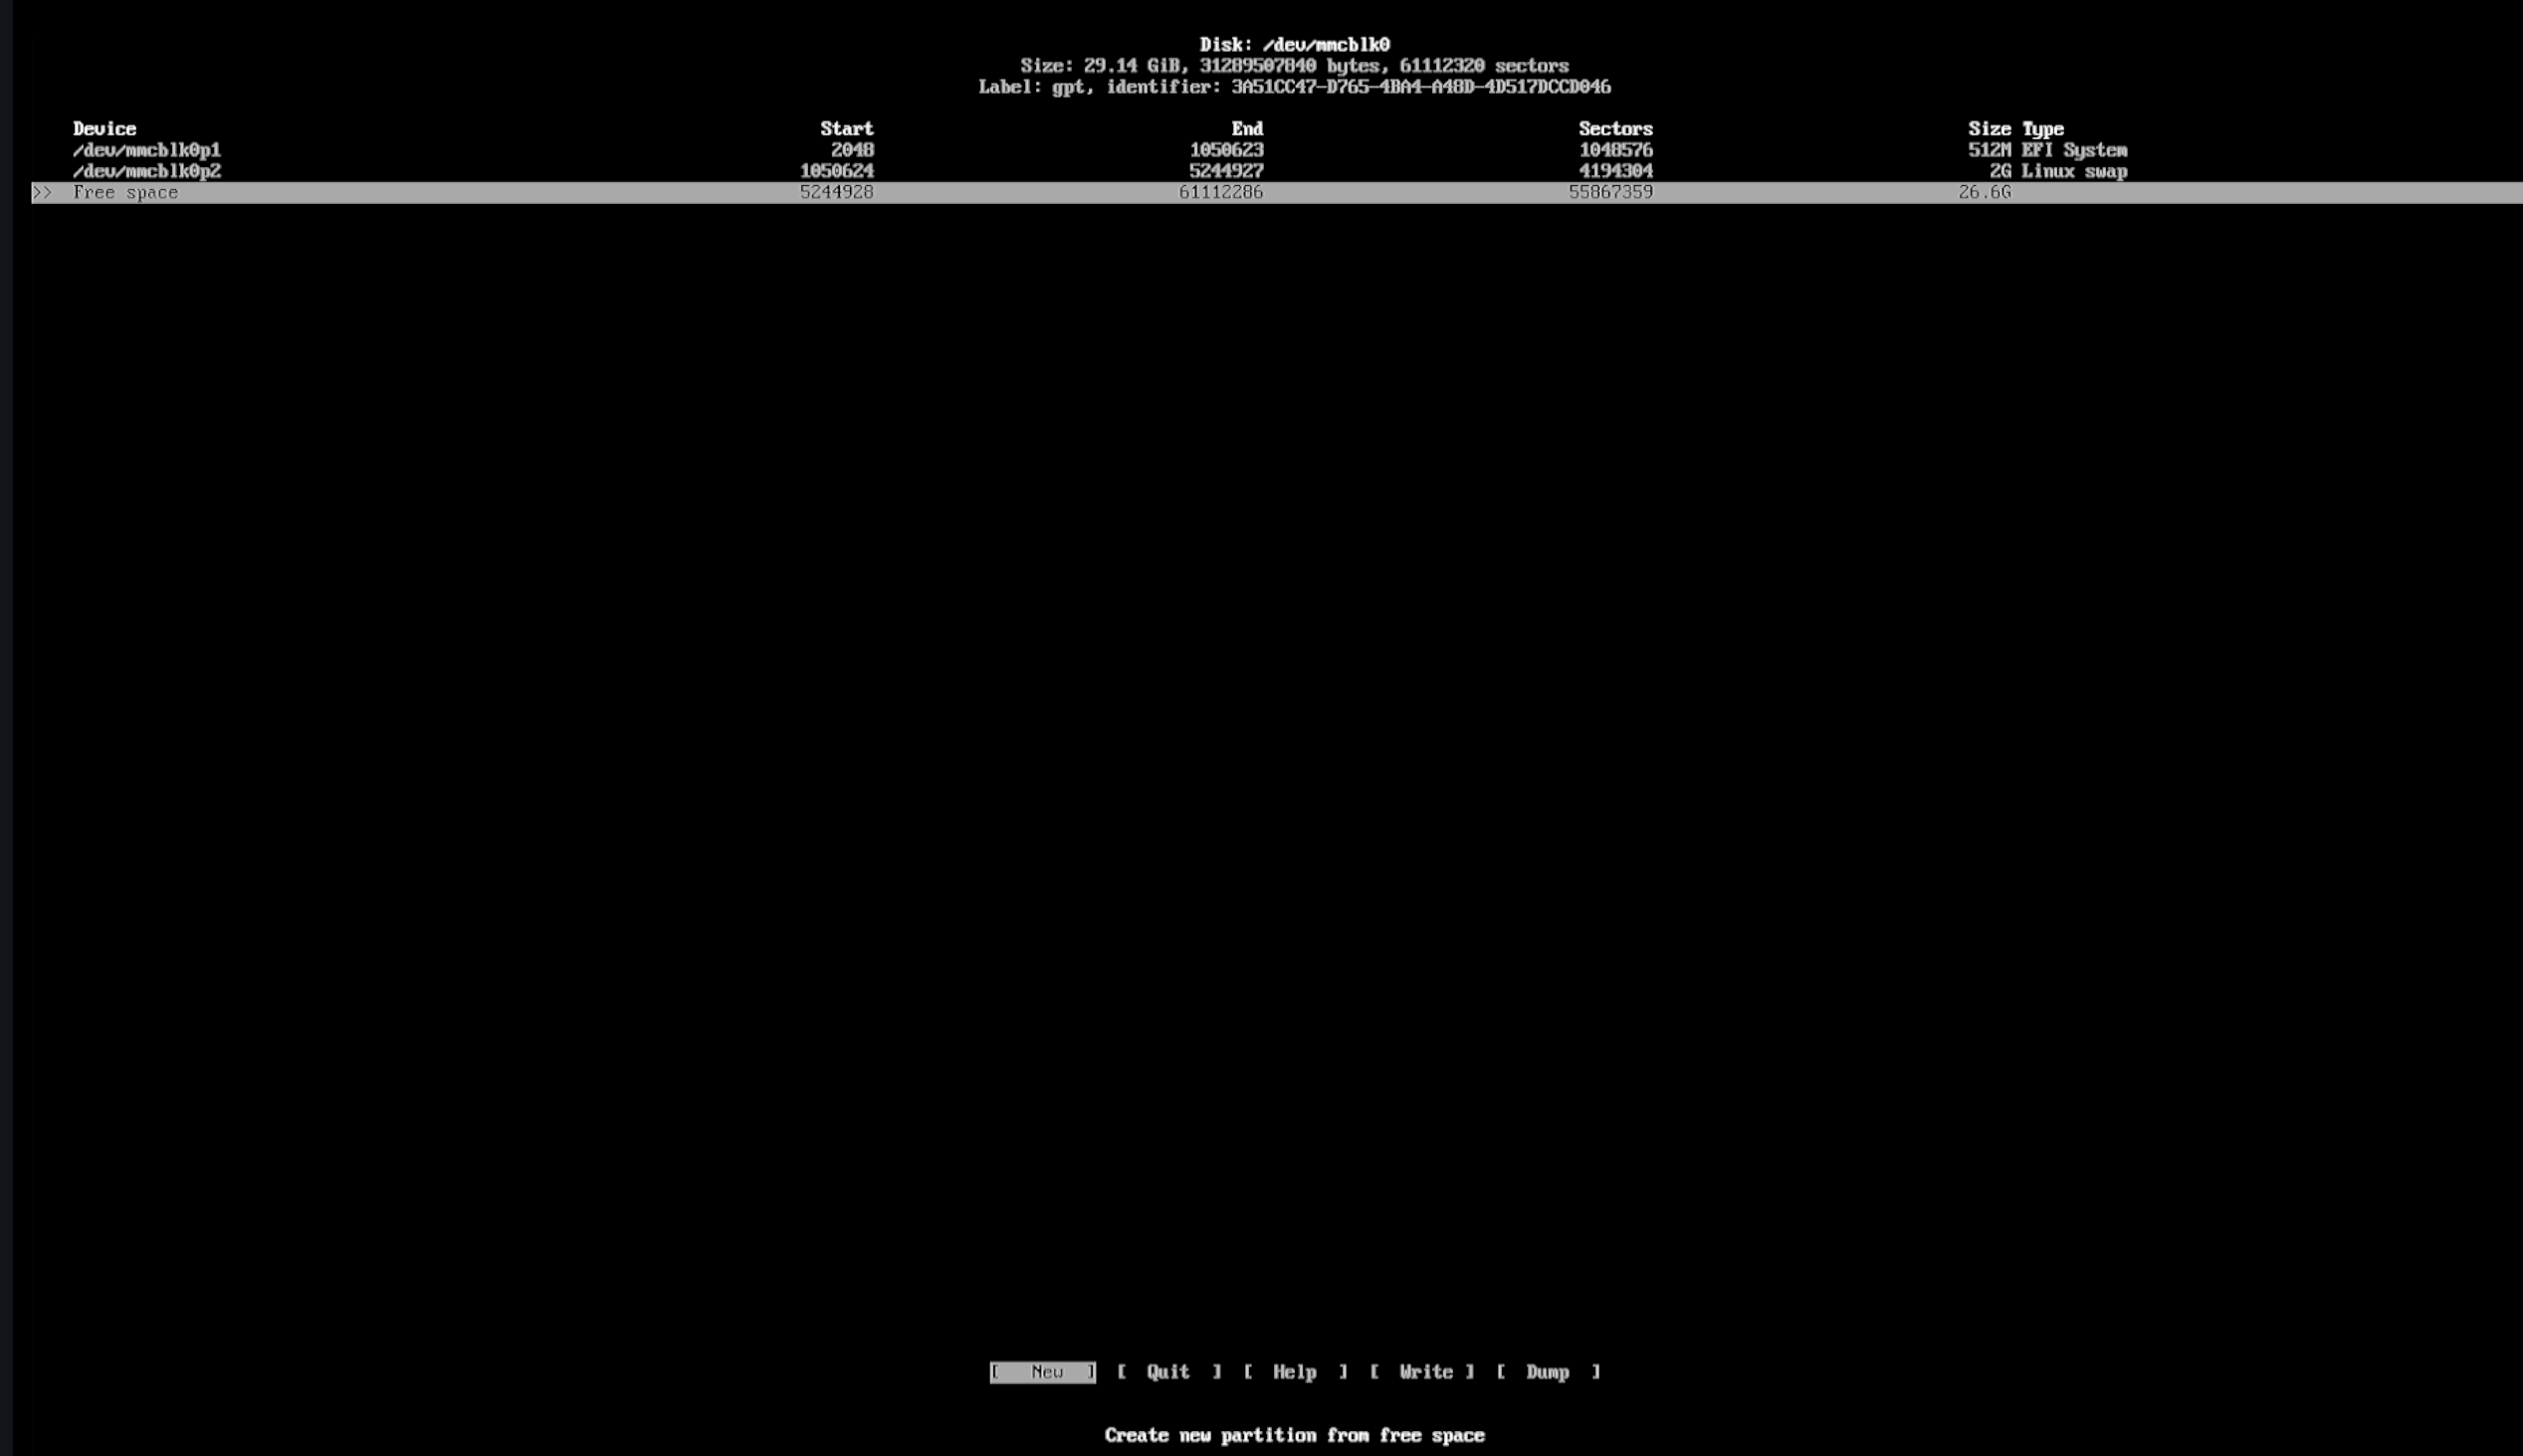
① Select the Remaining Free Space
You should now see:
Free space 26.6G
Keep this entry selected.
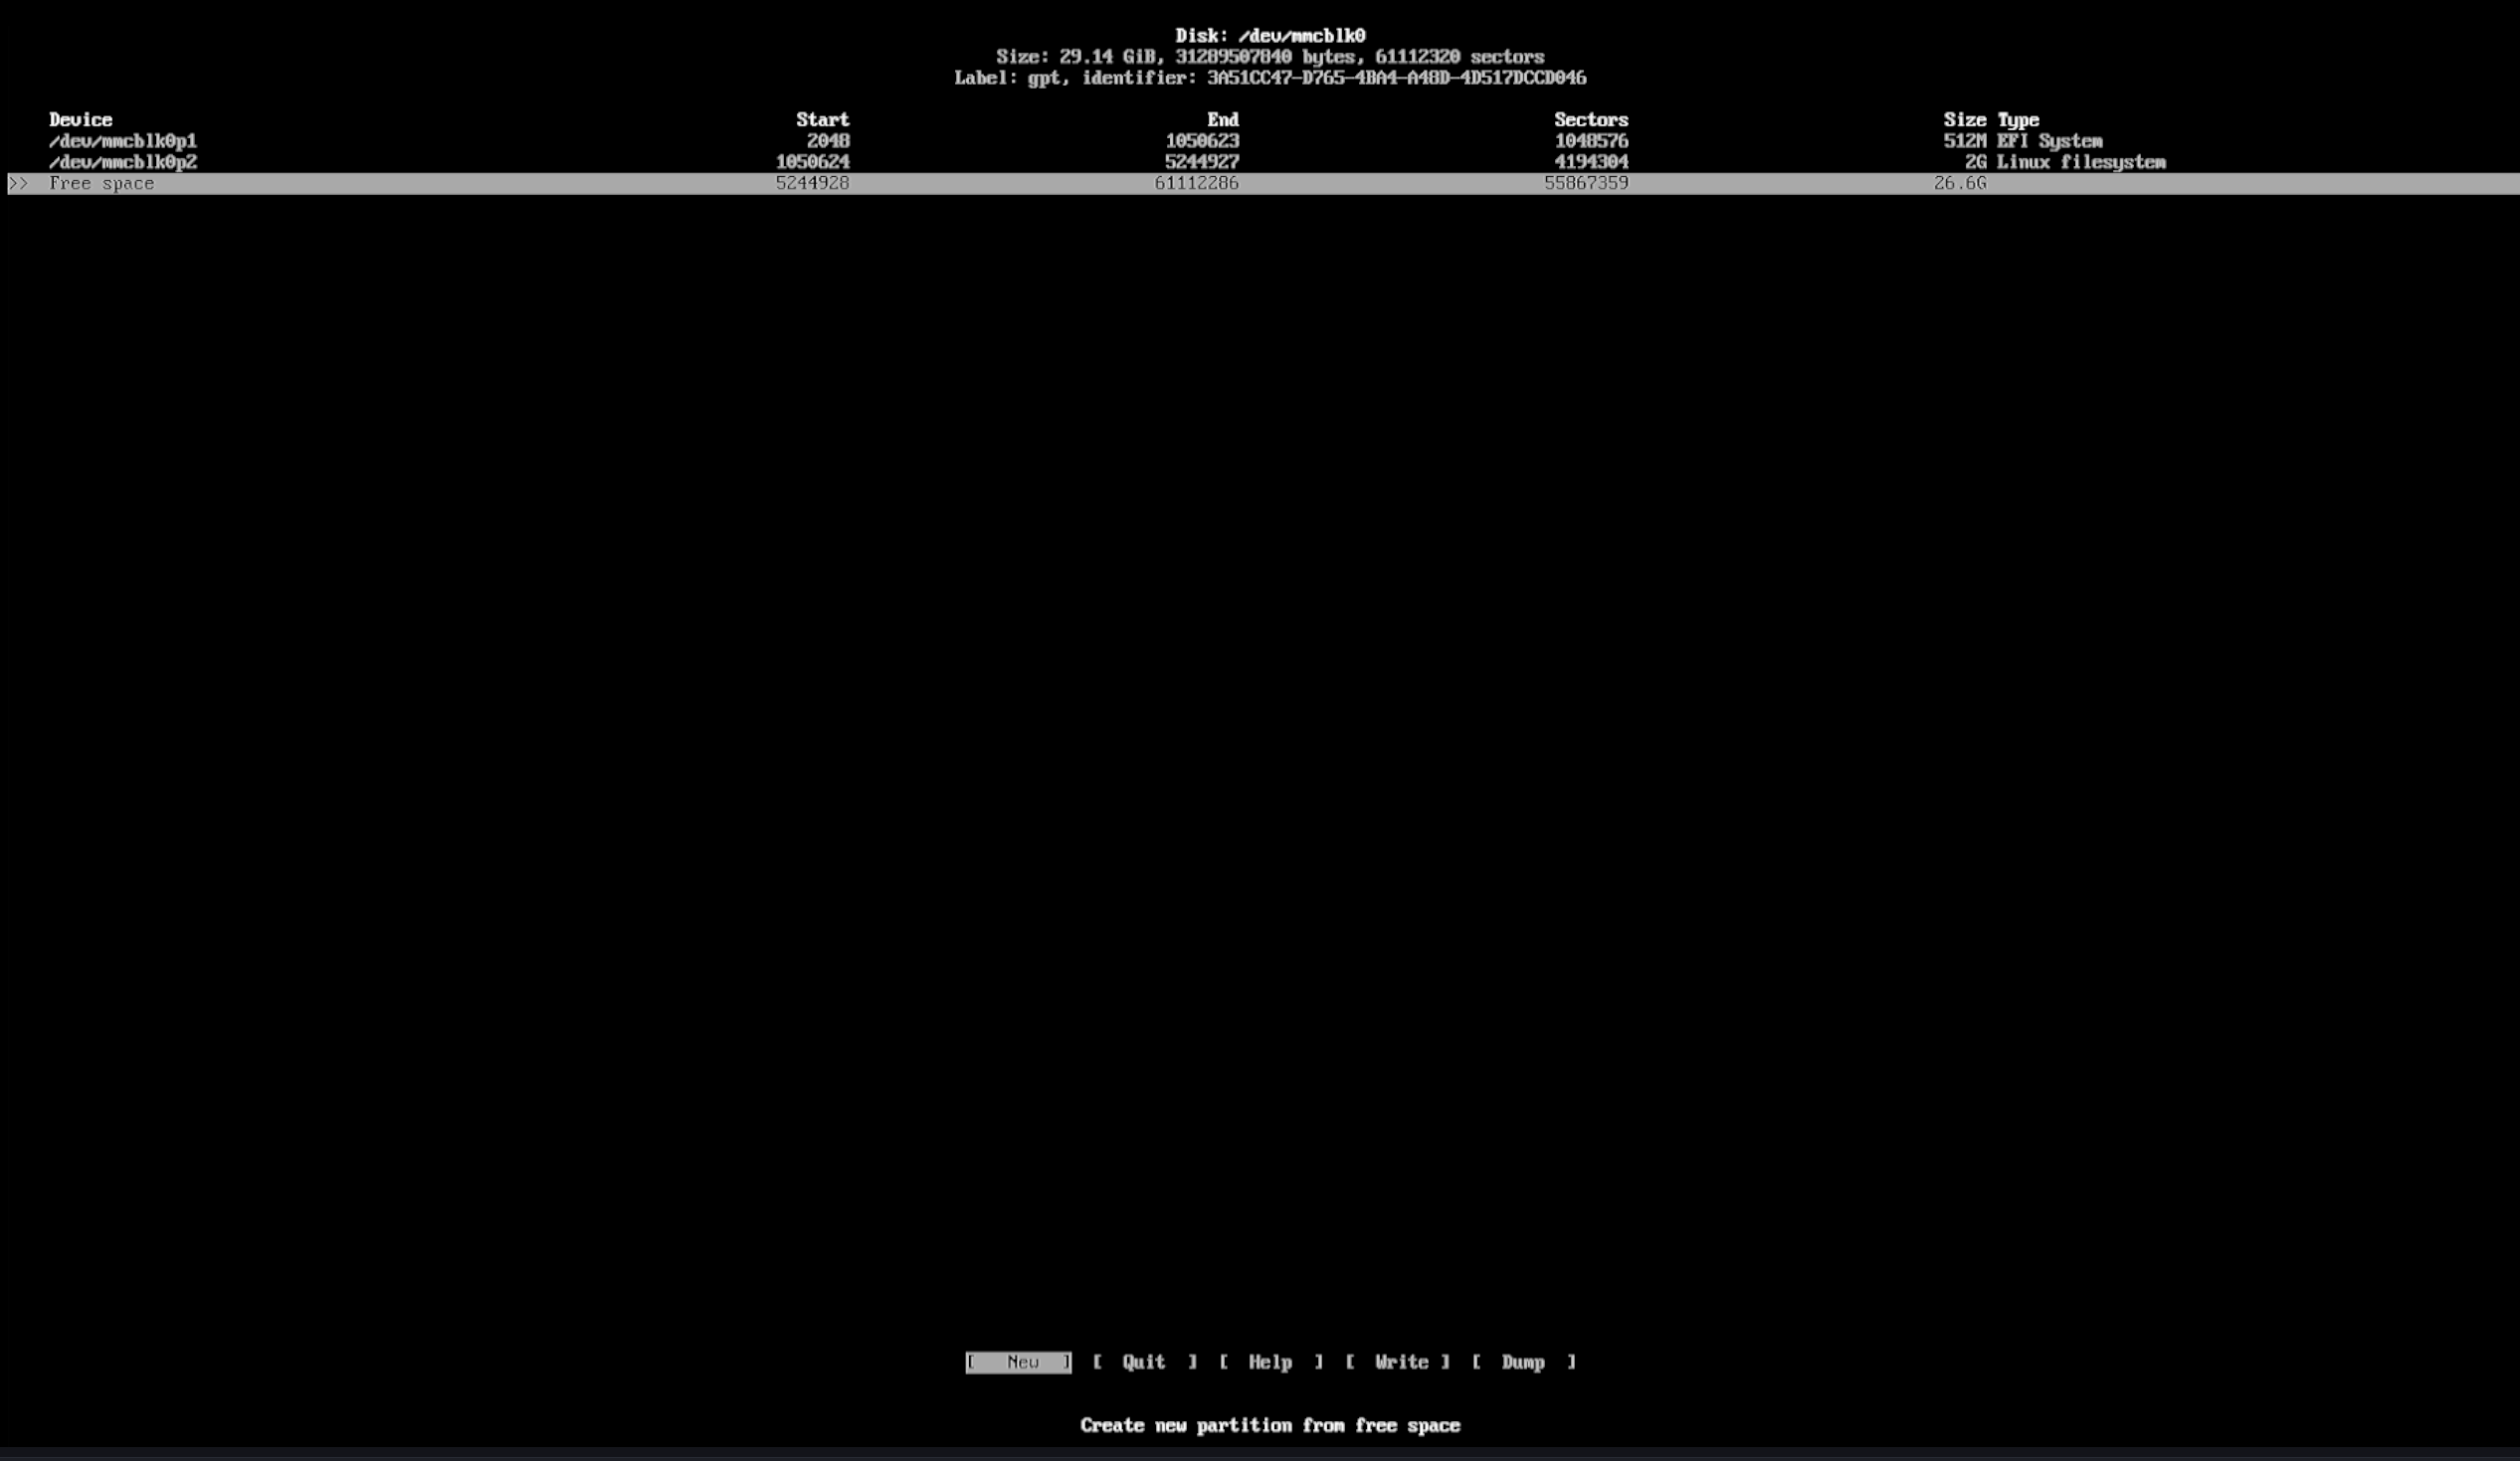
② Create a New Partition
Use the right arrow key (→) to move to the bottom menu.
Select [NEW].
Press Enter.
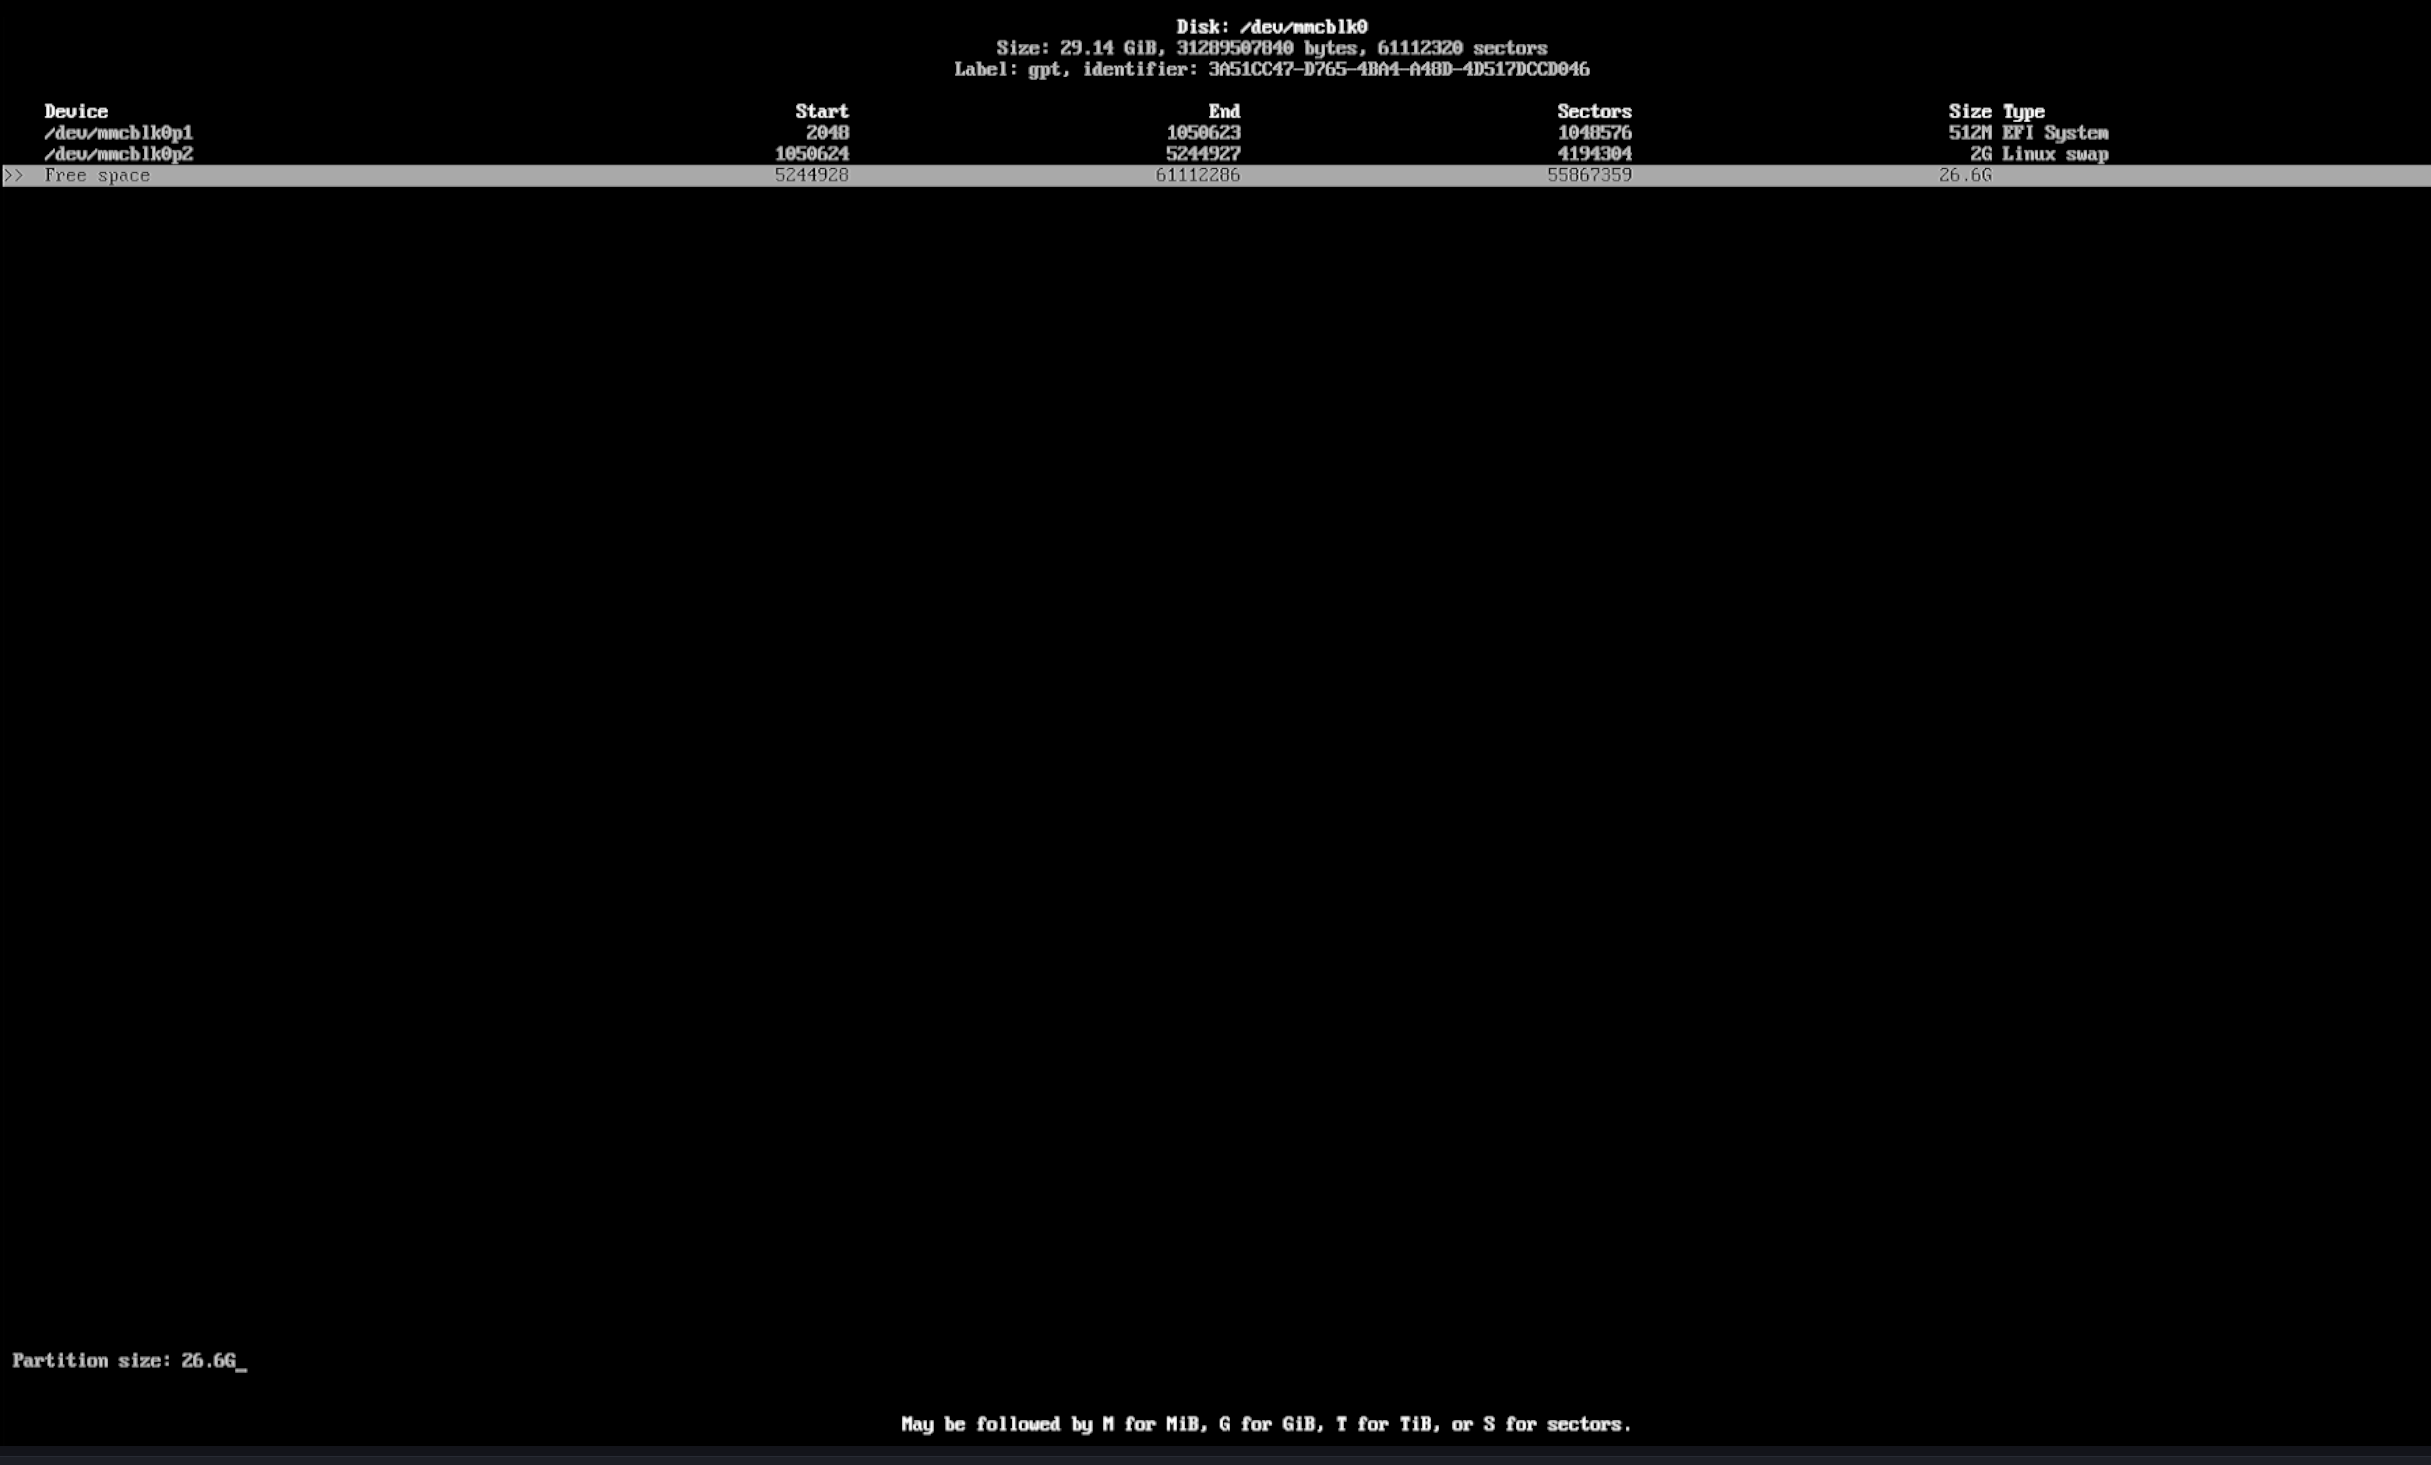
③ Use All Remaining Space
When prompted for the partition size:
Do not enter anything. Simply press Enter to use all remaining space.
④ Set the Partition Type
After the partition is created:
The default partition type is Linux filesystem.
In most cases, no change is required. Keep the default.

Write the Partition Table and Exit
Write the Partition Table
- Select [Write].
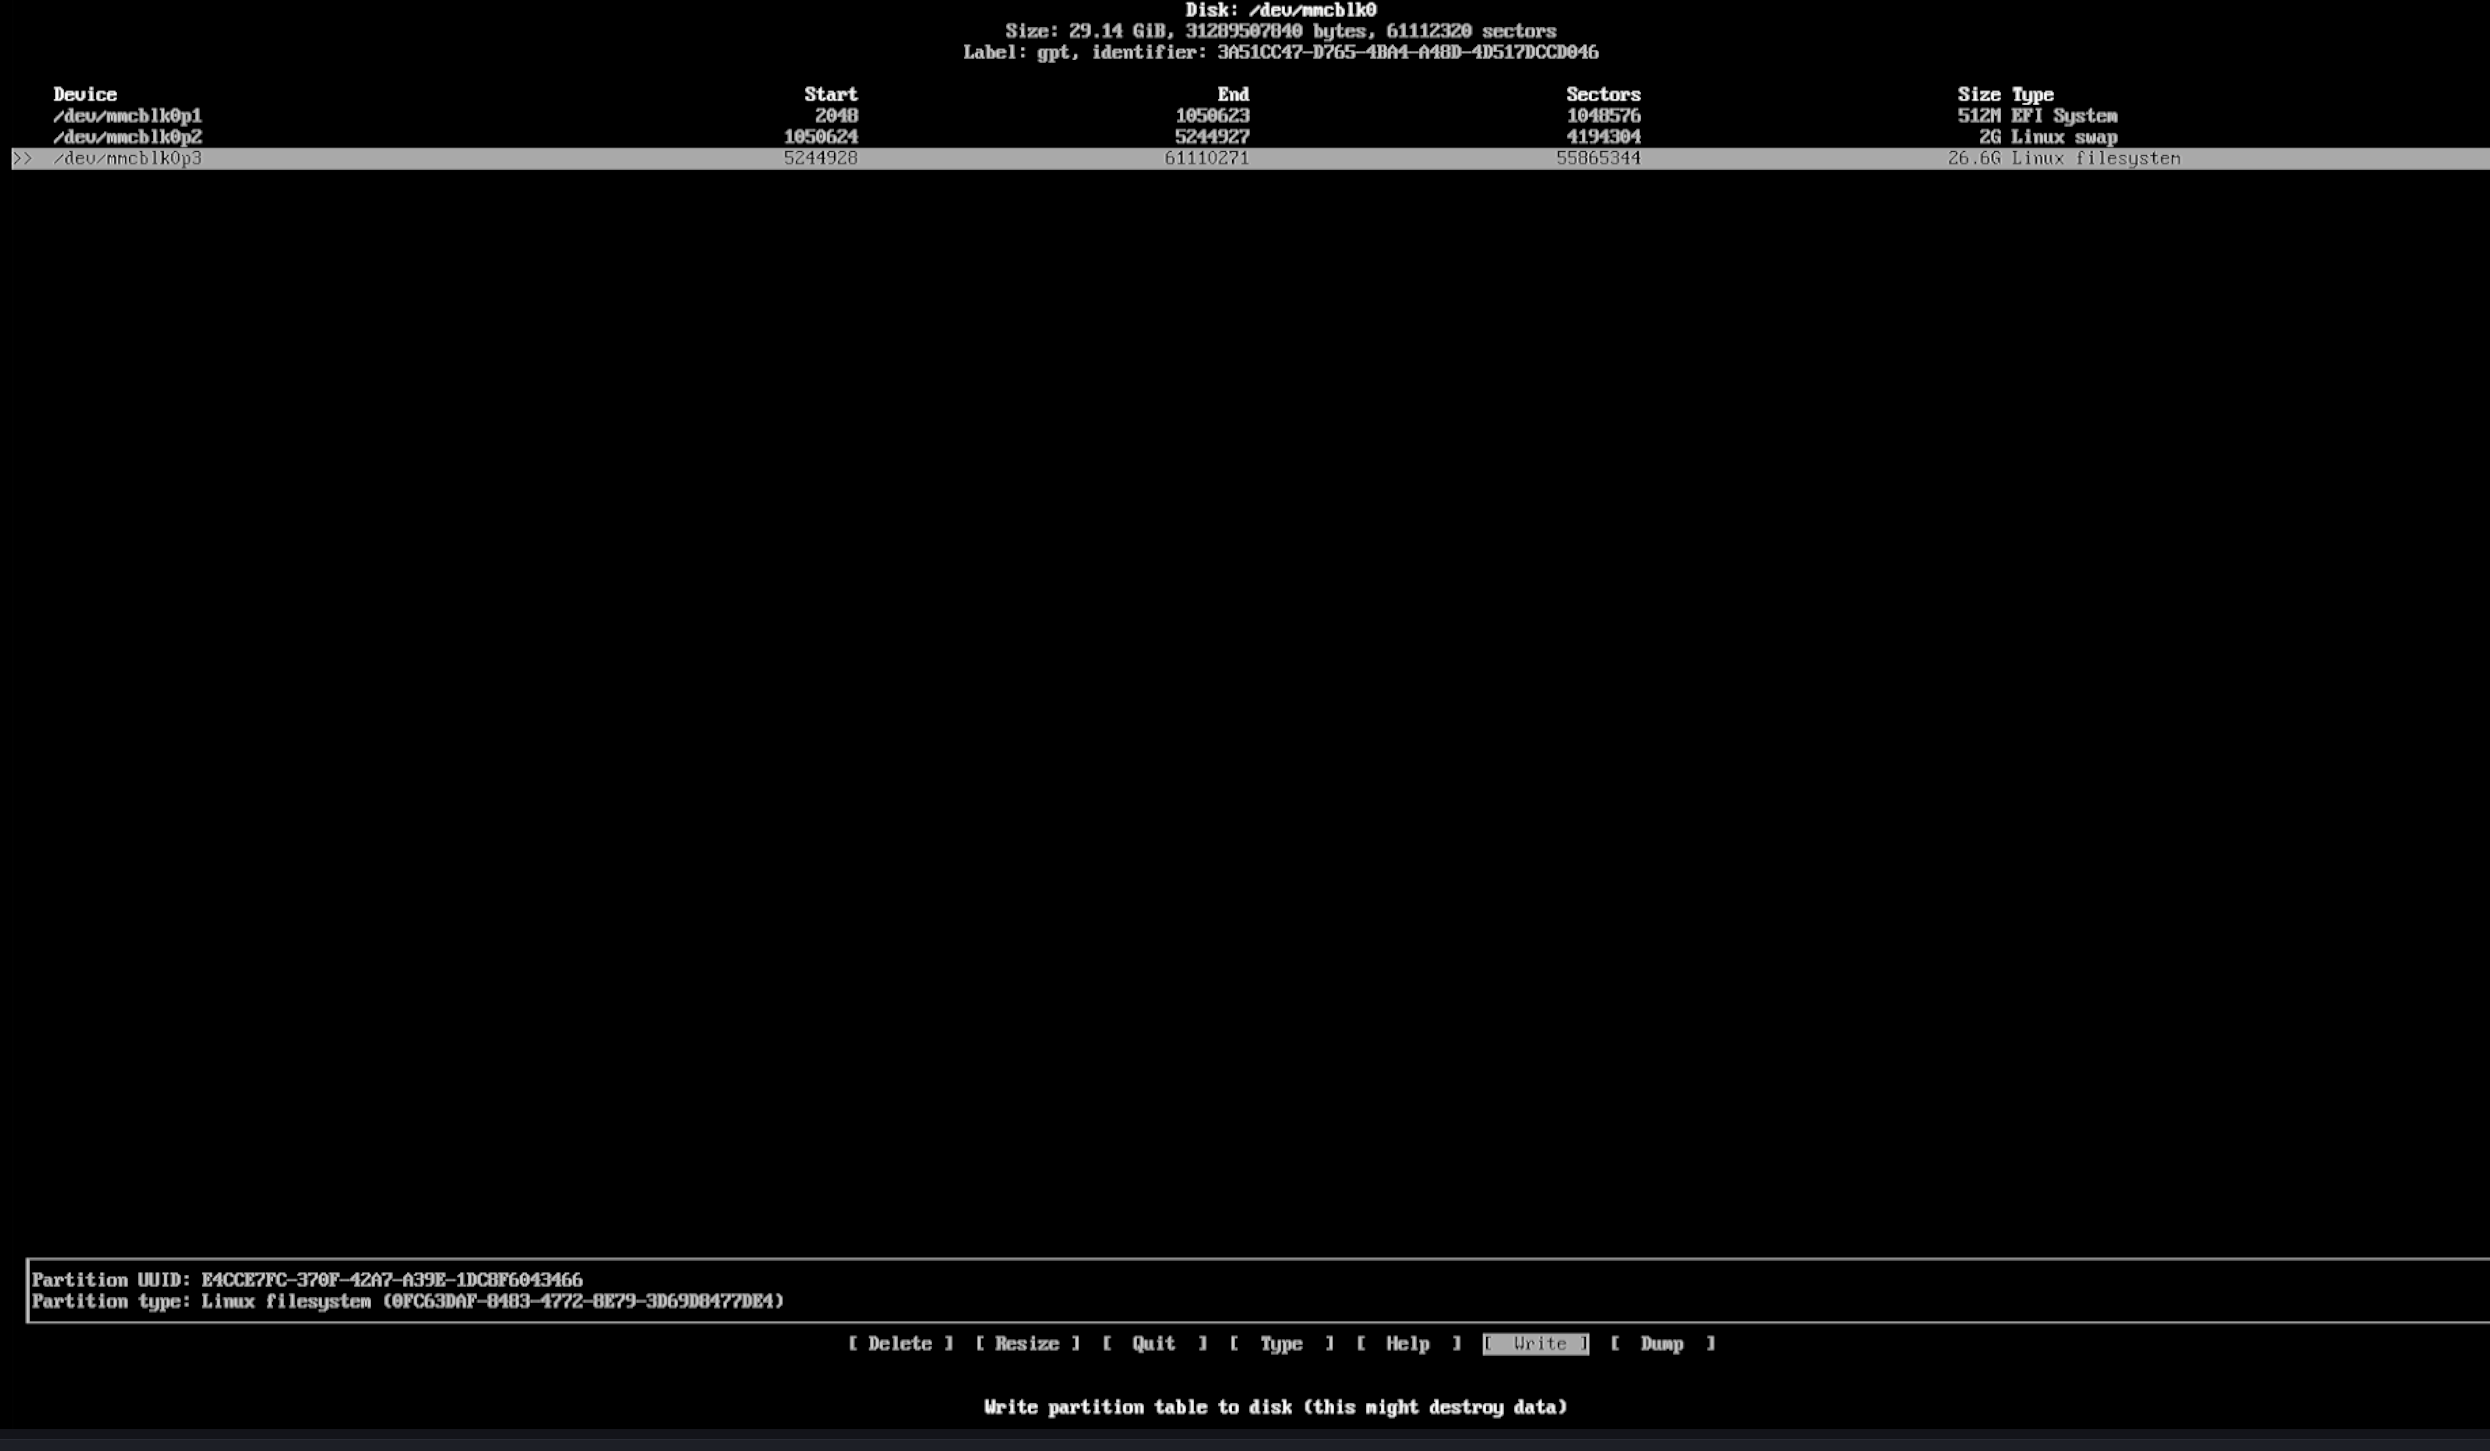
Press Enter.
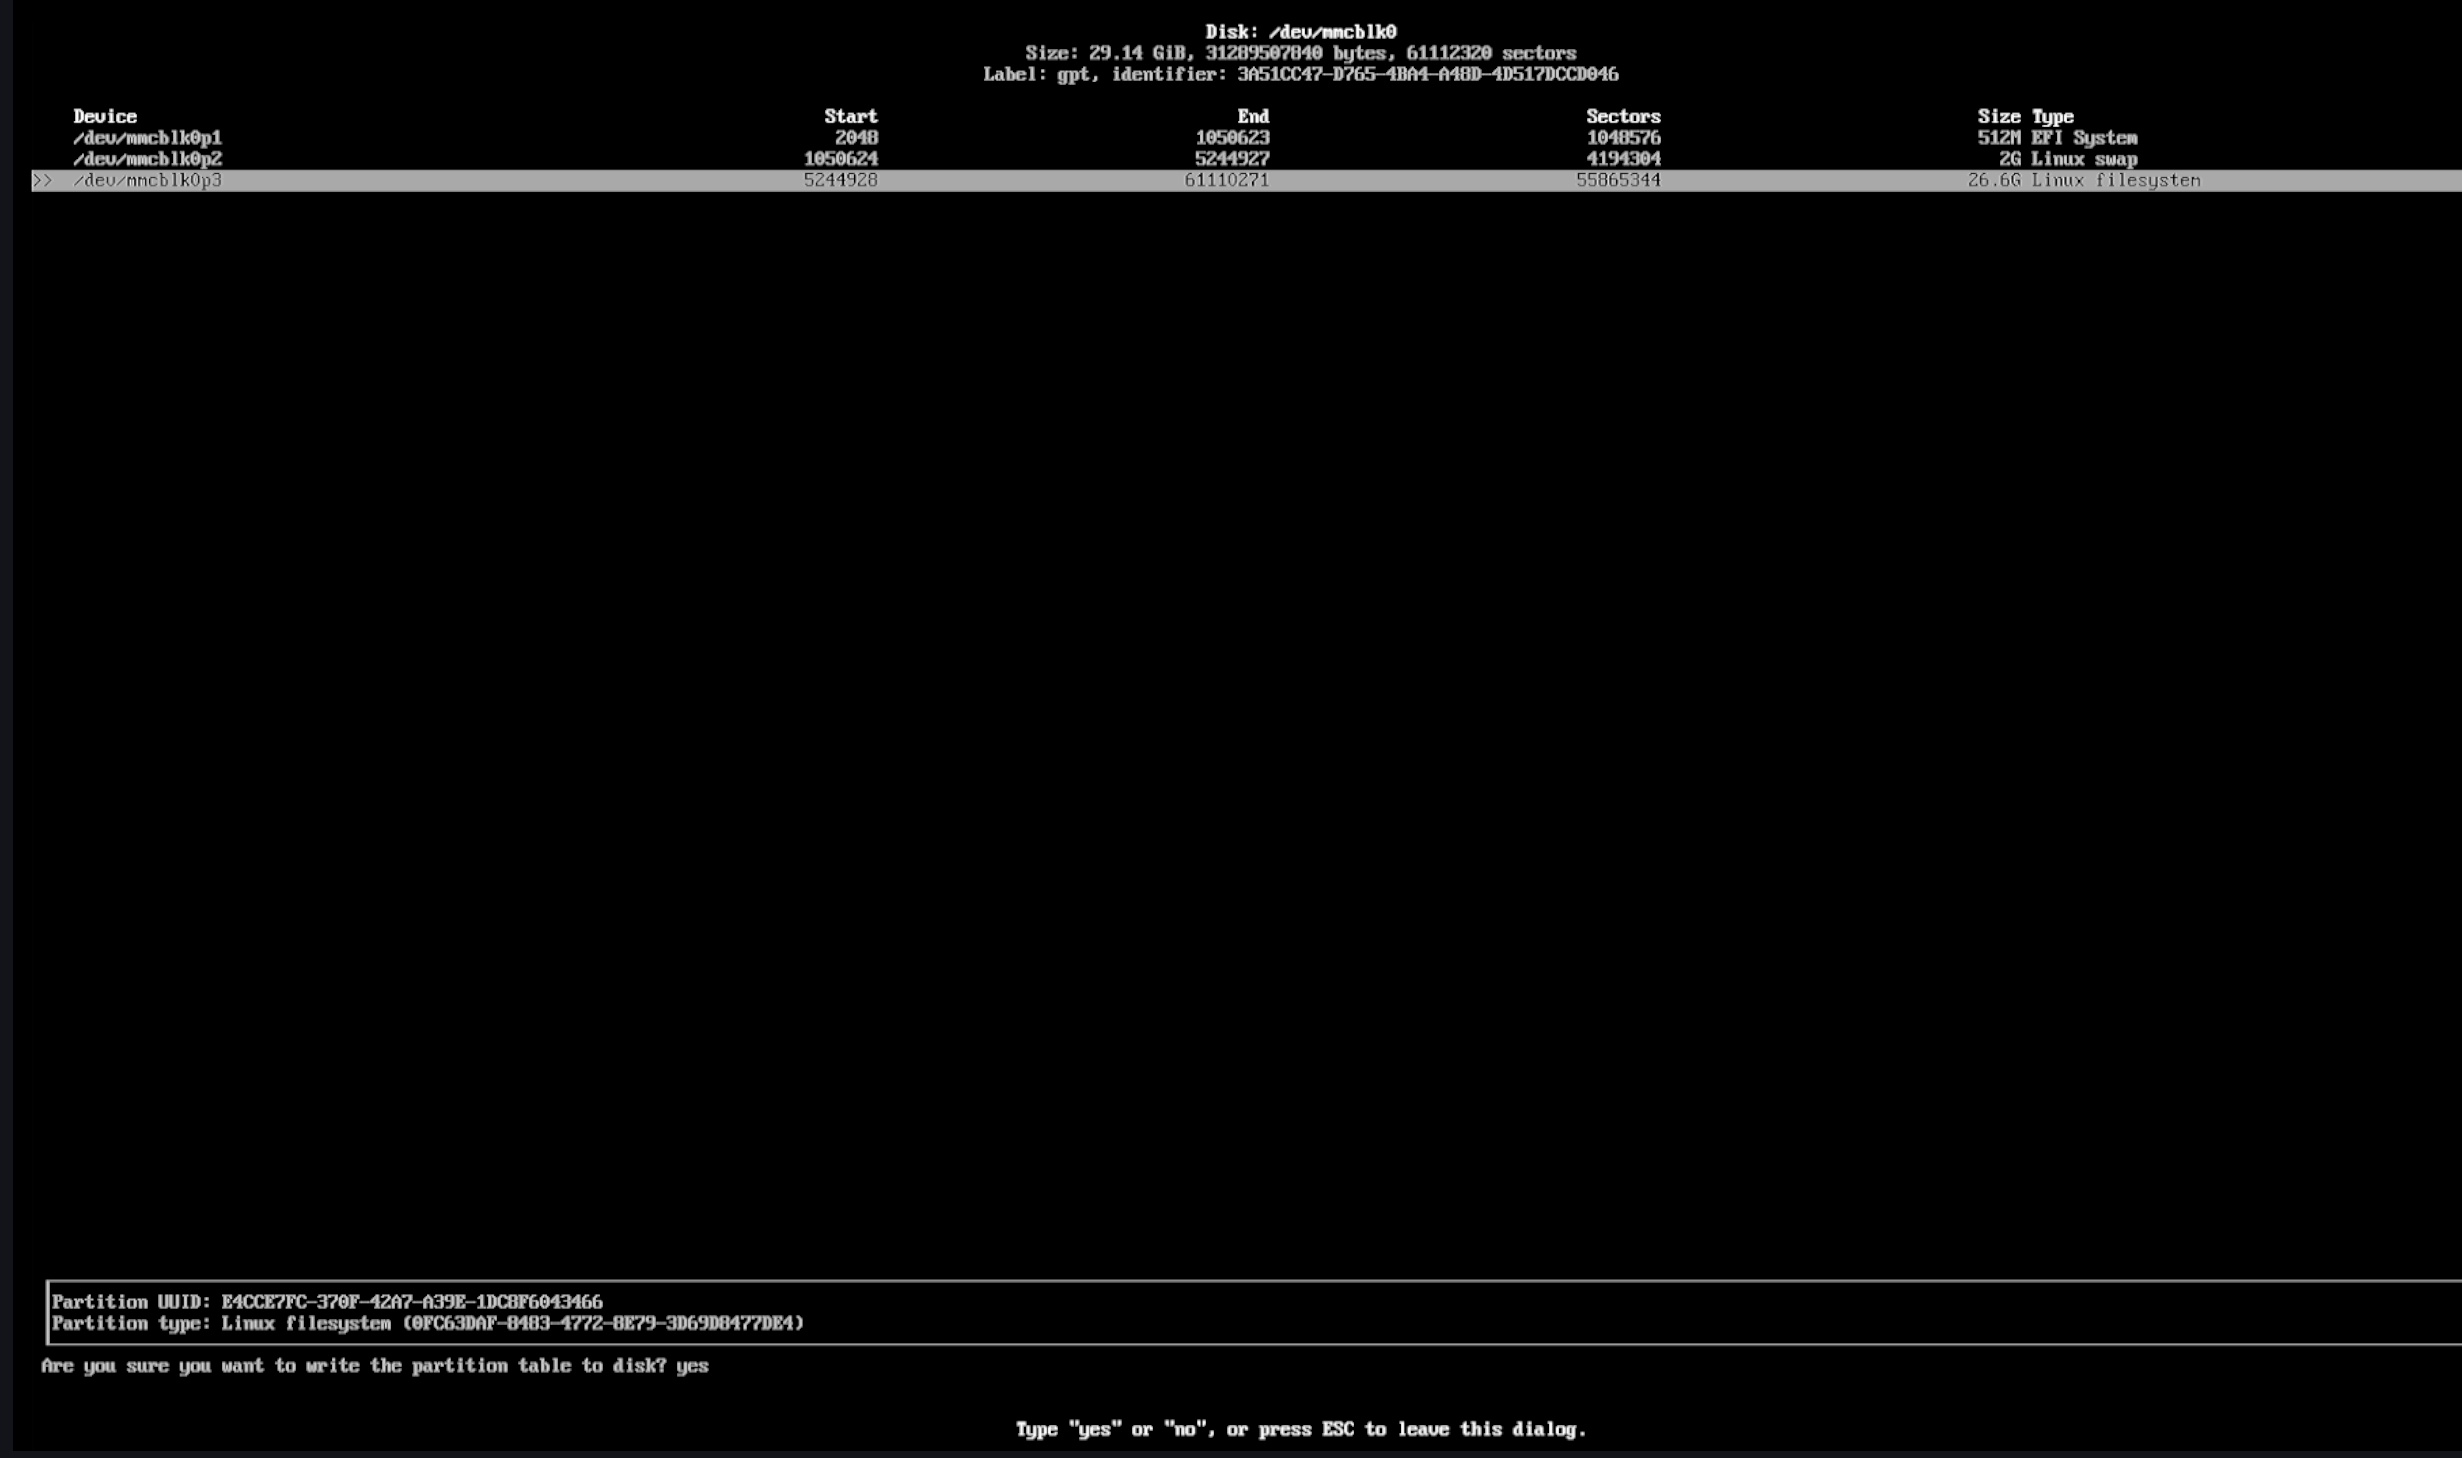
When prompted, type:yes
Exit cfdisk
- Select [Quit].
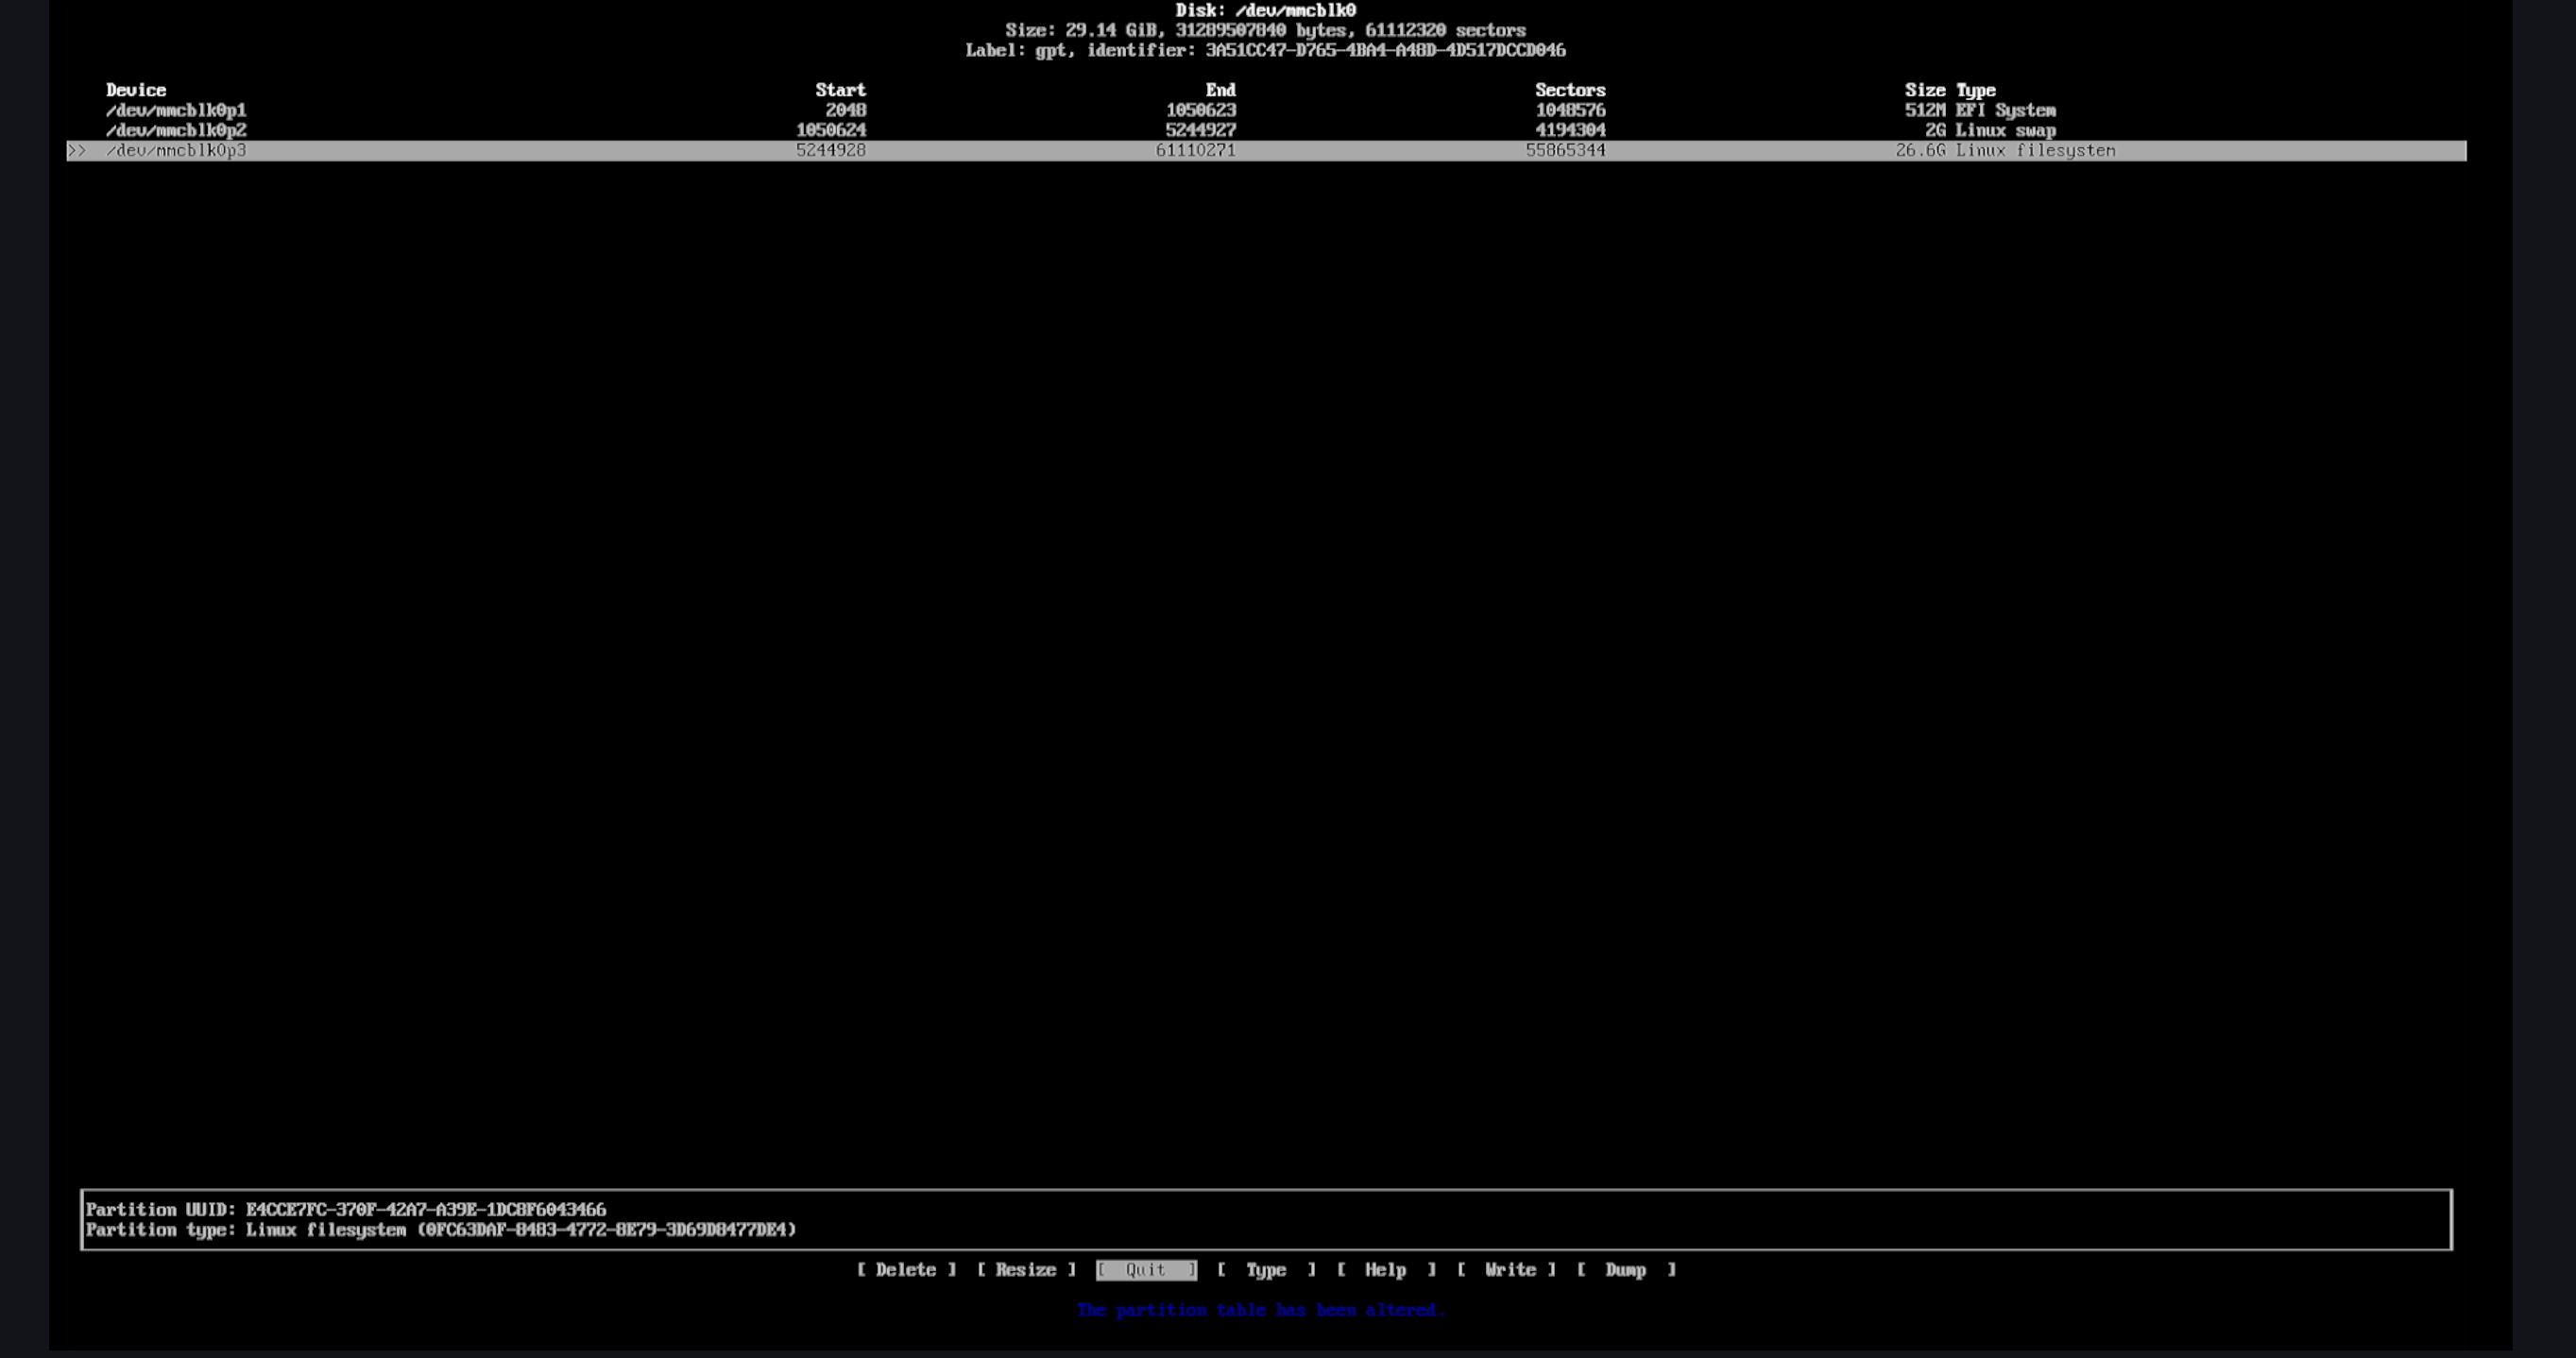
- Press Enter.
Partitioning Summary
At this point, disk partitioning is complete. You should have the following layout:
| Size | Partition | type |
|---|---|---|
| mmcblk0p1 | 512M | EFI System |
| mmcblk0p2 | 2G | Linux swap |
| mmcblk0p3 | 26.6G | Linux filesystem |
At this point, you have completed the most error-prone step in the Arch Linux installation process.
In simple terms:
Formatting = clearing a partition and preparing it for use
Mounting = telling the system how these partitions should be used
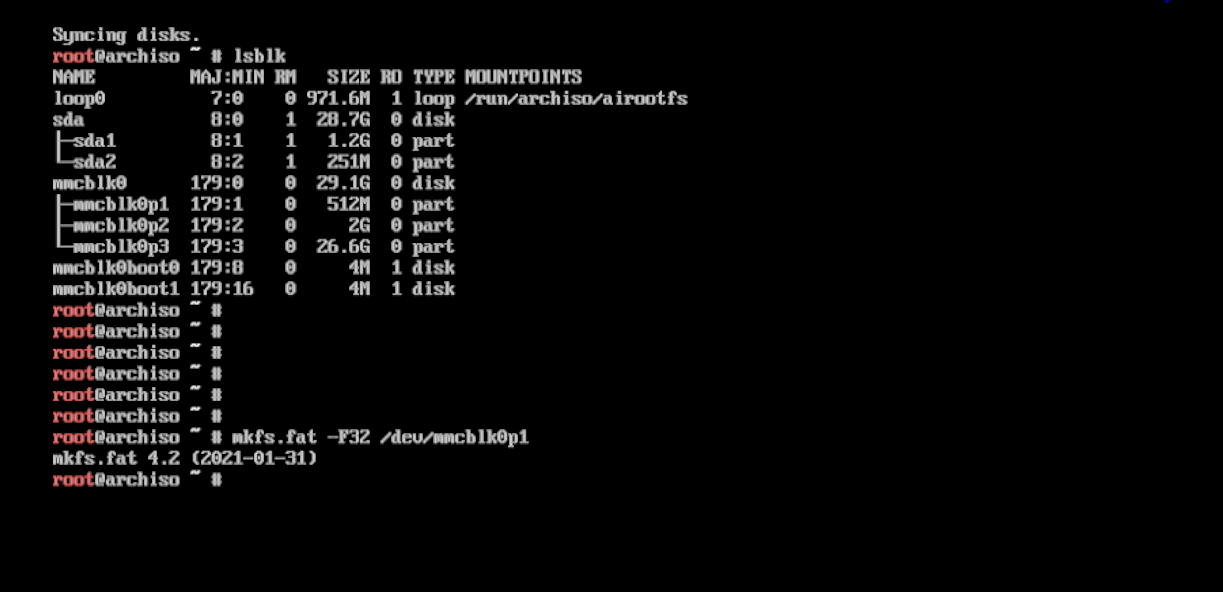
① Format the EFI Partition (FAT32)
Run the following command to format mmcblk0p1:
mkfs.fat -F32 /dev/mmcblk0p1
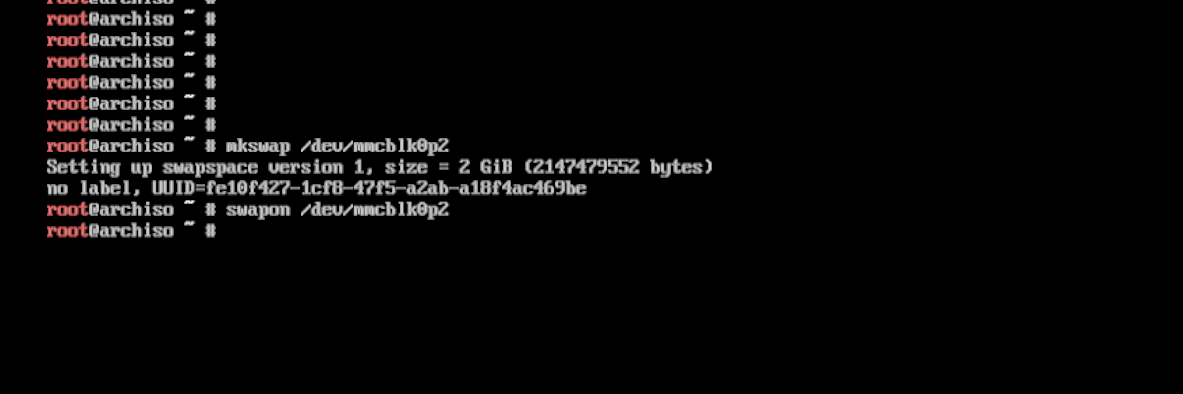
② Initialize and Enable the Swap Partition
mkswap /dev/mmcblk0p2
swapon /dev/mmcblk0p2
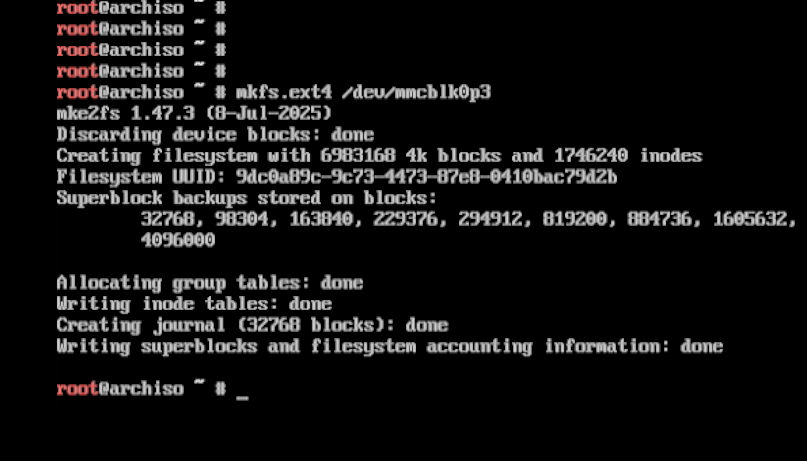
③ Format the Root Partition (ext4)
mkfs.ext4 /dev/mmcblk0p3
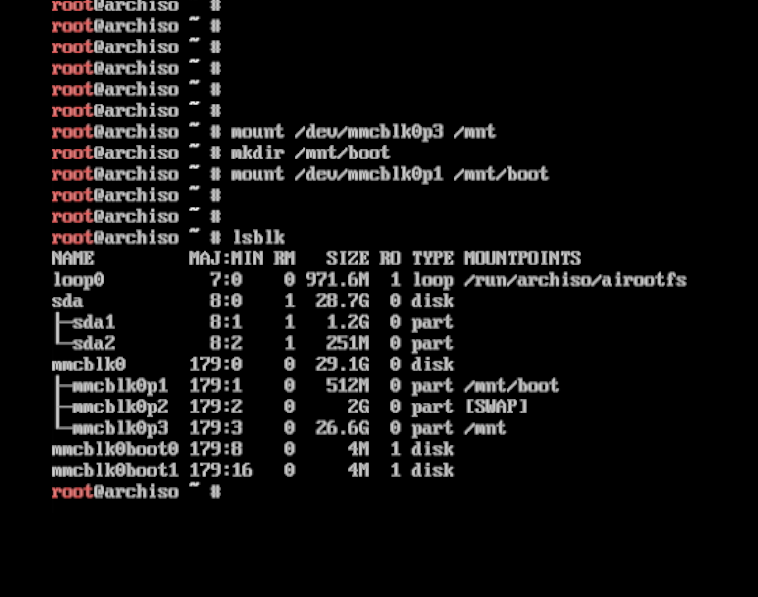
Mount the Root Partition to /mnt
mount /dev/mmcblk0p3 /mnt
Create and Mount the EFI Partition
mkdir /mnt/boot
mount /dev/mmcblk0p1 /mnt/boot
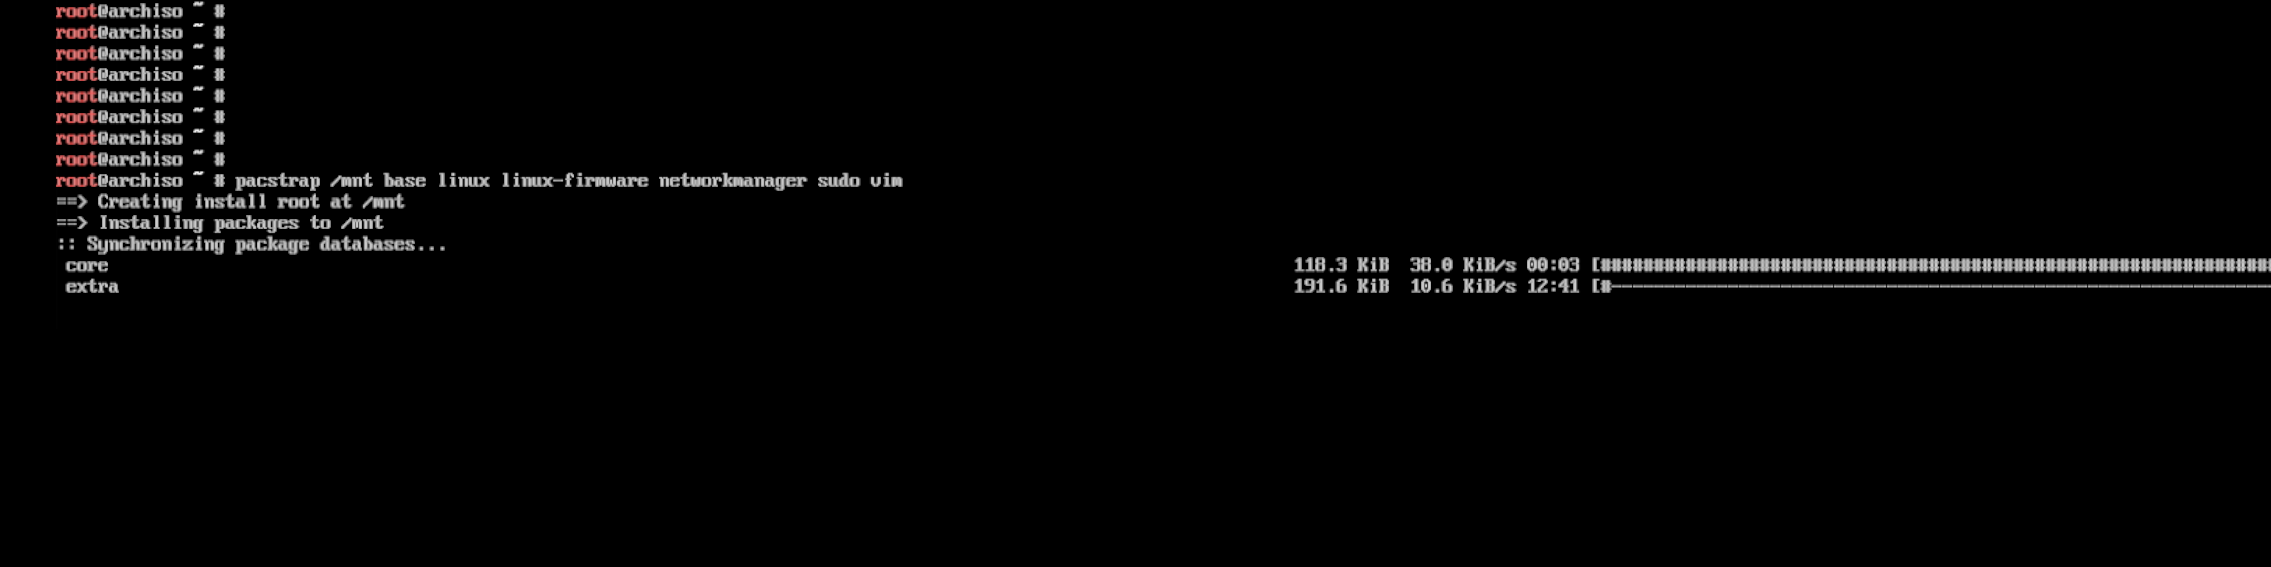
VI. Installing Arch Linux (pacstrap)
Parameter explanation (for reference):
base: Minimal Arch Linux system
linux: Standard Linux kernel
linux-firmware: Hardware firmware (required)
networkmanager: Network management tool
sudo: Privilege management for non-root users
vim: Text editor (used for later configuration)
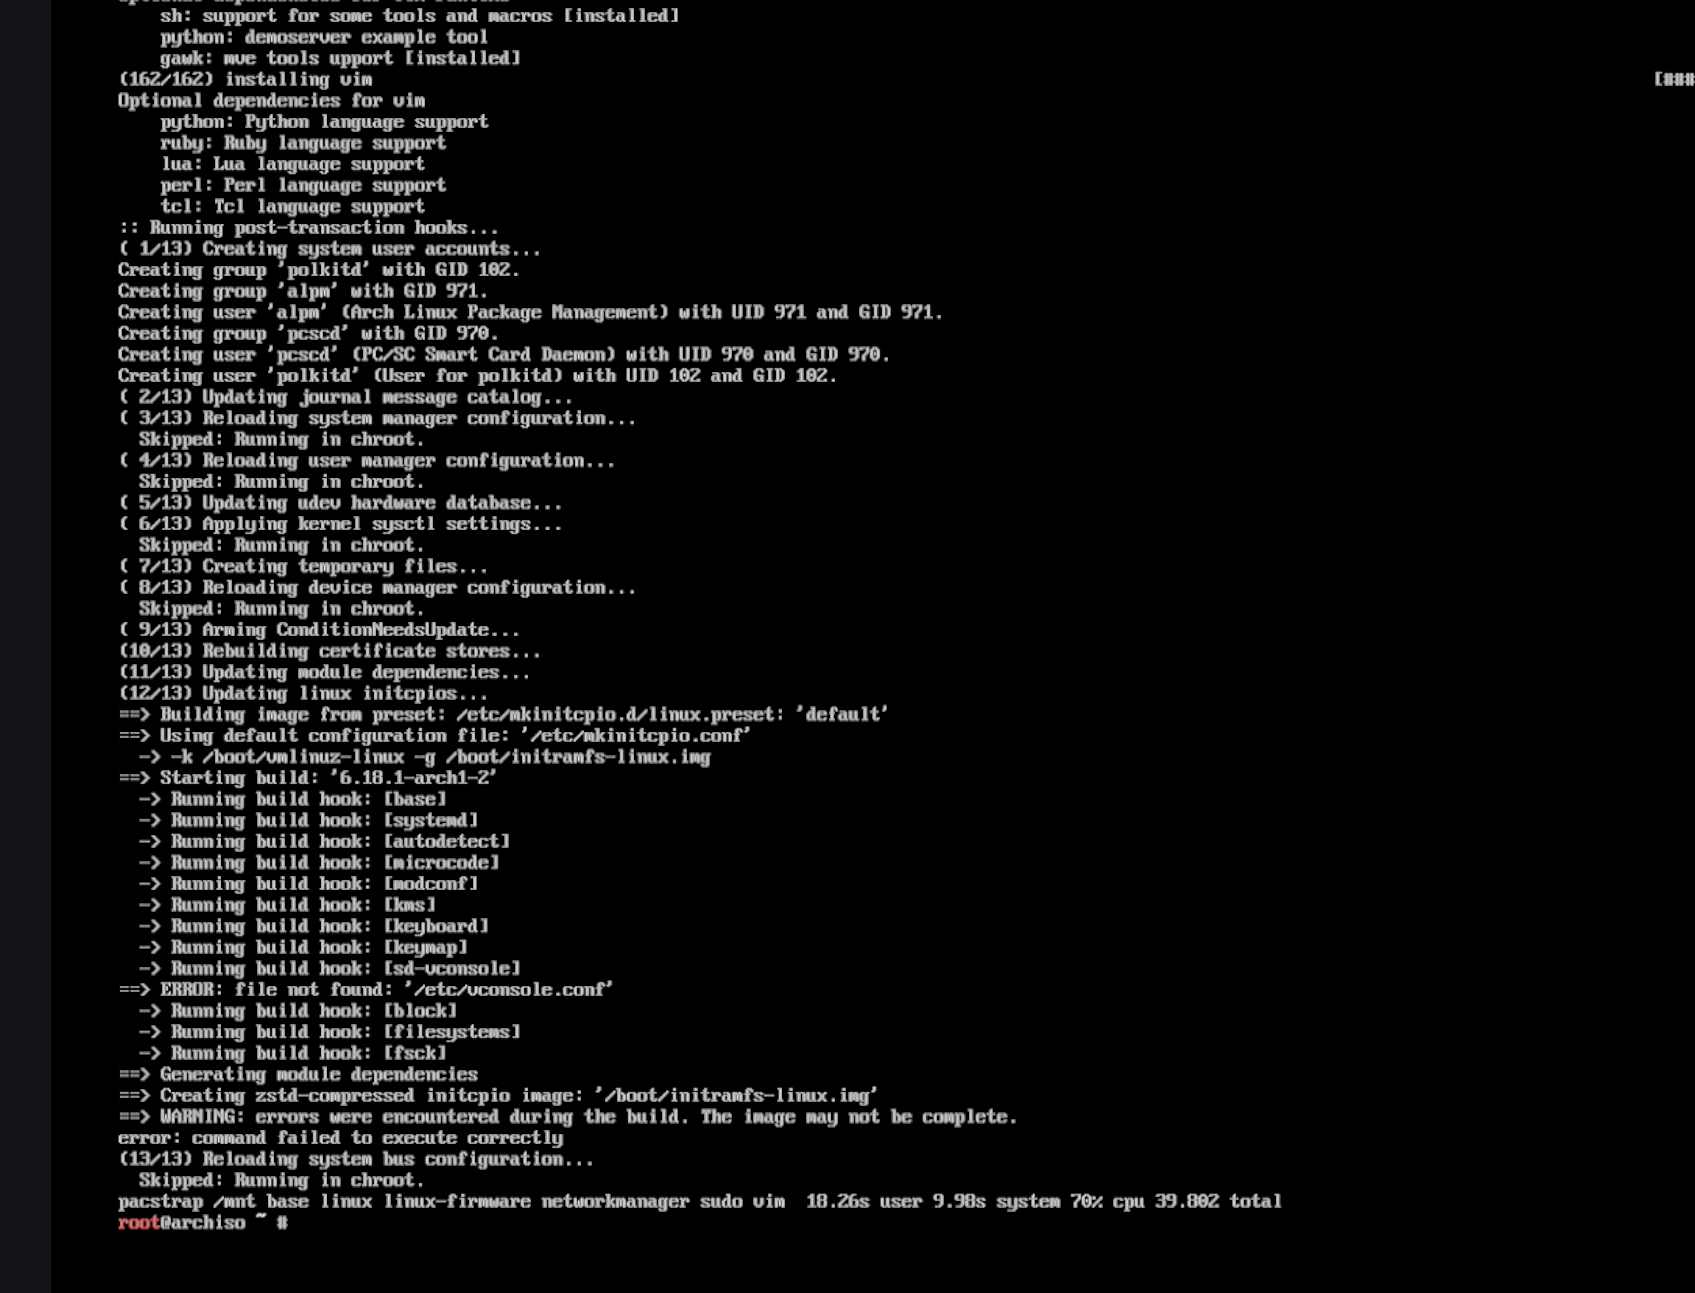
This step will download and install packages. The duration depends on network speed. A large amount of output during the process is normal.
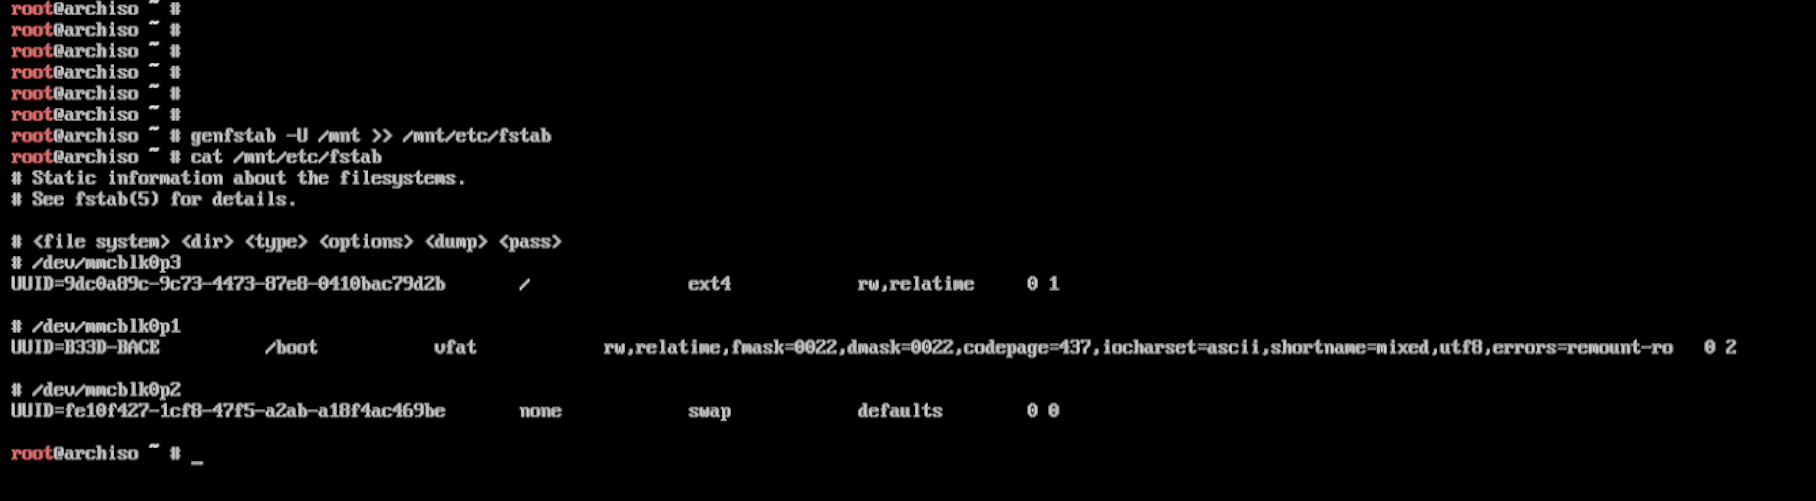
Generate the filesystem mount table for the new system:
genfstab -U /mnt >> /mnt/etc/fstab
- Switch into the newly installed Arch Linux system environment:
arch-chroot /mnt
- After a successful switch, the shell prompt will change to something similar to:
[root@arch /]#
This indicates that you have exited the installation environment and are now inside the newly installed Arch Linux system.

VII. Basic System Configuration
Using Hong Kong as an example:
ln -sf /usr/share/zoneinfo/Asia/Hong_Kong /etc/localtime
Synchronize the hardware clock (very important):
hwclock --systohc

Quick verification (optional)
If the time is shown as UTC+8 (Hong Kong time), the configuration is successful.

① Edit the locale list
Open the locale configuration file:
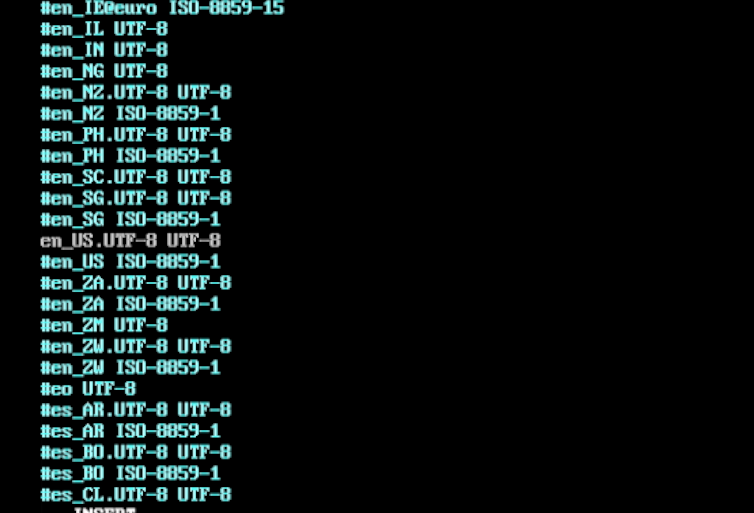
vim /etc/locale.gen

Find the language you want and uncomment the corresponding line (remove the leading #). Example for English (United States):
en_US.UTF-8 UTF-8
Save and exit:
Press Esc
Type
:wqPress Enter
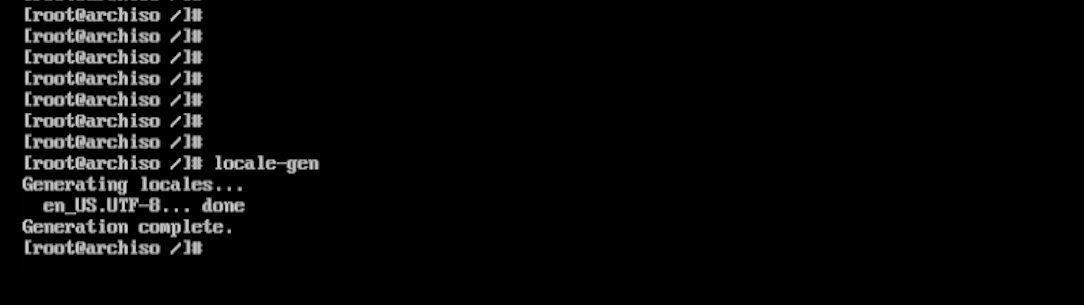
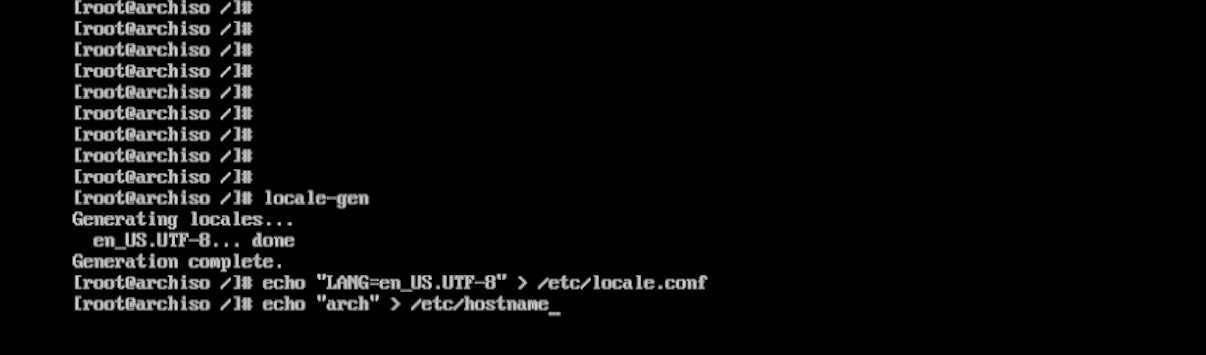
② Generate locales
locale-gen
Set the system hostname. You may replace it with any name you like. Here, arch is used as an example (you can choose a different name):
echo "arch" > /etc/hostname
Next, configure the hosts file:
vim /etc/hosts

Modify the file as follows:
127.0.0.1   localhost
::1         localhost
127.0.1.1   arch.localdomain arch
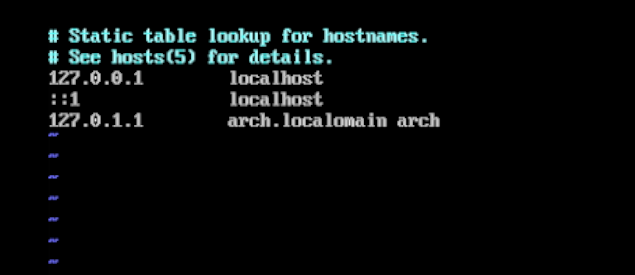
⚠️ If your hostname is not arch, replace arch in the above lines with the hostname you actually set.
Save and exit Vim:
Press Esc
Type
:wqPress Enter
Set a login password for the root user:
passwd
The system will prompt you to enter the password twice:
Enter the new password
Re-enter it to confirm
⚠️ Notes:
No characters (not even
*) will be displayed while typing the password — this is normal.Make sure both entries match.
Once completed, you can log in as root using this password.

Enable NetworkManager to start automatically at boot:
systemctl enable NetworkManager


VIII. Install and Configure the systemd-boot Bootloader
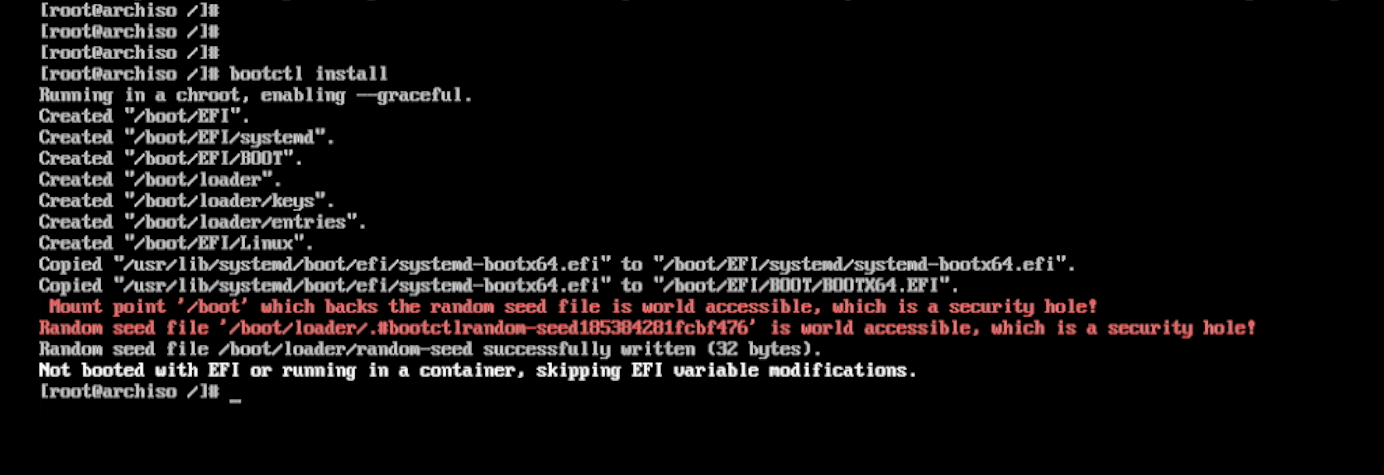
Simply run:
bootctl install
You need the following file:
/boot/loader/entries/arch.conf
This file tells systemd-boot:
Where the kernel is
Where the initramfs is
Which partition is the root filesystem
① Obtain the PARTUUID of the root partition
blkid /dev/mmcblk0p3
You should see output similar to:
/dev/mmcblk0p3: PARTUUID="12345678-9abc-def0-1234-56789abcdef0"
Copy and note the value inside the quotes.

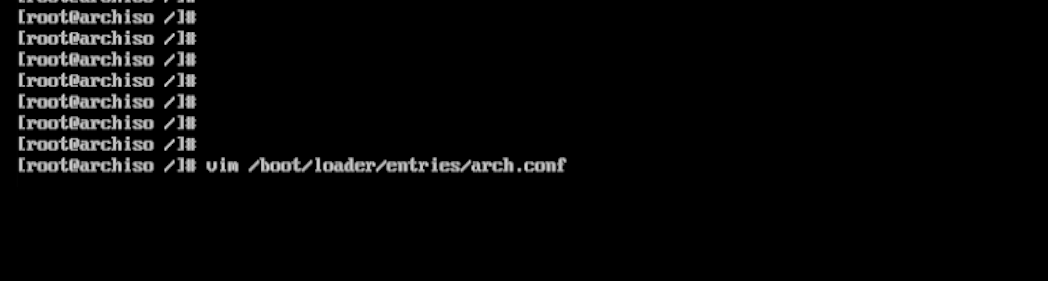
② Create the boot entry configuration file
vi /boot/loader/entries/arch.conf
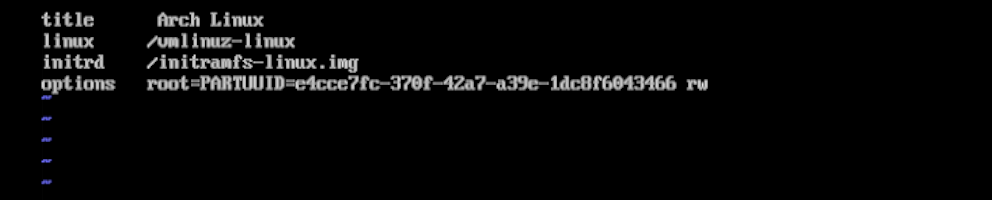
Enter insert mode (press i) and enter the following content:
⚠️ Replace YOUR_PARTUUID with the actual value obtained in the previous step.
title   Arch Linux
linux   /vmlinuz-linux
initrd  /initramfs-linux.img
options root=PARTUUID=YOUR_PARTUUID rw
Save and exit:
Press Esc
Type
:wqPress Enter
IX. Finish Installation and Reboot
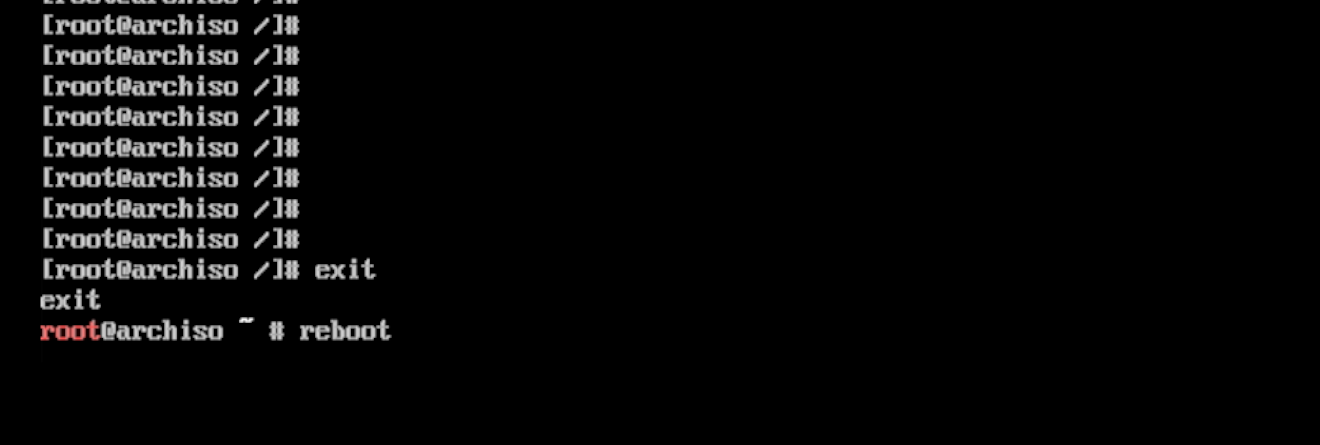
Exit chroot
Leave the chroot environment:exit

Reboot the system
reboot
⚠️ Before rebooting, make sure to remove the installation media (USB drive / ISO).
Installation Complete
After a successful boot, you should see a screen similar to the following:
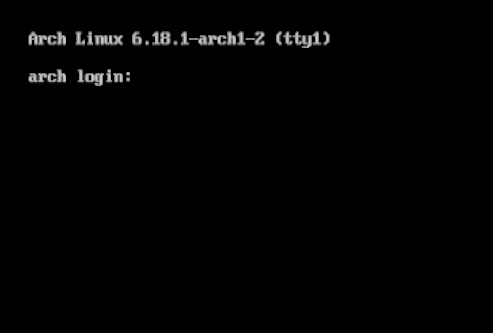
🎉 At this point, the basic installation of Arch Linux is complete. The system is now a clean, functional, and extensible starting point.
Next steps you may consider:
Configure networking
Set up a desktop environment
You can refer to the official Arch Wiki for further guidance: https://wiki.archlinux.org/title/General_recommendations
All further configurations can be gradually built on top of this foundation.