1.Introduction
![]()
OpenWrt is an open-source, Linux-based router operating system widely used on home routers, enterprise routers, soft routers, NAS devices, and other network equipment. It offers high flexibility and customization, allowing users to manage their network devices just like operating a small Linux server.
Key features of OpenWrt include:
Open source and transparent: Full control with no black-box components.
Highly extensible: Install additional packages such as VPN, AdGuard, Docker, and more.
High performance: Well-suited for gigabit networks and powerful soft-router hardware.
Flexible networking: Supports advanced features such as VLAN, multi-WAN, and bypass routing.
This tutorial aims to demonstrate how to use the ZimaBoard 2 to build a high-performance soft router and guide you through the complete installation process of OpenWrt.
2.Preparation
Please prepare the following hardware and tools in advance to ensure a smooth installation process:
ZimaBoard 2 device
USB drive (≥16GB) for creating the bootable installer
Tips
The flashing process will erase all data on the USB drive. Please back up any important files beforehand!
PC (Windows / macOS) for downloading the firmware and flashing it to the USB drive
Monitor + MiniDP to HDMI/DP adapter + keyboard + Ethernet cable
3.Installation Steps
Step 1: Create an OpenWrt Bootable USB Drive
Download the firmware
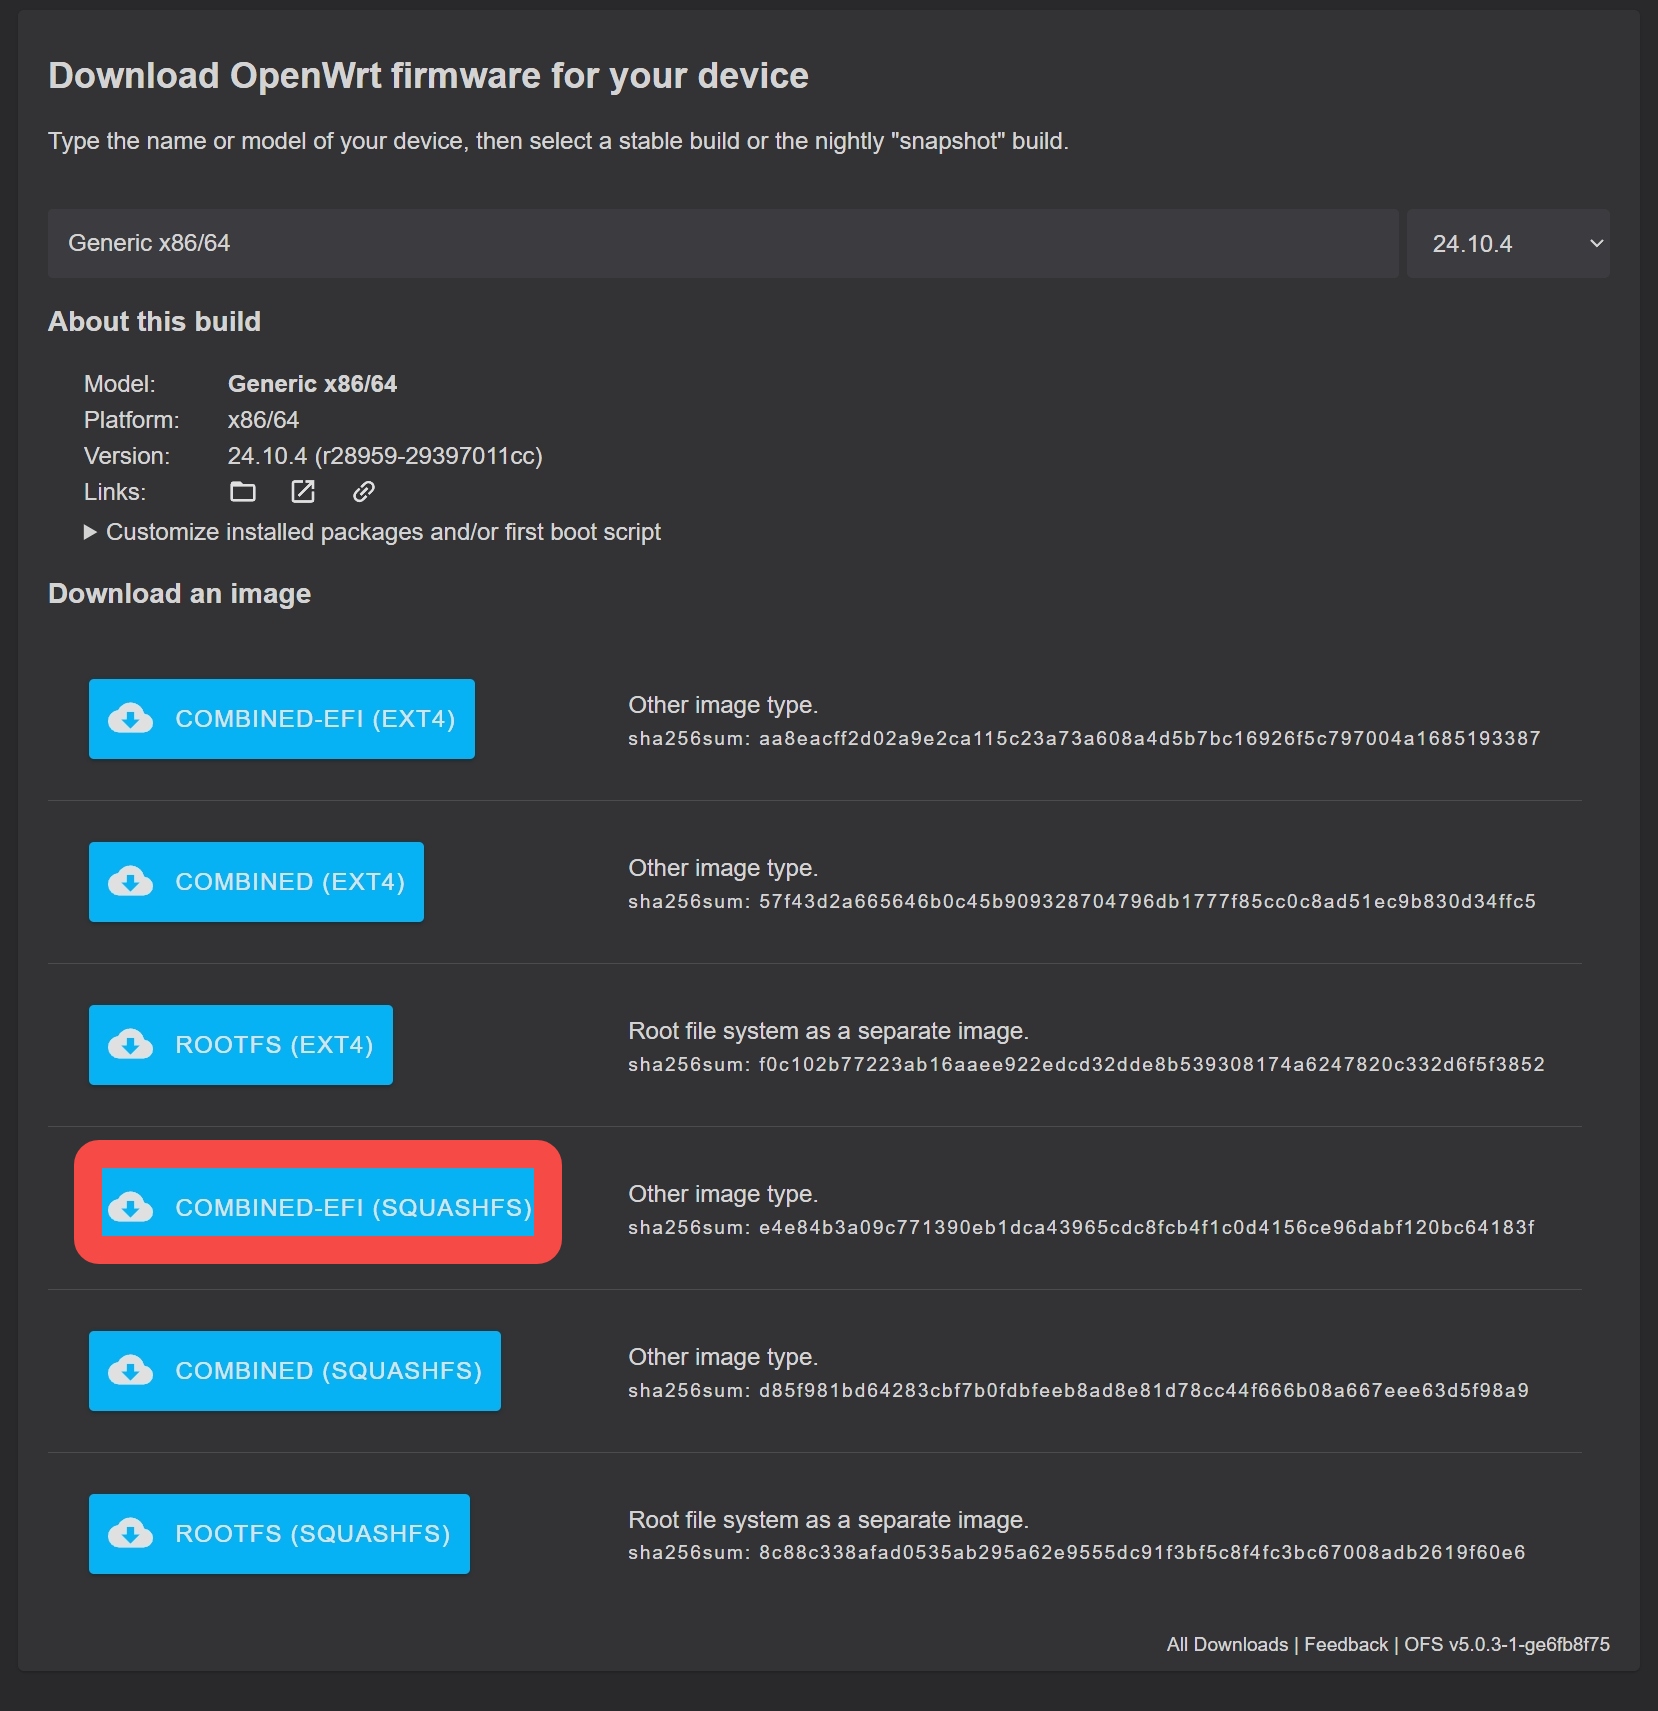
Visit the official download page: Download the official firmware of openwrt
Select the recommended image type: Choose the COMBINED-EFI (SQUASHFS) version. This is a complete bootable image designed for x86_64 devices, supports UEFI boot, and is fully compatible with the ZimaBoard 2 BIOS environment.
Step 2: Flash the Image to the USB Drive Using balenaEtcher
1.Prepare an empty USB drive on your computer
TipsThe flashing process will erase all data on the USB drive. Please back up any important files beforehand!
2.Insert the USB drive into your PC
3.Open balenaEtcher(If you don’t have it installed, you can download it from the official website .)
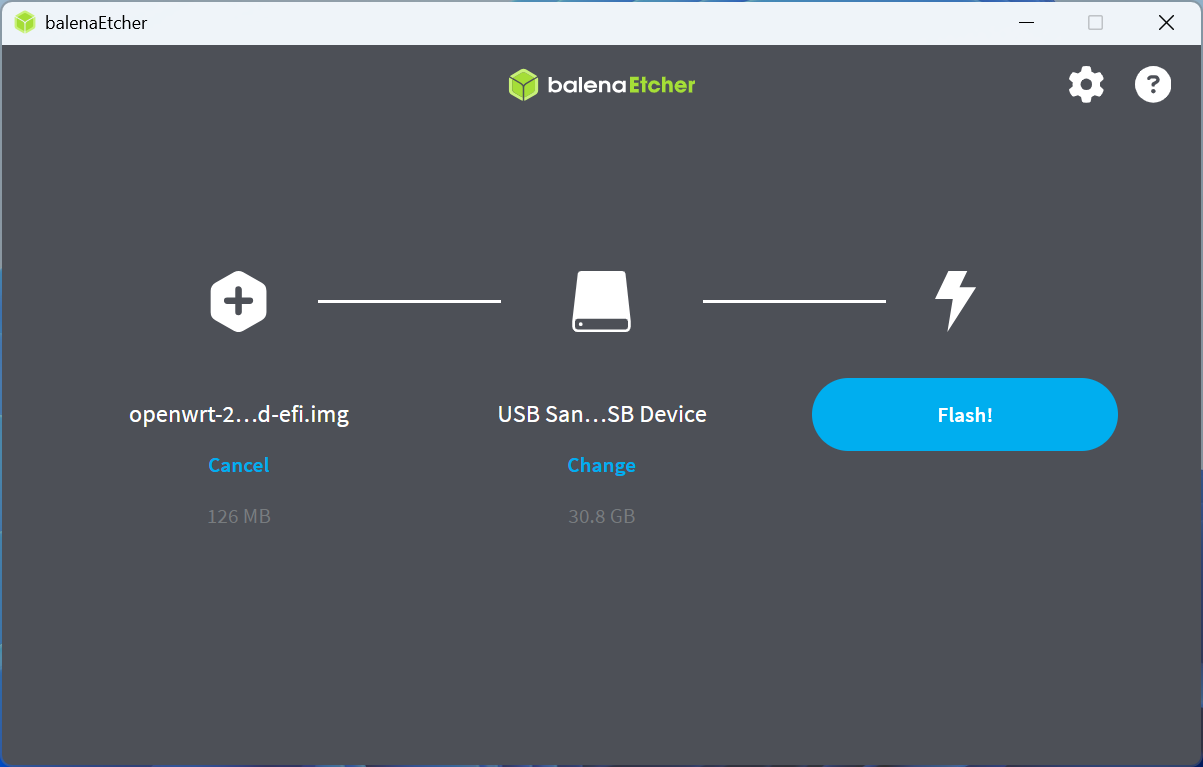
4.Start flashing
Click Flash from file and select the downloaded OpenWrt x86 image
Click Select target and choose your USB drive
The flashing process typically takes 1–3 minutes, so please wait patiently
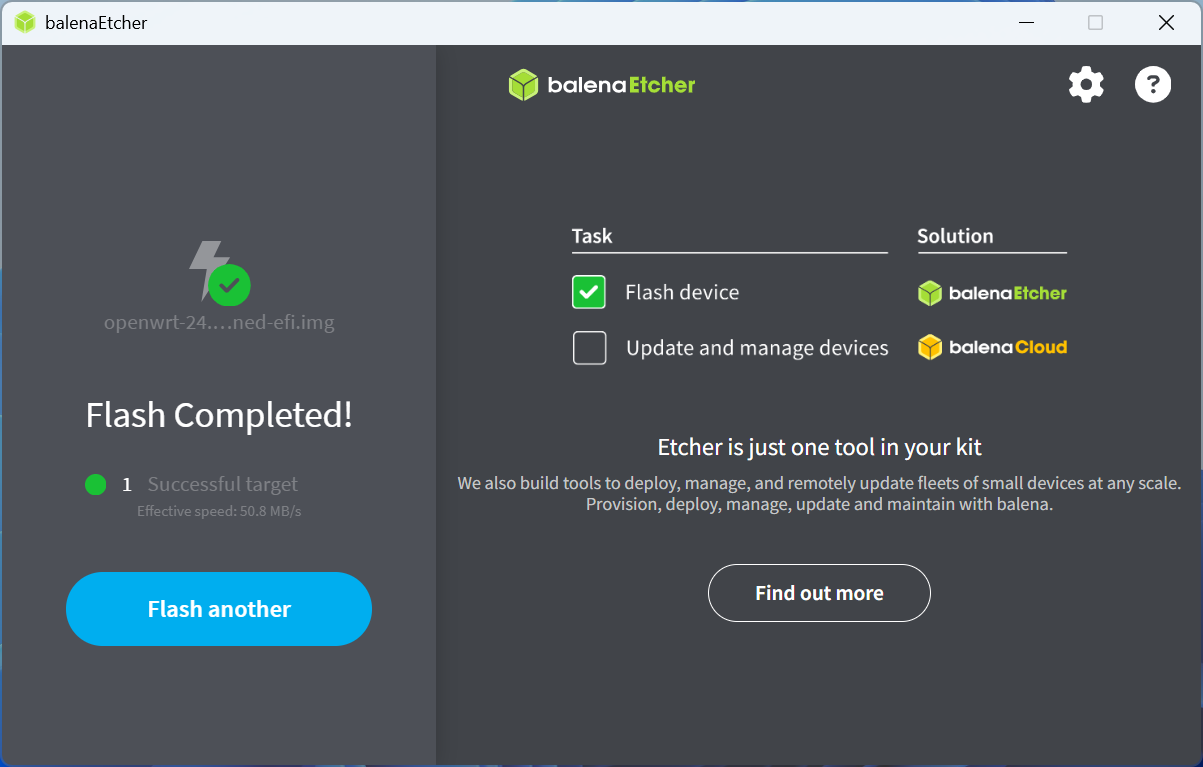
5.Flash complete — remove the USB drive
Once Etcher displays “Flash Complete!”, you can safely eject the USB drive. Your USB drive is now a bootable OpenWrt installation medium.
Step 3: Boot the ZimaBoard 2 from the USB Drive
1.Prepare and connect the hardware
Insert the newly created OpenWrt bootable USB drive into one of the USB ports on the ZimaBoard 2
Use an Ethernet cable to connect the LAN port (the one closest to the power connector) to your computer
Connect the power supply and ensure the keyboard and monitor (or other control method) are ready
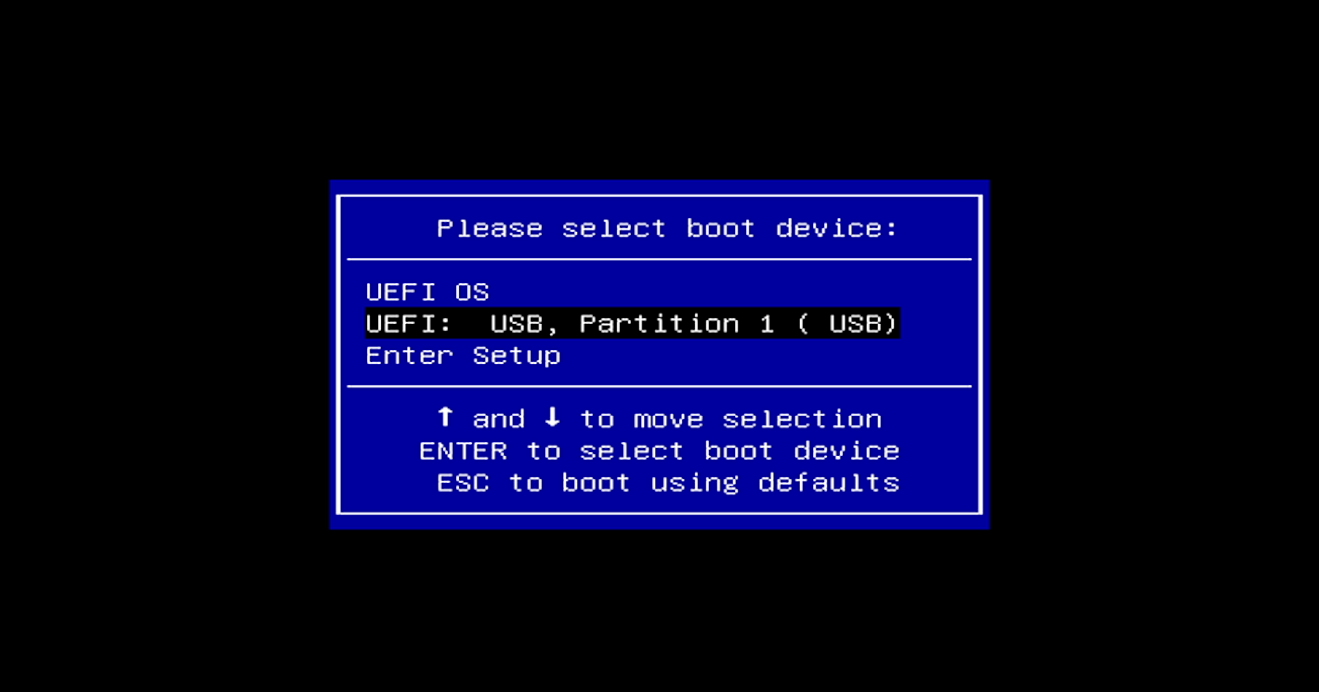
2.Enter the Boot Menu
Press the power button to start the ZimaBoard 2
When the boot screen appears, repeatedly press F11 to enter the Boot Menu
3.Select the USB drive as the boot device
In the Boot Menu, use the arrow keys to select your USB drive
Press Enter to confirm and boot from the USB drive
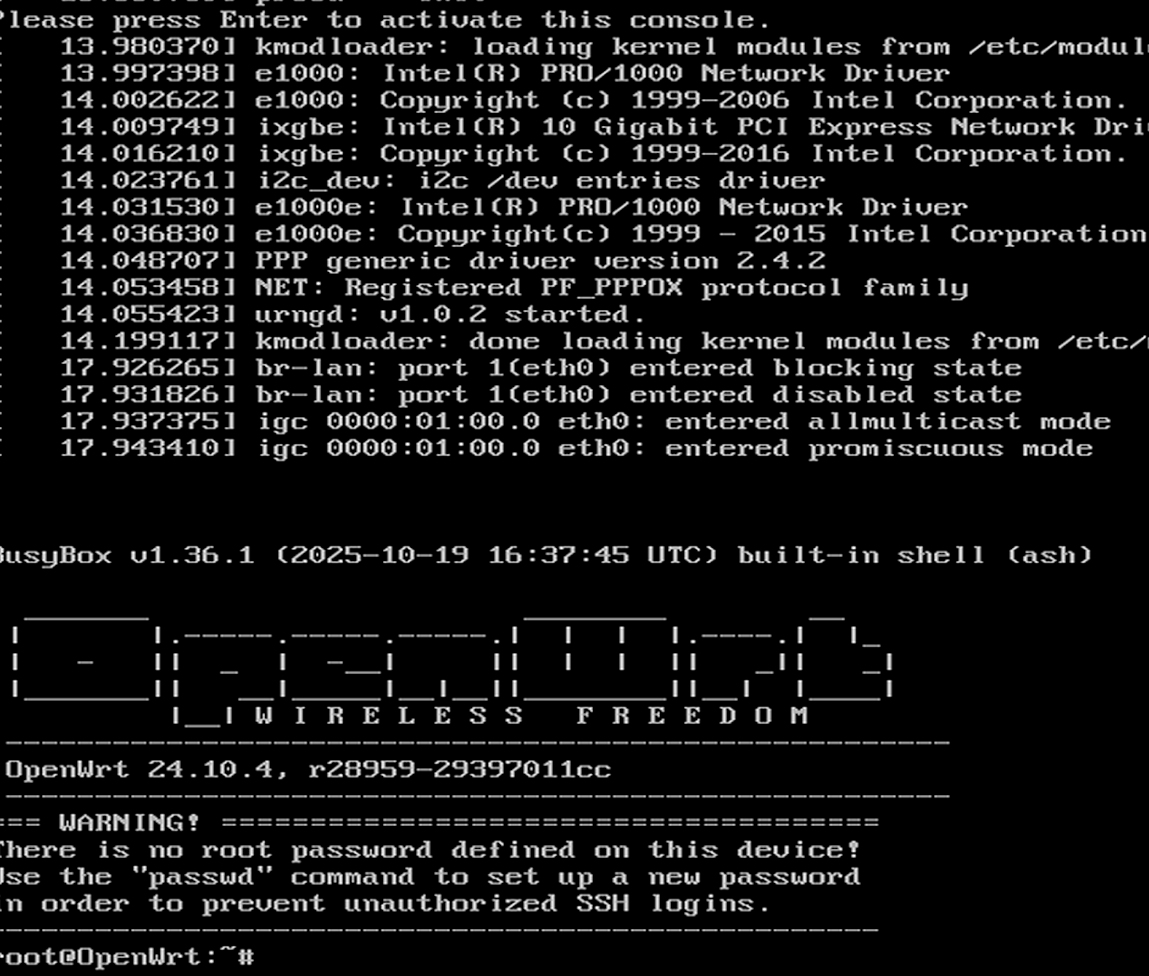
4.Confirm that OpenWrt has booted successfully
- If everything is working correctly, the ZimaBoard 2 will boot from the USB drive and enter the OpenWrt system (usually a command-line interface)
Step 4: Access the OpenWrt Web Interface via Browser
1.Ensure your computer is connected to the ZimaBoard 2
The Ethernet cable from your computer should be plugged into the LAN port (the port closest to the power connector) on the ZimaBoard 2
Your computer’s network adapter should be set to obtain an IP address automatically (DHCP)
In most cases, OpenWrt will assign your computer an address in the 192.168.1.x range (e.g., 192.168.1.100)
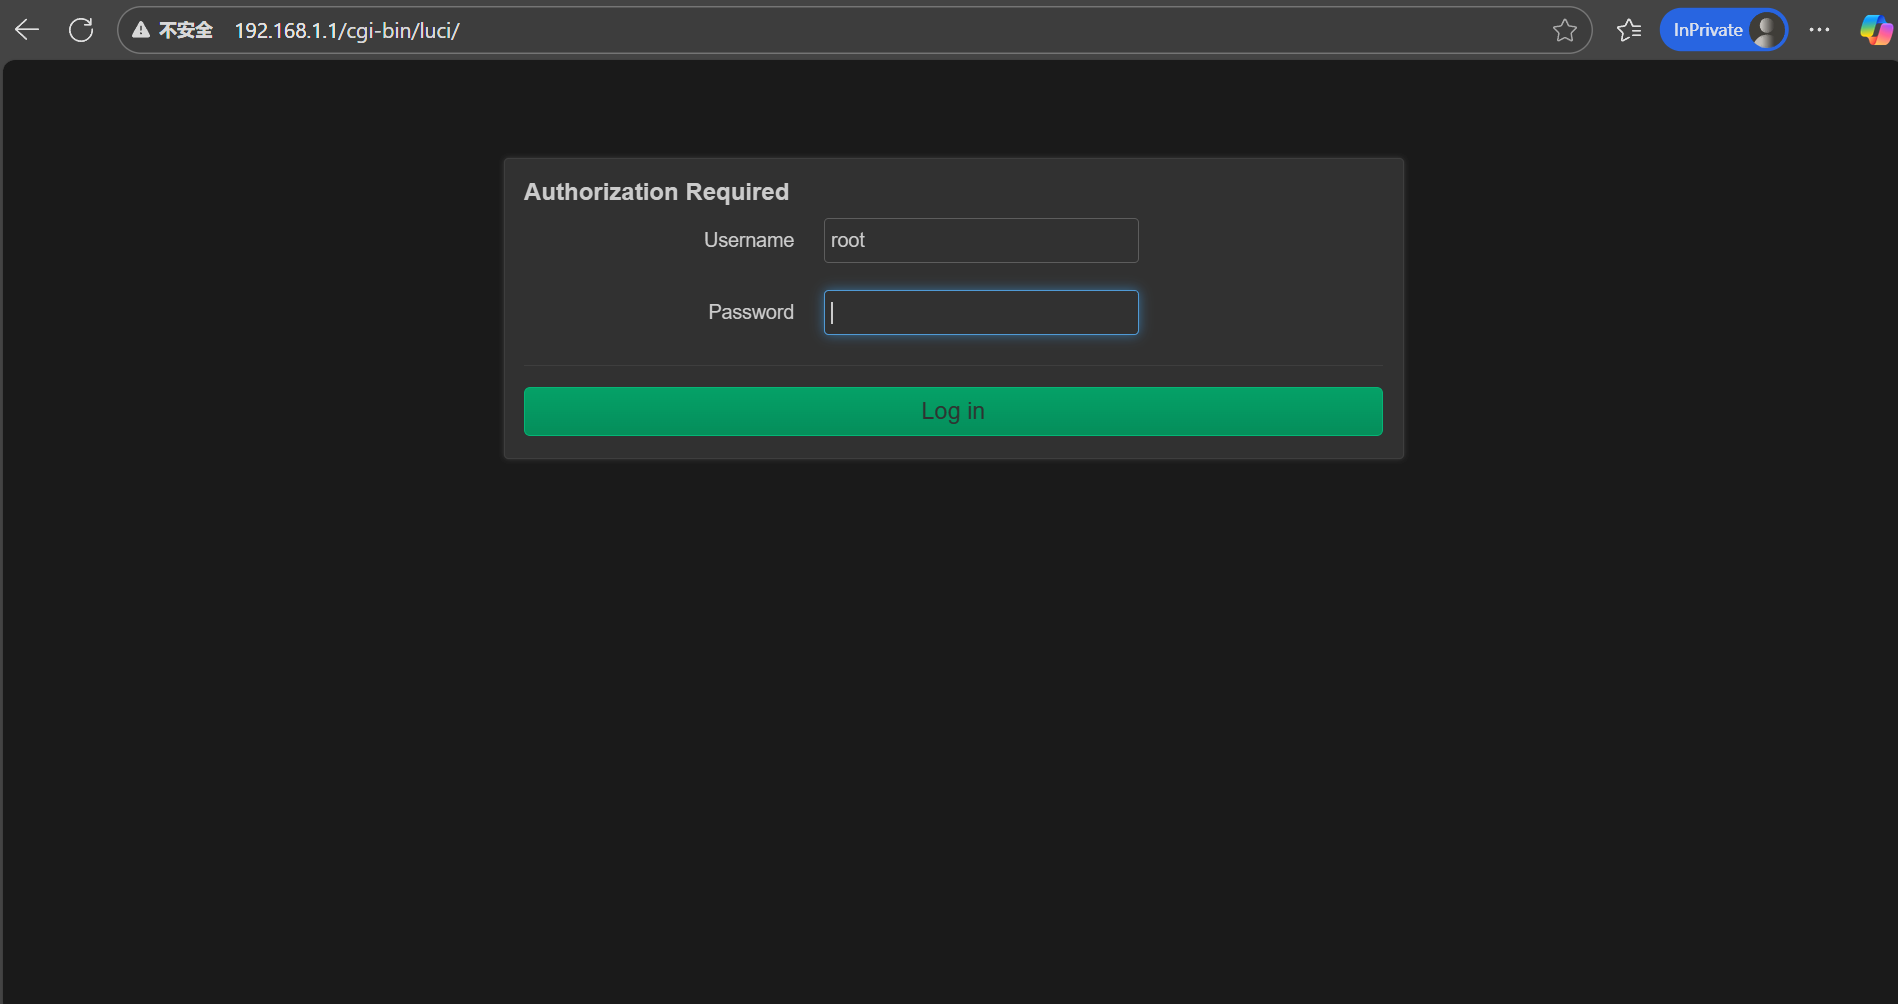
2.Open the OpenWrt management page in your browser On your computer, open any browser (Chrome, Edge, Firefox, etc.), and enter the following address in the URL bar:
http://192.168.1.1
3.Log in to OpenWrt Default username: root Default password: password
4.Final Notes
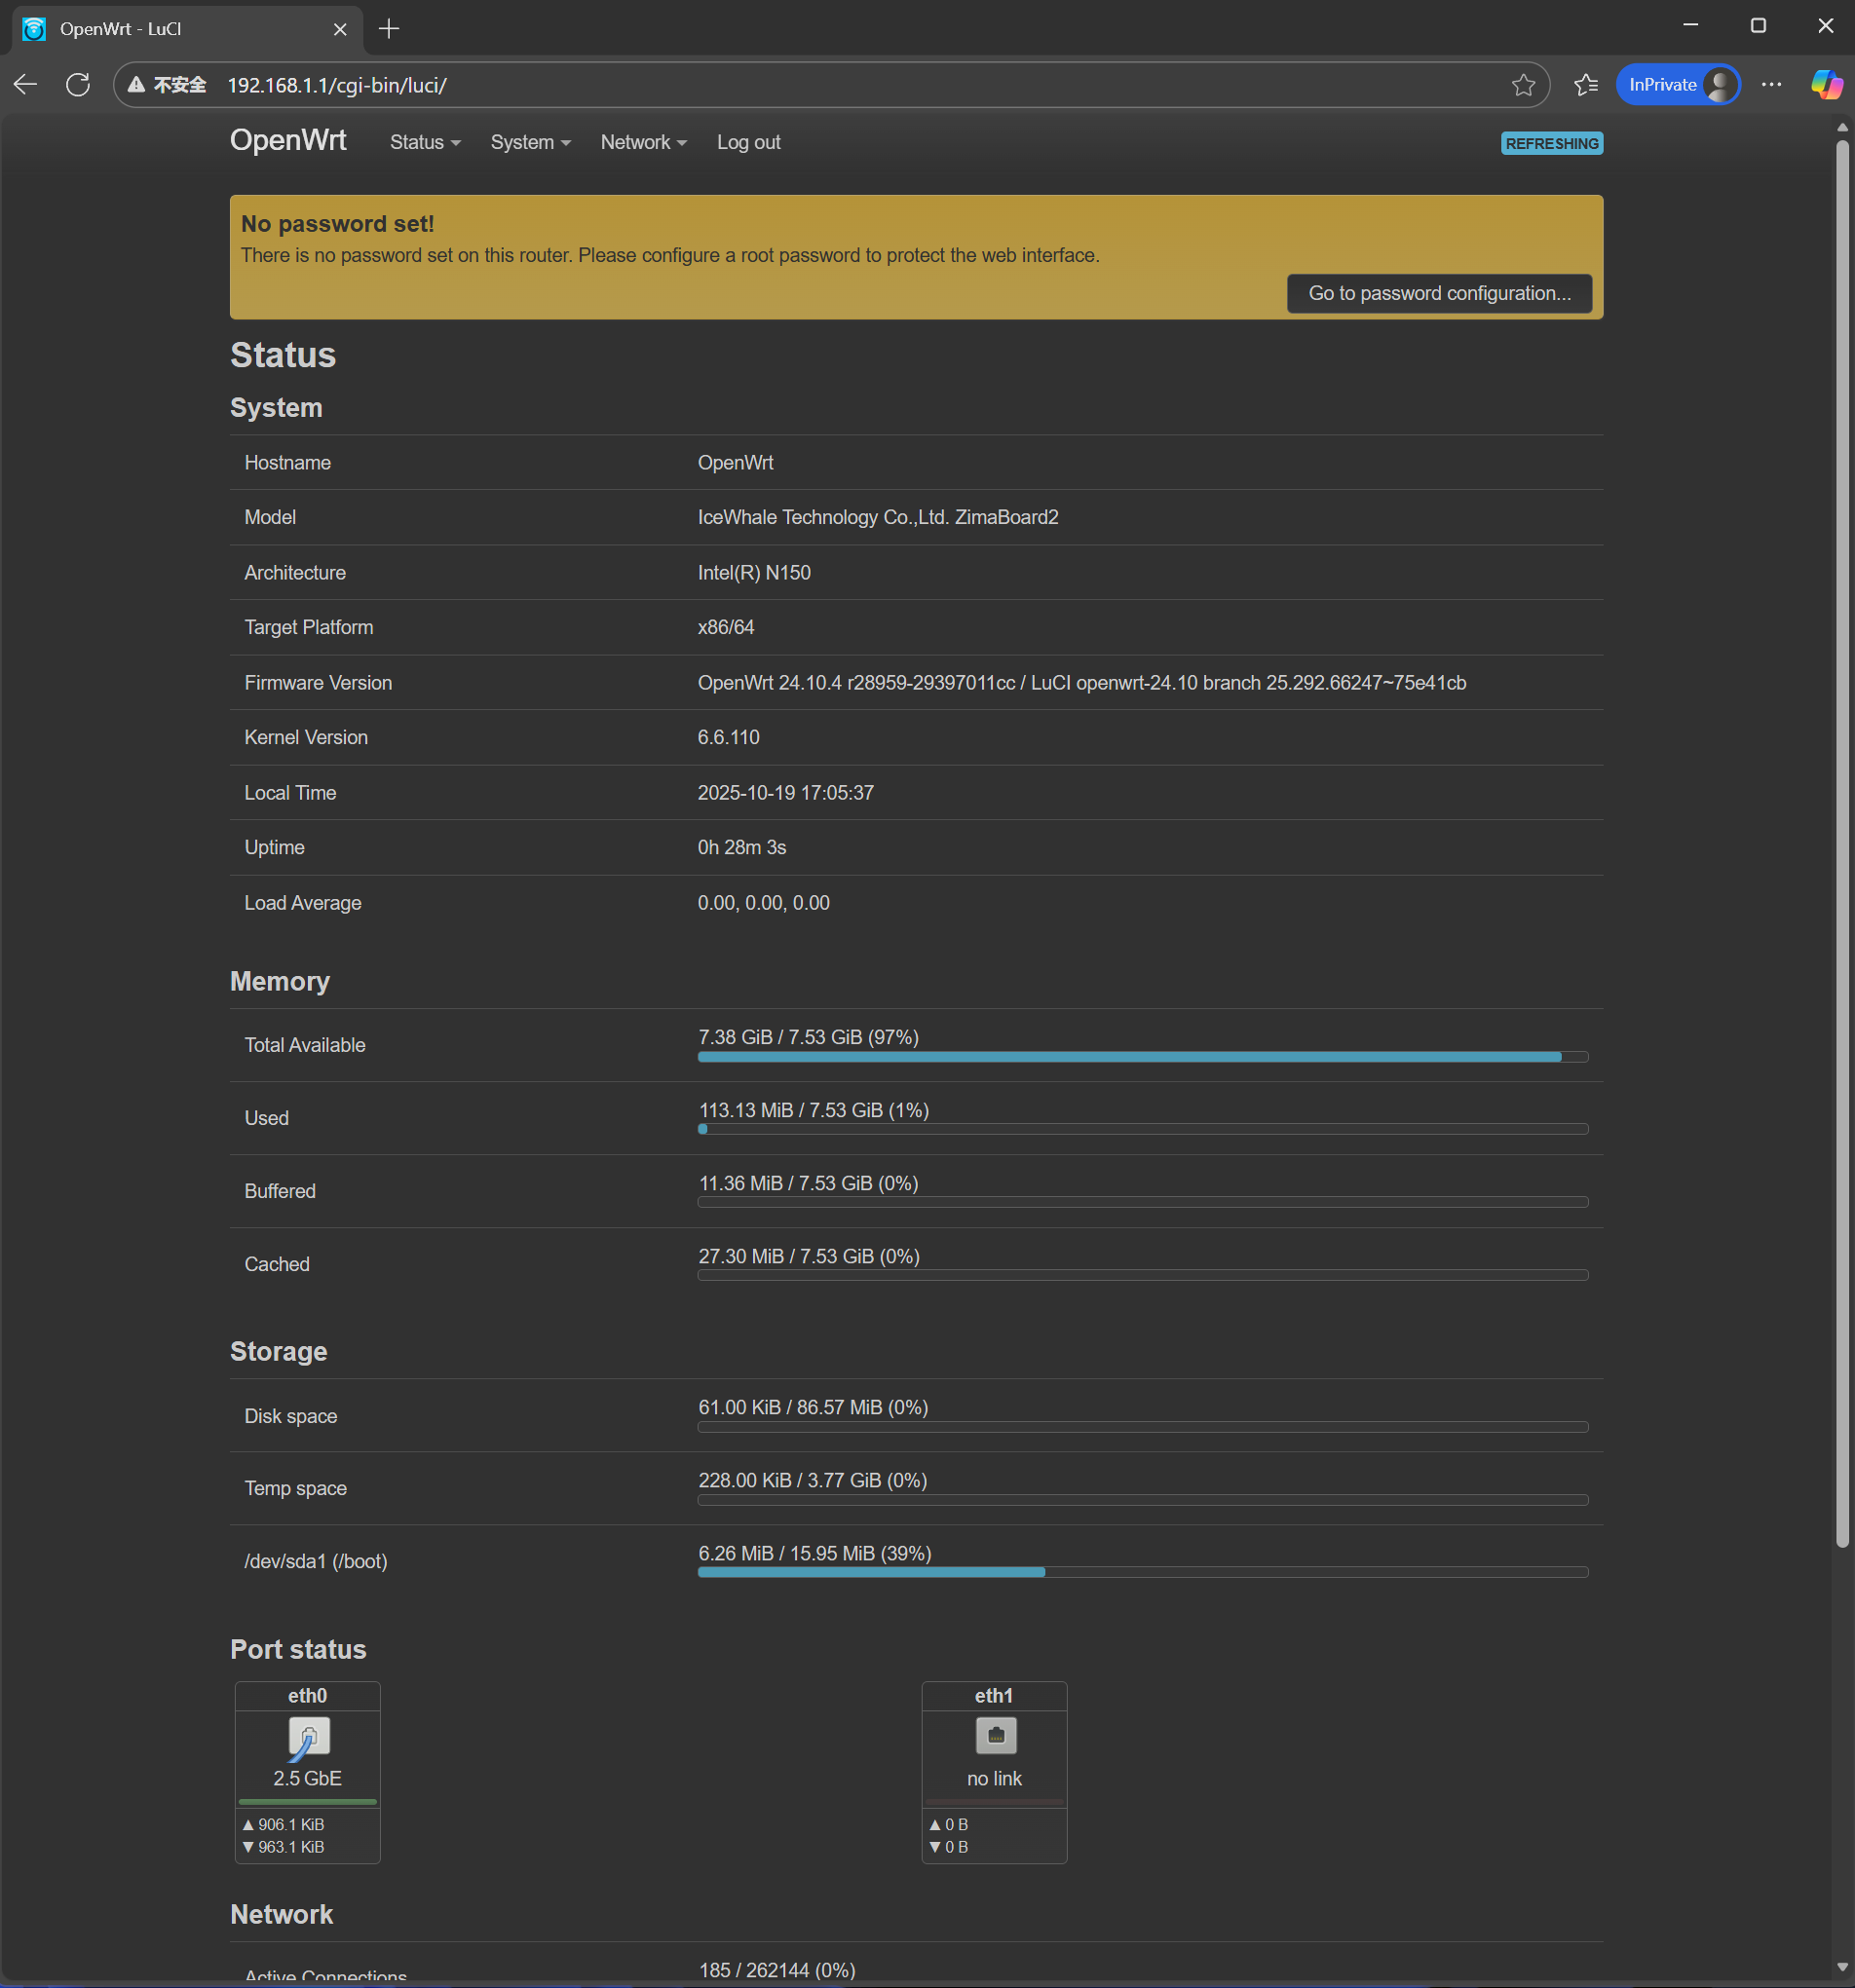
At this point, you have completed the basic process of installing OpenWrt on the ZimaBoard 2.
From downloading the firmware and creating the bootable USB drive to booting from it and successfully logging into the web interface, you have now transformed this compact board into a powerful soft router.
From here, you can continue customizing your setup based on your needs, such as:
Configuring PPPoE or setting up a bypass (bridge) router
Installing common plugins (Docker, ad-blocking tools, proxy services, etc.)
Setting up remote access, NAS, media servers, and more
The combination of ZimaBoard 2 + OpenWrt offers endless possibilities—this tutorial is only the beginning.
If you encounter any issues during the process, feel free to share your situation and error messages with the community for assistance.