Originally published on the IceWhale Community Forum by Muditha Liyanagama (Community Contributor): Source URL
Hello fellow ZimaOS and Zimaboard enthusiasts!
I’ve found that while the ZimaOS community and the Ice-whale team offer fantastic support, finding clear, organized, and detailed installation guides can sometimes be a challenge. For those of us who prefer a straightforward, step-by-step approach, especially when troubleshooting those tiny, frustrating issues, this guide is for you. This is the first in a series of articles I plan to write on ZimaOS and Zimaboard, and I hope it proves helpful.
I performed this installation on a Zimaboard2 with the following specifications:
CPU: Intel(R) N150 4 Cores 2.90 GHz 4 Threads
RAM: 16 GB 6400 MHz LPDDR5
GPU: Intel Corporation Alder Lake-N [Intel Graphics]
Operating System: ZimaOS v1.5.3 Plus
Let’s get Syncthing installed
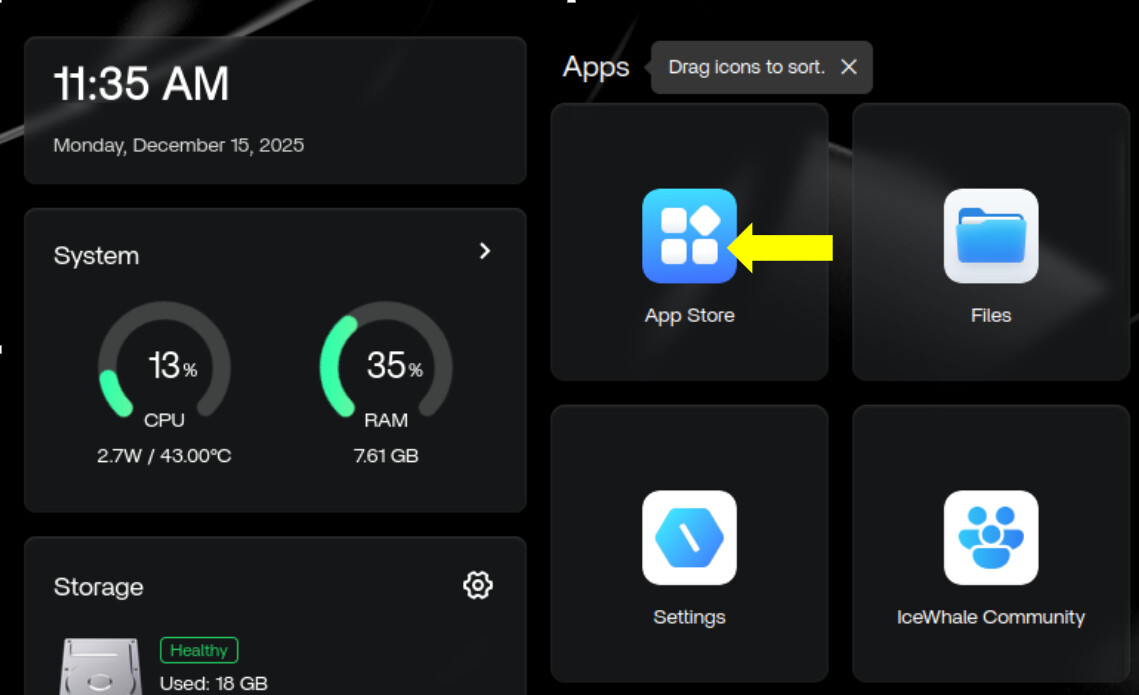
Step 1: Accessing the App Store
Sign in to your ZimaOS interface.
Navigate to the App Store.
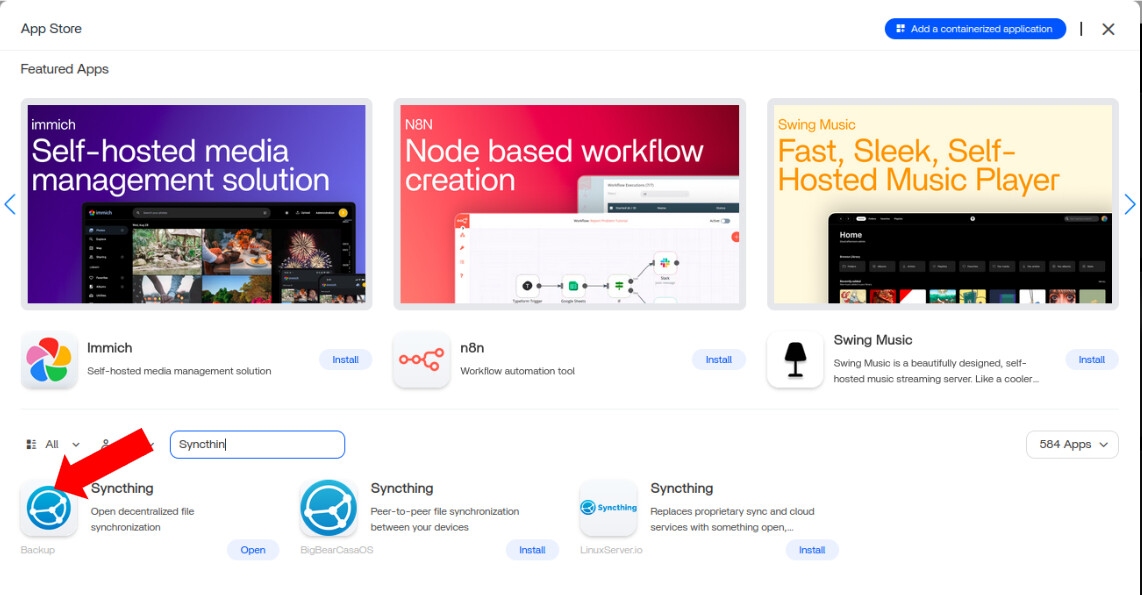
Step 2: Finding and Selecting Syncthing
In the App Store search bar, type Syncthing.
Select Syncthing (Backup) from the search results.
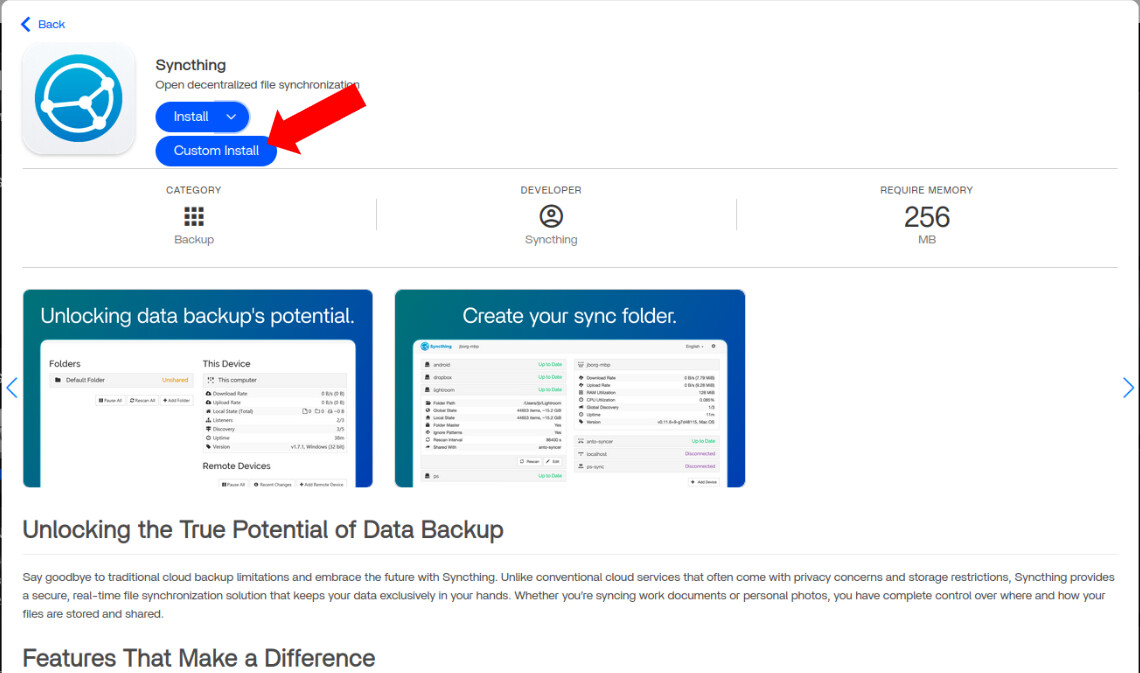
Step 3: Custom Installation
Locate the Install button. Instead of clicking it directly, click the small down arrow next to it.
Select Custom Install.
Step 4: Critical Configuration Before Installation
This is where we set up the essential parameters for Syncthing to work correctly.
Syncthing Folder Path:
This is the primary location where Syncthing will manage your synchronized files. Any subfolders you create within this path will be accessible for synchronization.
Important Note: You cannot use the root of any mounted disk or system folders (like Gallery, Media, Document, etc.) as your Syncthing folder path. This is because running Syncthing with these paths typically requires root user privileges, which is not recommended for security reasons.
PGID and PUID:
These are crucial identifiers that tell Syncthing which user permissions to use. Setting them incorrectly can lead to synchronization problems and may require a full uninstall and reinstall to fix.
How to find your PGID and PUID:
In ZimaOS, go to Settings.
Navigate to General.
Enable Developer mode.
Go to View.
Click on SSH Access to enable it.
Click on Web-based terminal.
Sign in using your ZimaOS username and password.
Once logged into the terminal, enter the following commands, pressing Enter after each. Remember to replace username with your actual ZimaOS username. id -u username id -g username
The output will display your PUID (User ID) and PGID (Group ID). Carefully copy and paste these numbers into the corresponding fields under the Environment Variables section in the Syncthing custom installation screen, as shown in the example image provided. For me, the PGID was 1000 and the PUID was 999.
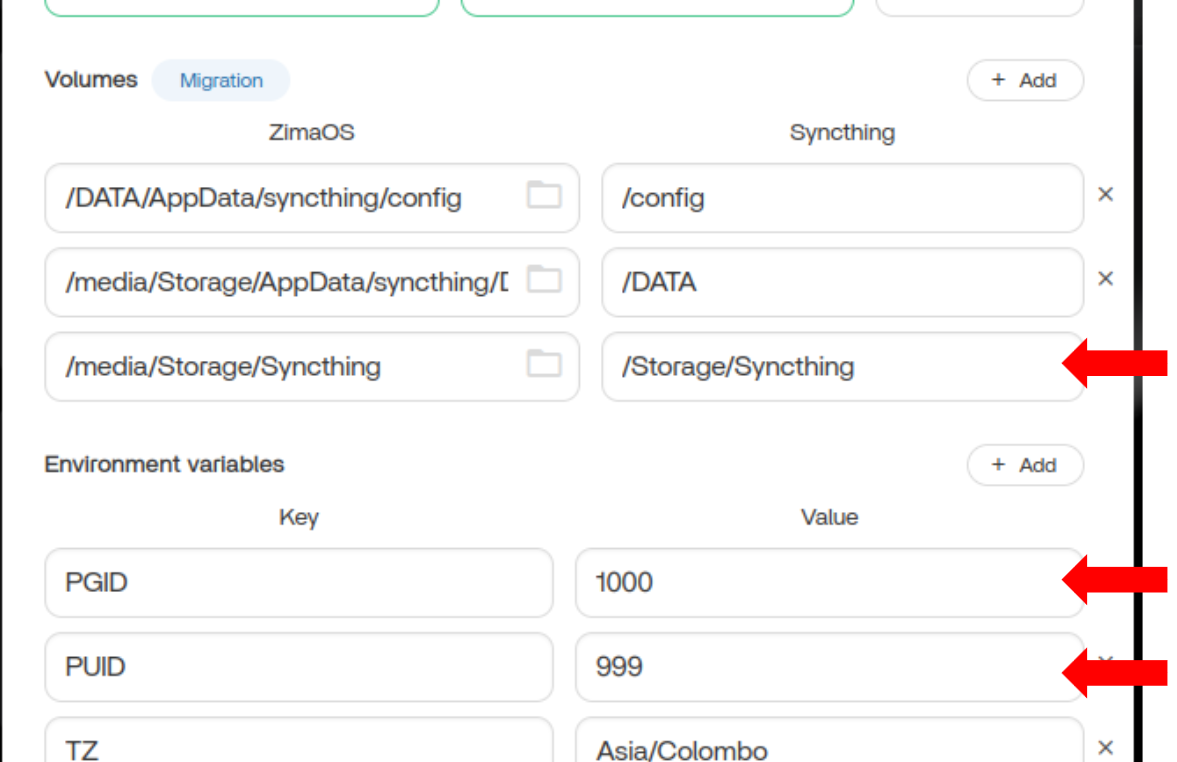
Double-Check: Before proceeding, review all your settings very carefully. Ensure the Syncthing folder path is valid and that your PGID and PUID values are correctly entered.
Install: Once you are confident that all settings are correct, click the Install button.
Step 5: Post-Installation - Synchronization Best Practices
After Syncthing has been successfully installed:
When you are synchronizing folders, always create the destination folder path through Syncthing itself.
Do NOT create the destination folder directly using ZimaOS’s default file browser. Doing so can sometimes lead to unexpected synchronization issues.
I hope this detailed guide makes installing Syncthing on your ZimaOS device a smooth and successful experience! Happy synchronizing!