ZimaOS does not have a desktop environment. When you connect a monitor to your device, the screen displays a console overview showing the ZimaOS version, device model, and the IP addresses you can use to access the ZimaOS web dashboard.
Example of what you will see on the display:
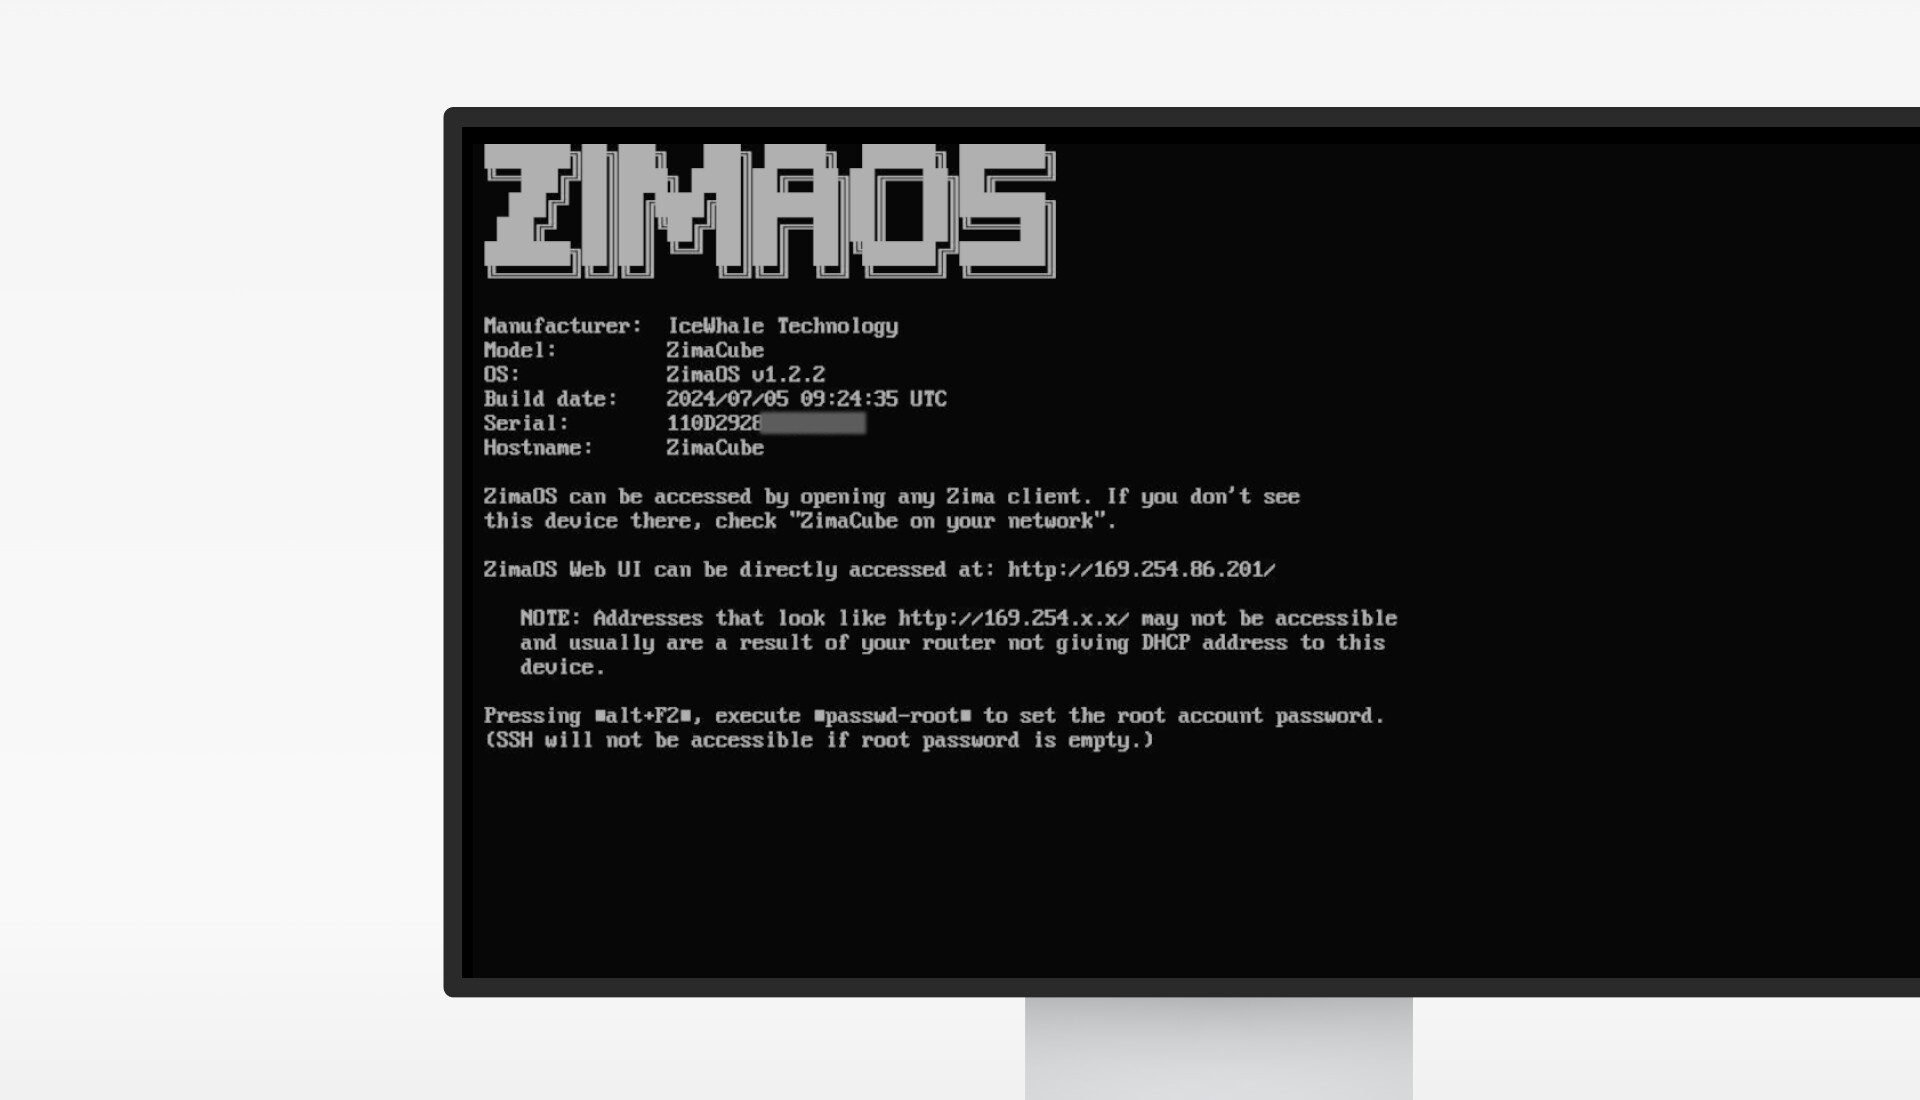
By default, ZimaOS obtains an IP address automatically via DHCP — just plug in the Ethernet cable and the device is ready. If you need to change network settings, open the dashboard and go to Settings > Network.
Networking Settings
The Network page shows all physical Ethernet ports on your device at a glance. For each port you can see:
- Interface name (e.g.,
eth0,eth1) - Link status (Connected / Disconnected)
- Current link speed (e.g., 1000 Mbps, 2500 Mbps)
- Assigned IP address (via DHCP)
This makes it easy to verify that each port is negotiating at the expected speed and has received a valid IP from your router.
Configuring a Static IP
Each network interface can be switched from automatic (DHCP) to a manual static IP configuration:
- Click on the interface you want to configure
- Switch the mode from DHCP to Manual
- Enter your desired IP address, subnet mask, gateway, and DNS server
- Click Save
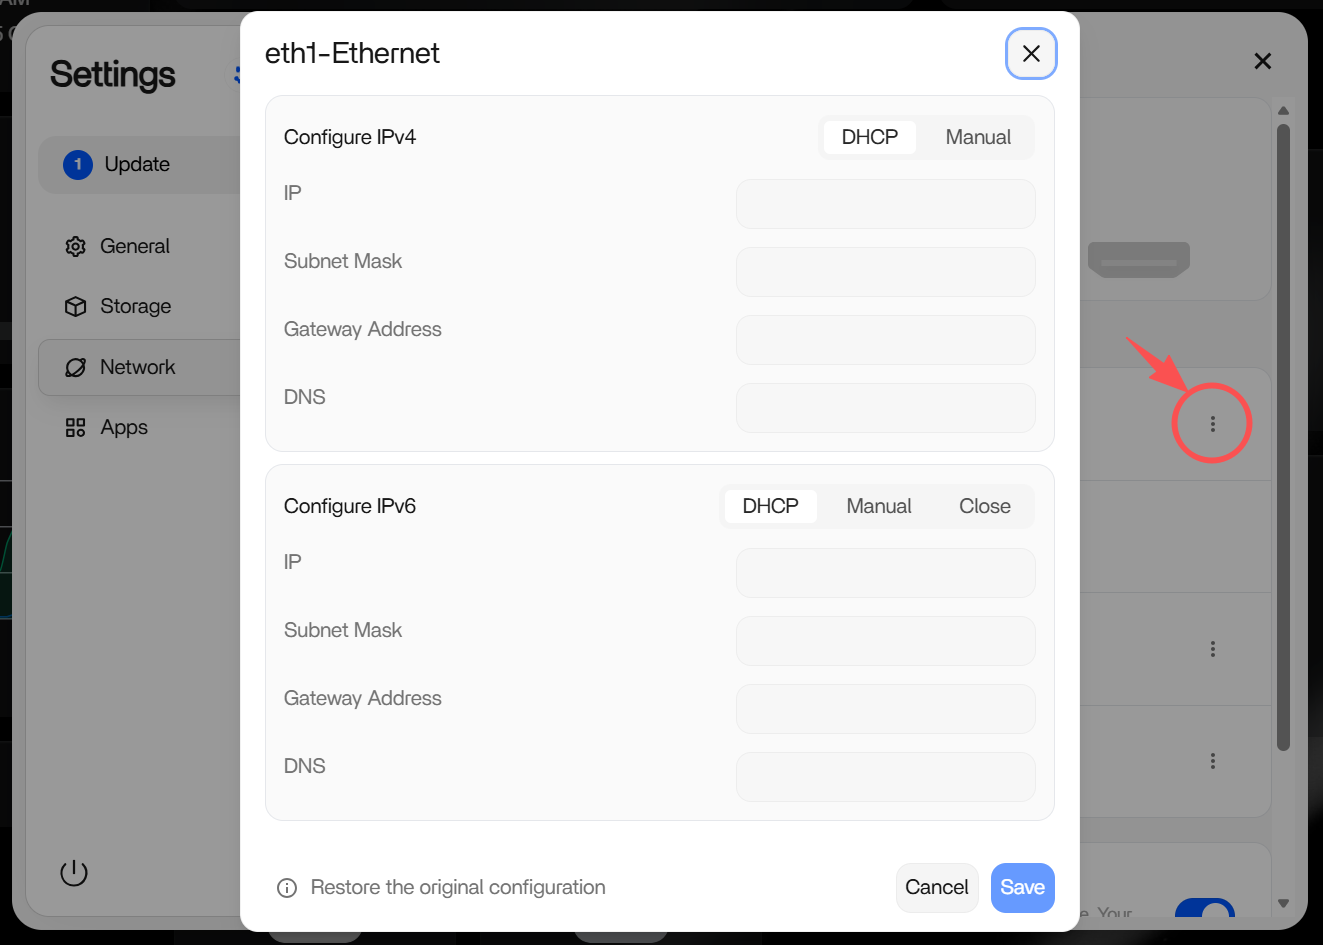
The change takes effect immediately. If the new IP is on a different subnet, your current dashboard session will disconnect — use the new IP shown on the connected monitor to reconnect.
Remote Access
The Remote Access toggle on the Networking page allows you to enable inbound access to your ZimaOS dashboard over the internet. When enabled, ZimaOS establishes a secure relay connection so you can reach your device from anywhere without configuring port forwarding on your router.
For more details, see Remote Access.