
The ZimaCube has seven drive bays. The 7th bay is tucked behind the front panel, separate from the six main bays. It is designed for a 2.5-inch SSD or a slim hard drive.
This guide walks through installing a drive into the 7th bay, and removing one if you need to swap it out later.
Before You Start
- Shut down the ZimaCube and unplug the power cable.
- The 7th bay supports 2.5-inch SATA drives. A 7mm-thick SSD or slim HDD fits best.
- You will need a Phillips screwdriver.
Installing a Drive
Step 1: Remove the front panel. Grip the bottom edge of the front panel and pull it forward. It is held by friction clips — no screws.
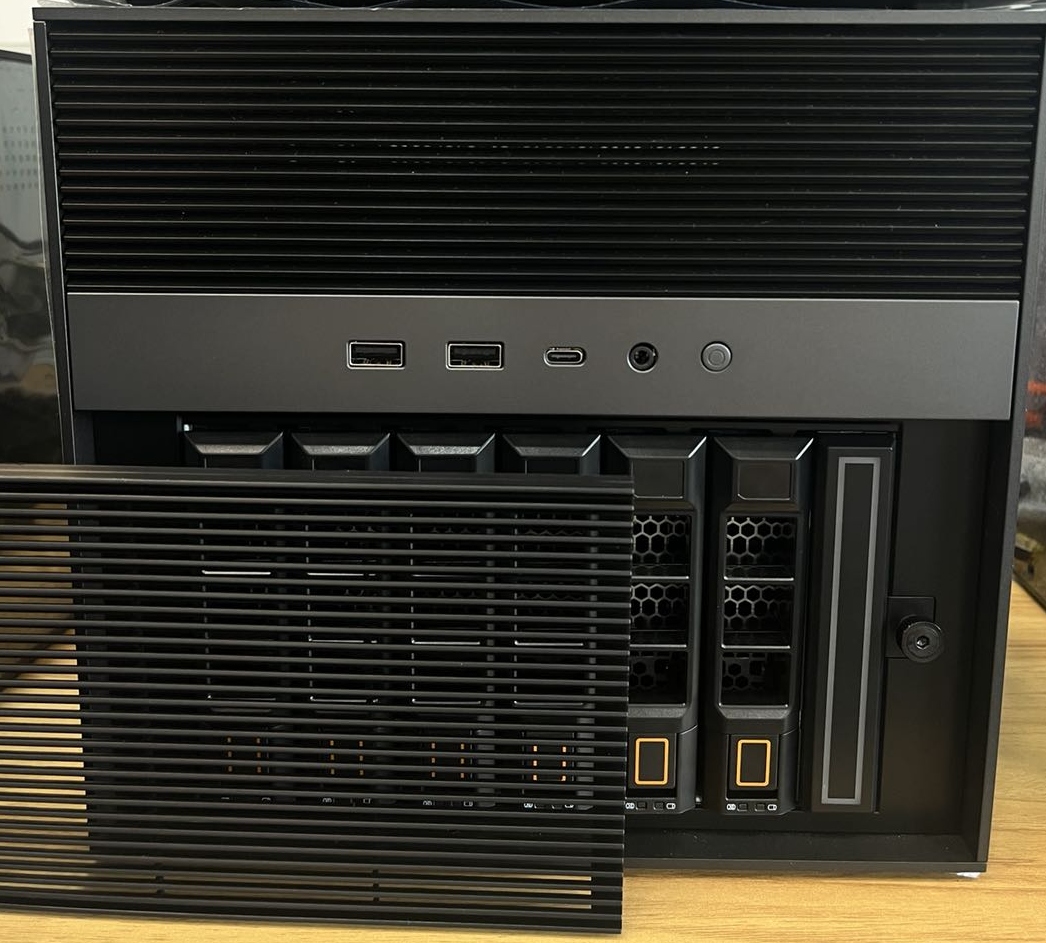
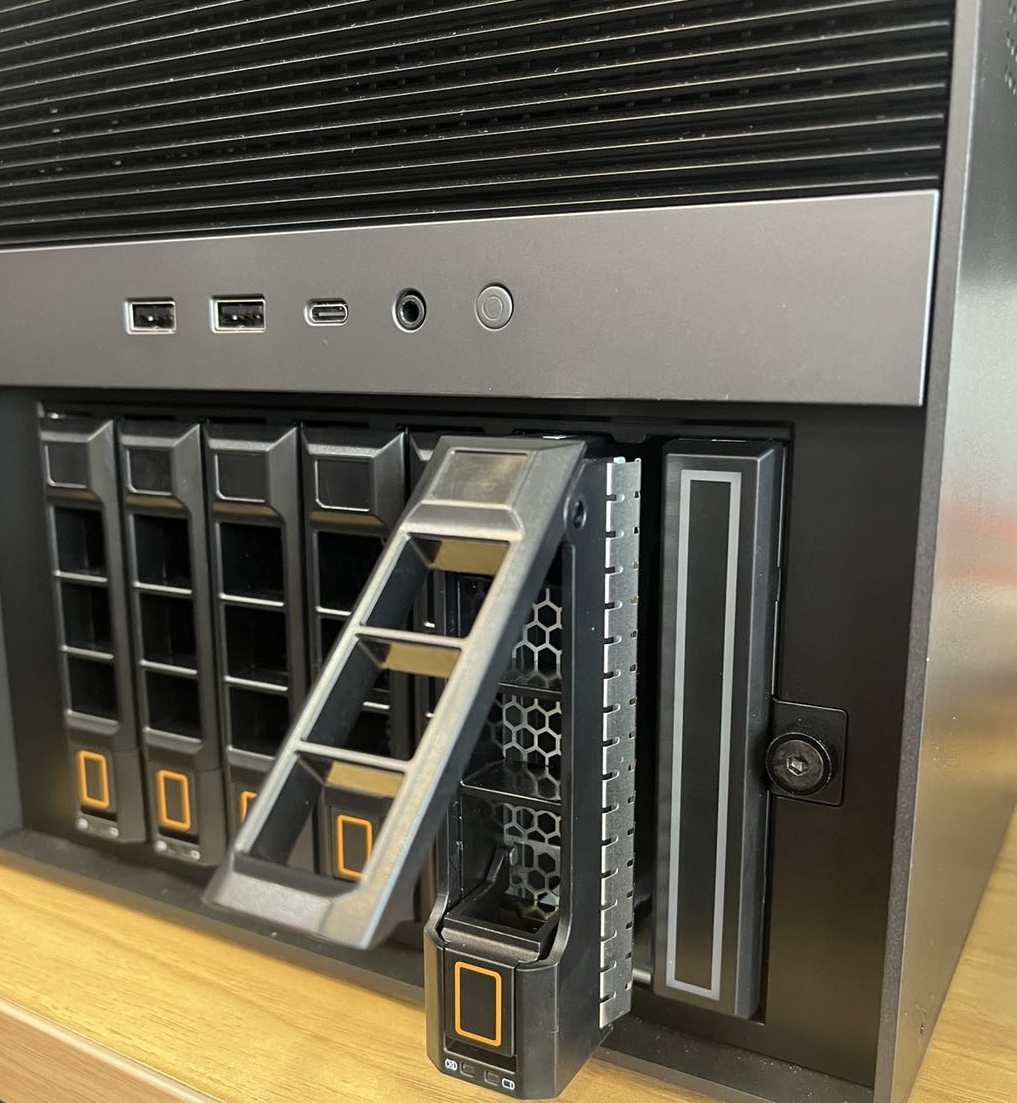
Step 2: Remove the 6th bay. The 6th bay blocks access to the 7th bay. Pull the 6th bay tray out of the chassis.
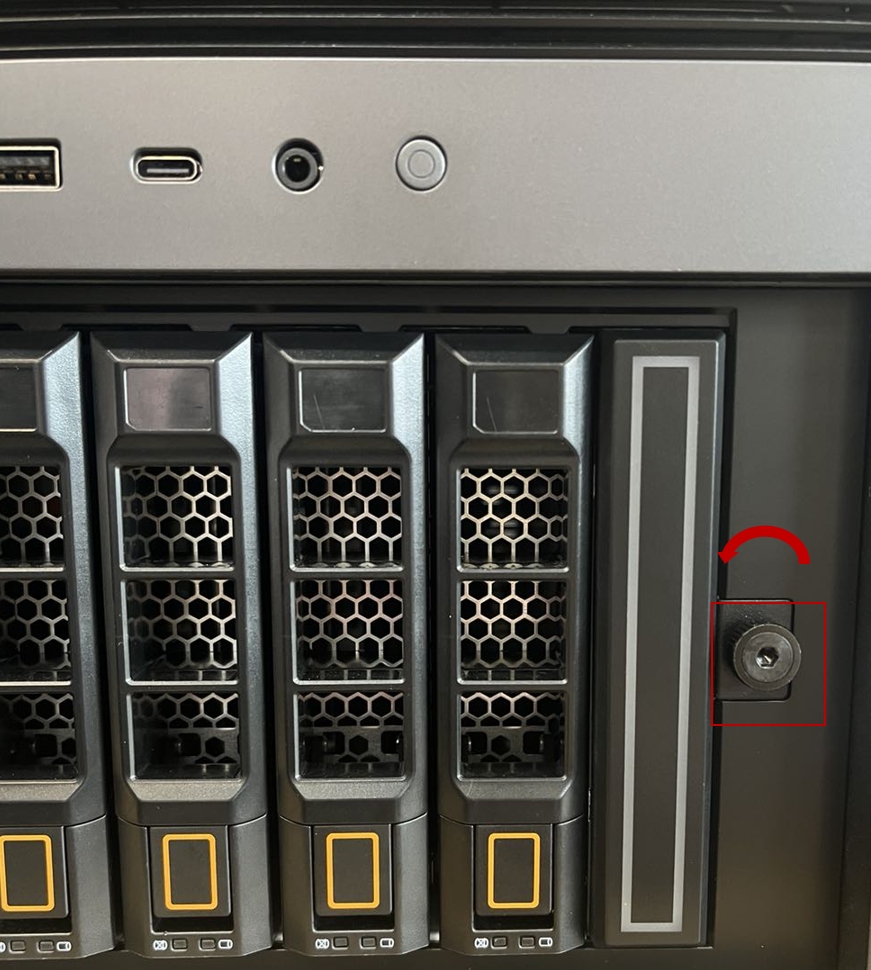
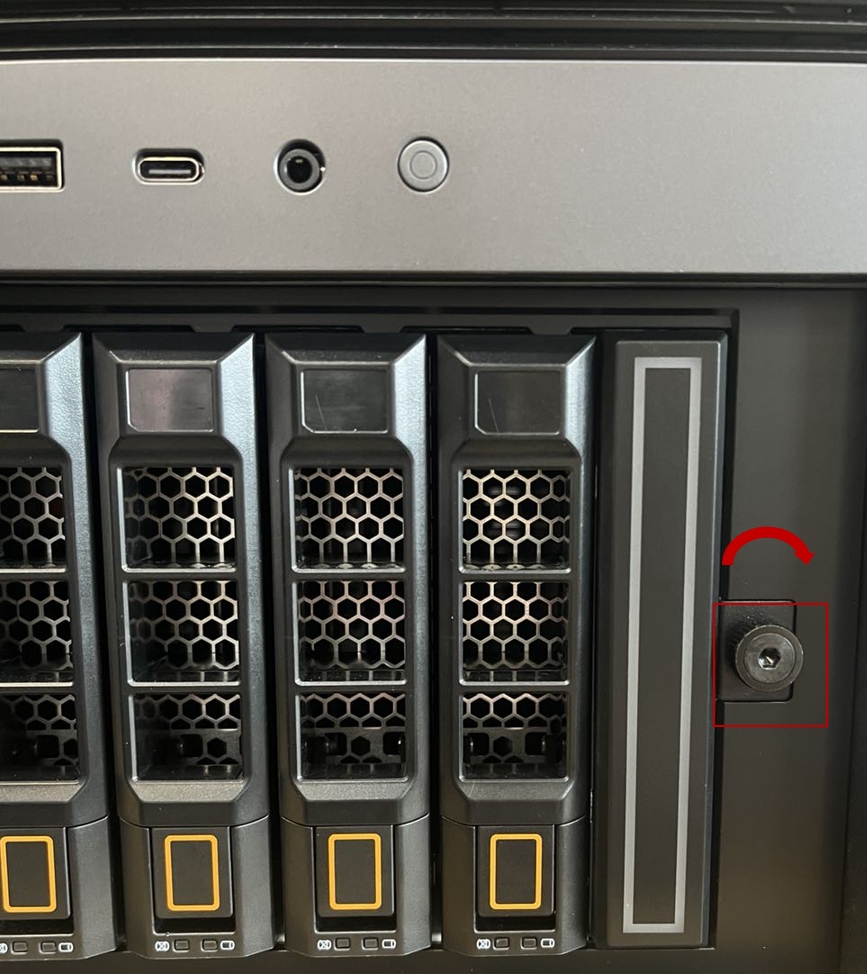
Step 3: Unscrew the 7th bay bracket. Turn the screws counterclockwise to release the bracket that covers the 7th bay slot.
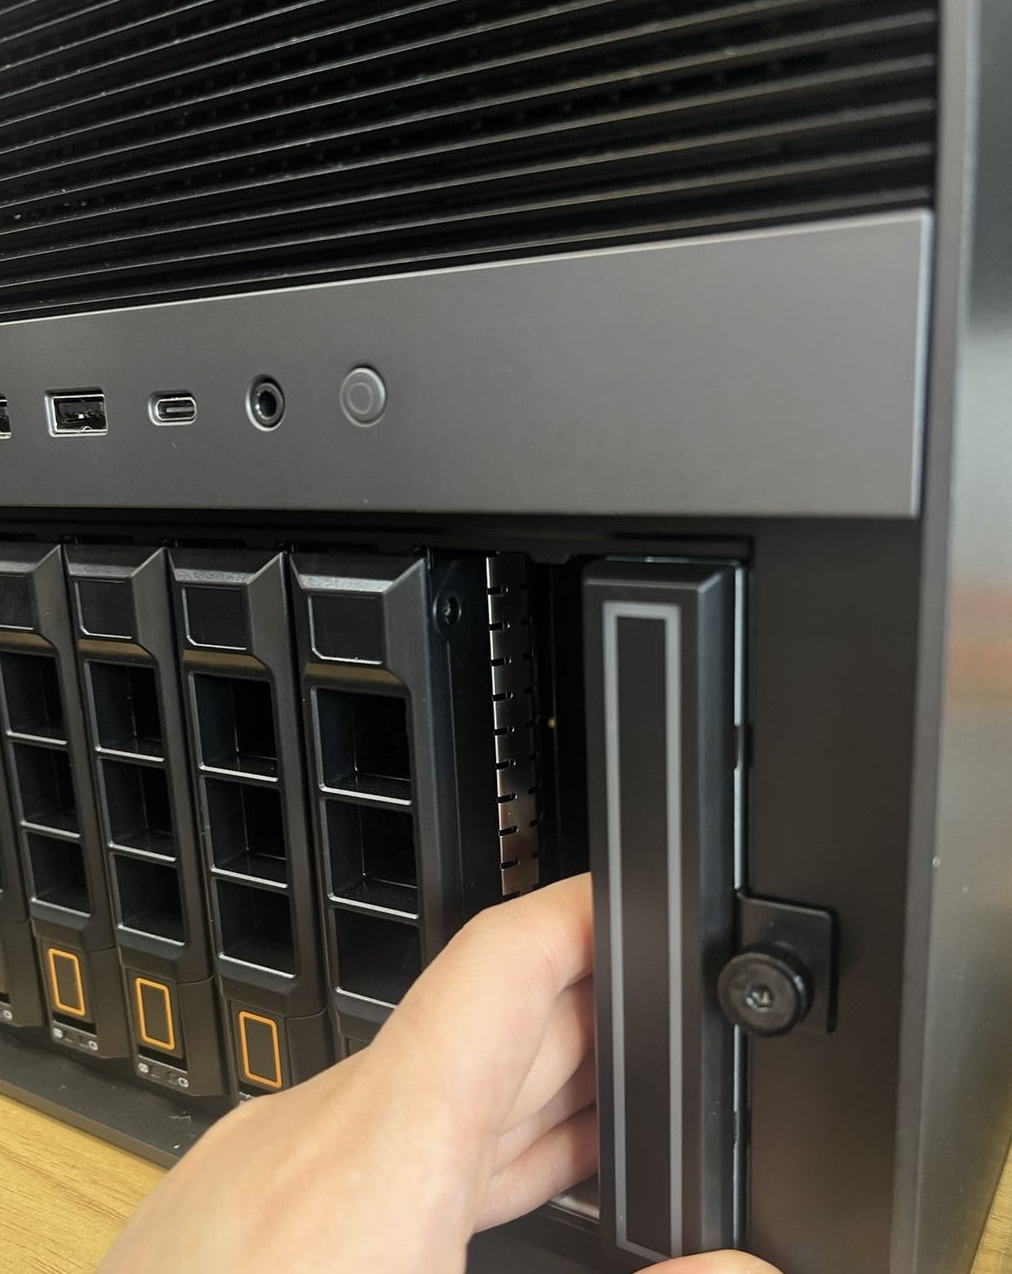
Step 4: Slide out the 7th bay tray. Pull it straight out from the chassis.
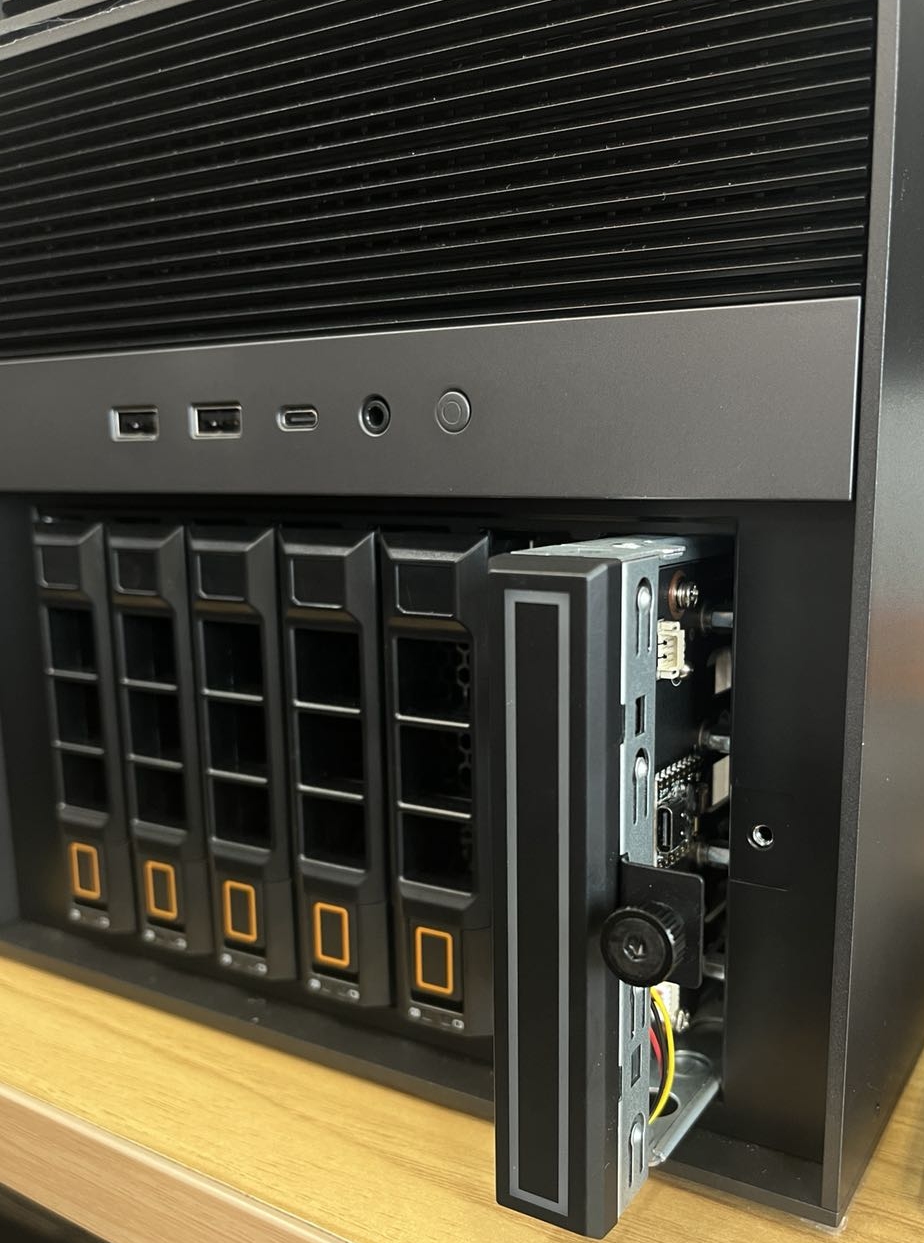
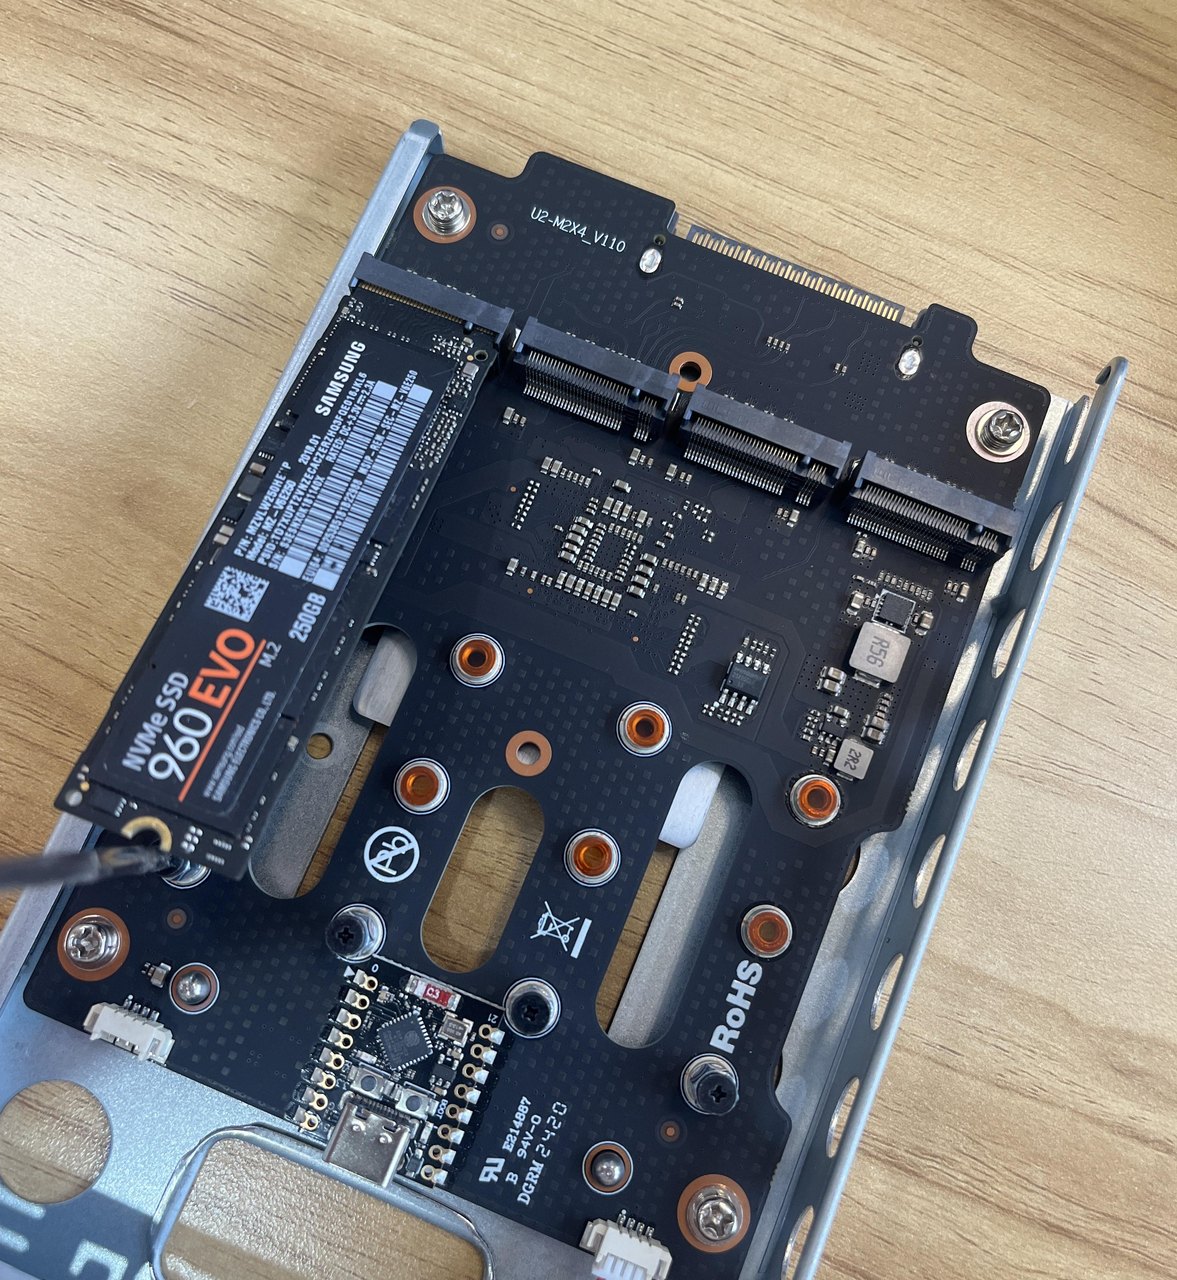
Step 5: Mount your drive onto the tray. Align the screw holes and secure the drive with four screws.
Step 6: Slide the tray back in and tighten. Push the 7th bay tray back into position and tighten the bracket screws clockwise.
Step 7: Reinsert the 6th bay tray and snap the front panel back on.
Removing a Drive
Follow the same steps in reverse. Power off and unplug first, then remove the front panel, 6th bay, and 7th bay bracket. Slide the tray out, unscrew the drive, and reassemble.
After Installation
Power on the ZimaCube. The new drive should appear in ZimaOS under Storage > Disks. If it does not show up, try reseating the tray — the SATA connector at the back of the bay needs to make firm contact.
From here you can format the drive, add it to a RAID array, or use it as a standalone volume. See the RAID Options Overview for help deciding how to configure it.