
RAID combines multiple drives to improve reliability, performance, or both. It distributes data across drives so that higher read and write speeds are possible, and data remains intact even if a drive fails. JBOD simply joins several disks into one continuous volume, making the most of the total capacity.
If you are new to this and just want to know which setup fits your situation, start with Storage Setup. It walks through the decision without assuming prior knowledge. This page is the technical reference.
What Each Option Does
Here is what each level means in plain terms.
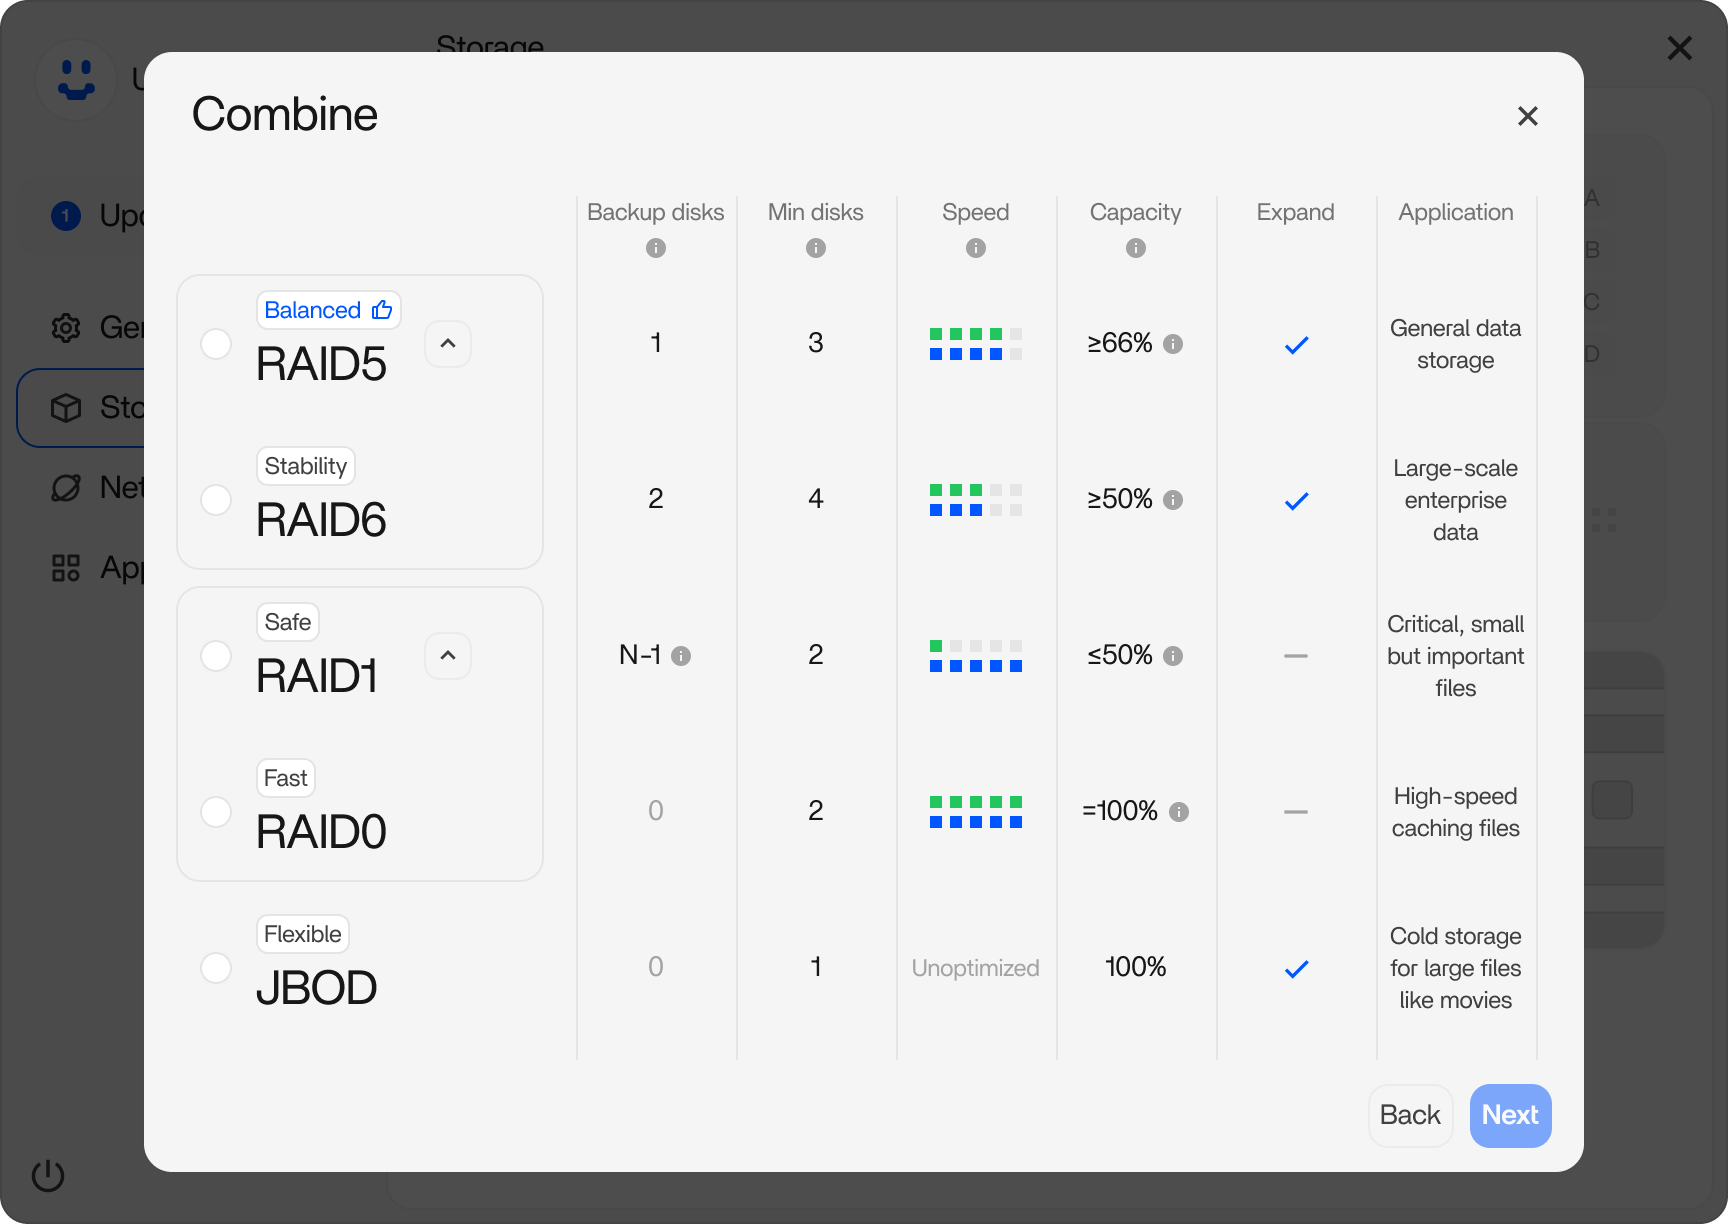
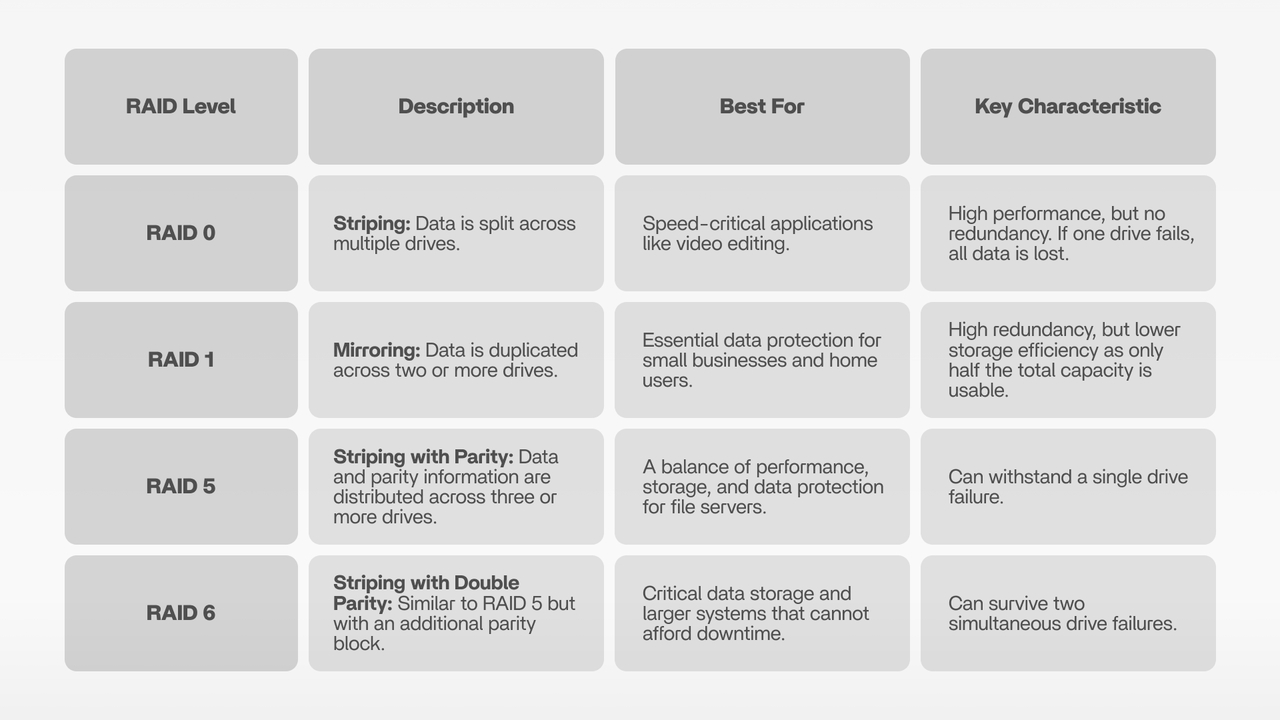
- RAID 0 (Fast): Splits data across drives for maximum speed and capacity. No redundancy. If one drive fails, all data is lost. Best for temporary data or when speed matters more than safety.
- RAID 1 (Safe): Mirrors data across two drives. One fails, the other keeps working. Simple and reliable. The classic home NAS choice. Limited to two drives by design.
- RAID 5 (Balanced): Spreads data and parity across three or more drives. Survives one drive failure, uses space efficiently, and can grow by adding drives over time. The go-to for small businesses and growing libraries.
- RAID 6 (Stability): Like RAID 5 but with double parity. Survives two drive failures. Requires four or more drives. For setups where downtime is expensive.
- JBOD: Concatenates disks into one large volume with no redundancy. Maximum capacity, but if one disk fails, the entire volume is lost. We generally do not recommend it for important data.
For a visual comparison, see the table below.
Detailed Steps to Create RAID 5
RAID 5 is ideal for users seeking a balance of storage efficiency, performance, and single-drive failure protection. It requires at least three disks. Below is a step-by-step guide for creating a RAID 5 array using the updated ZimaOS UI.
- Open Settings > Storage. You will see a list of current disks and available operations.
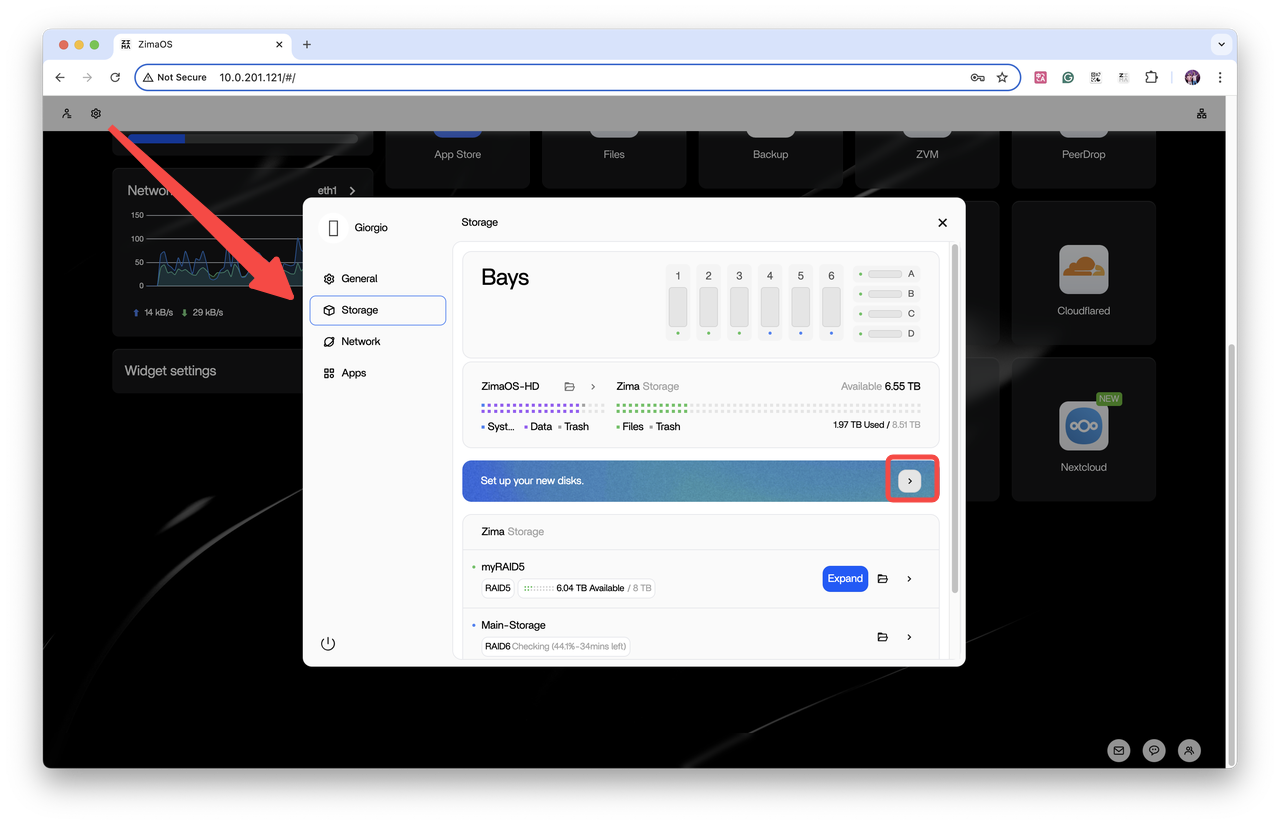
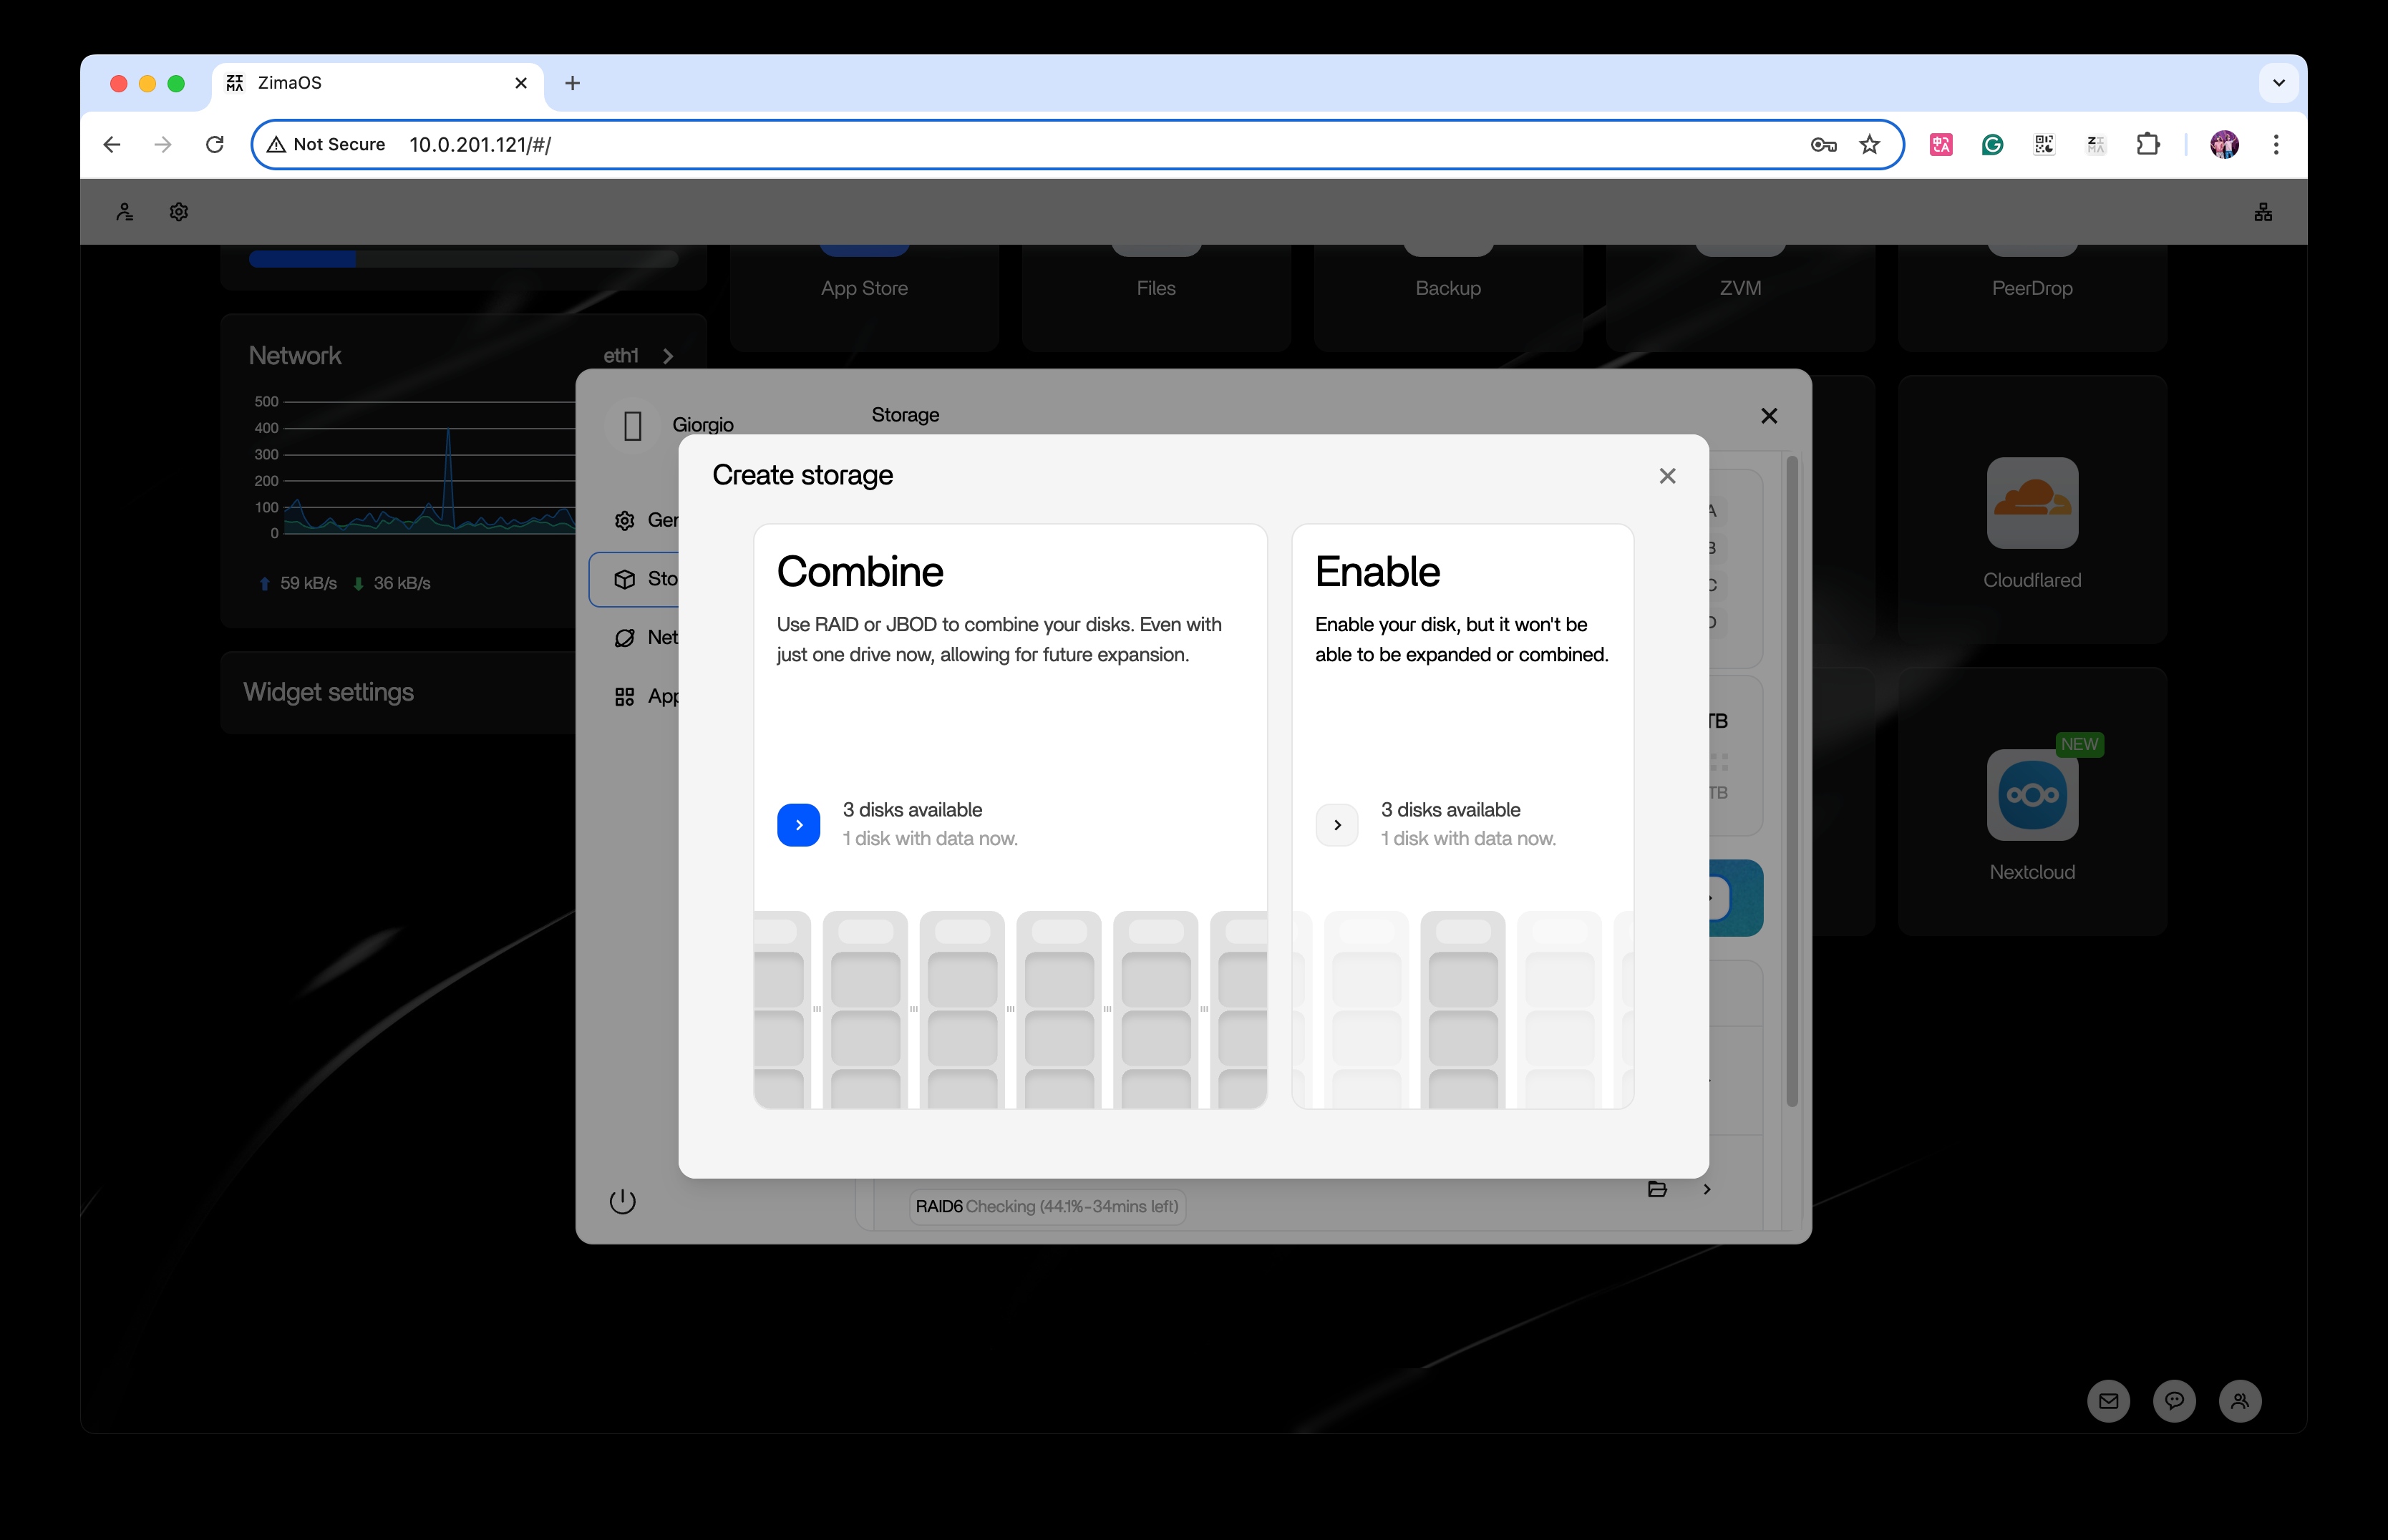
- Click Combine to open the disk combination menu.
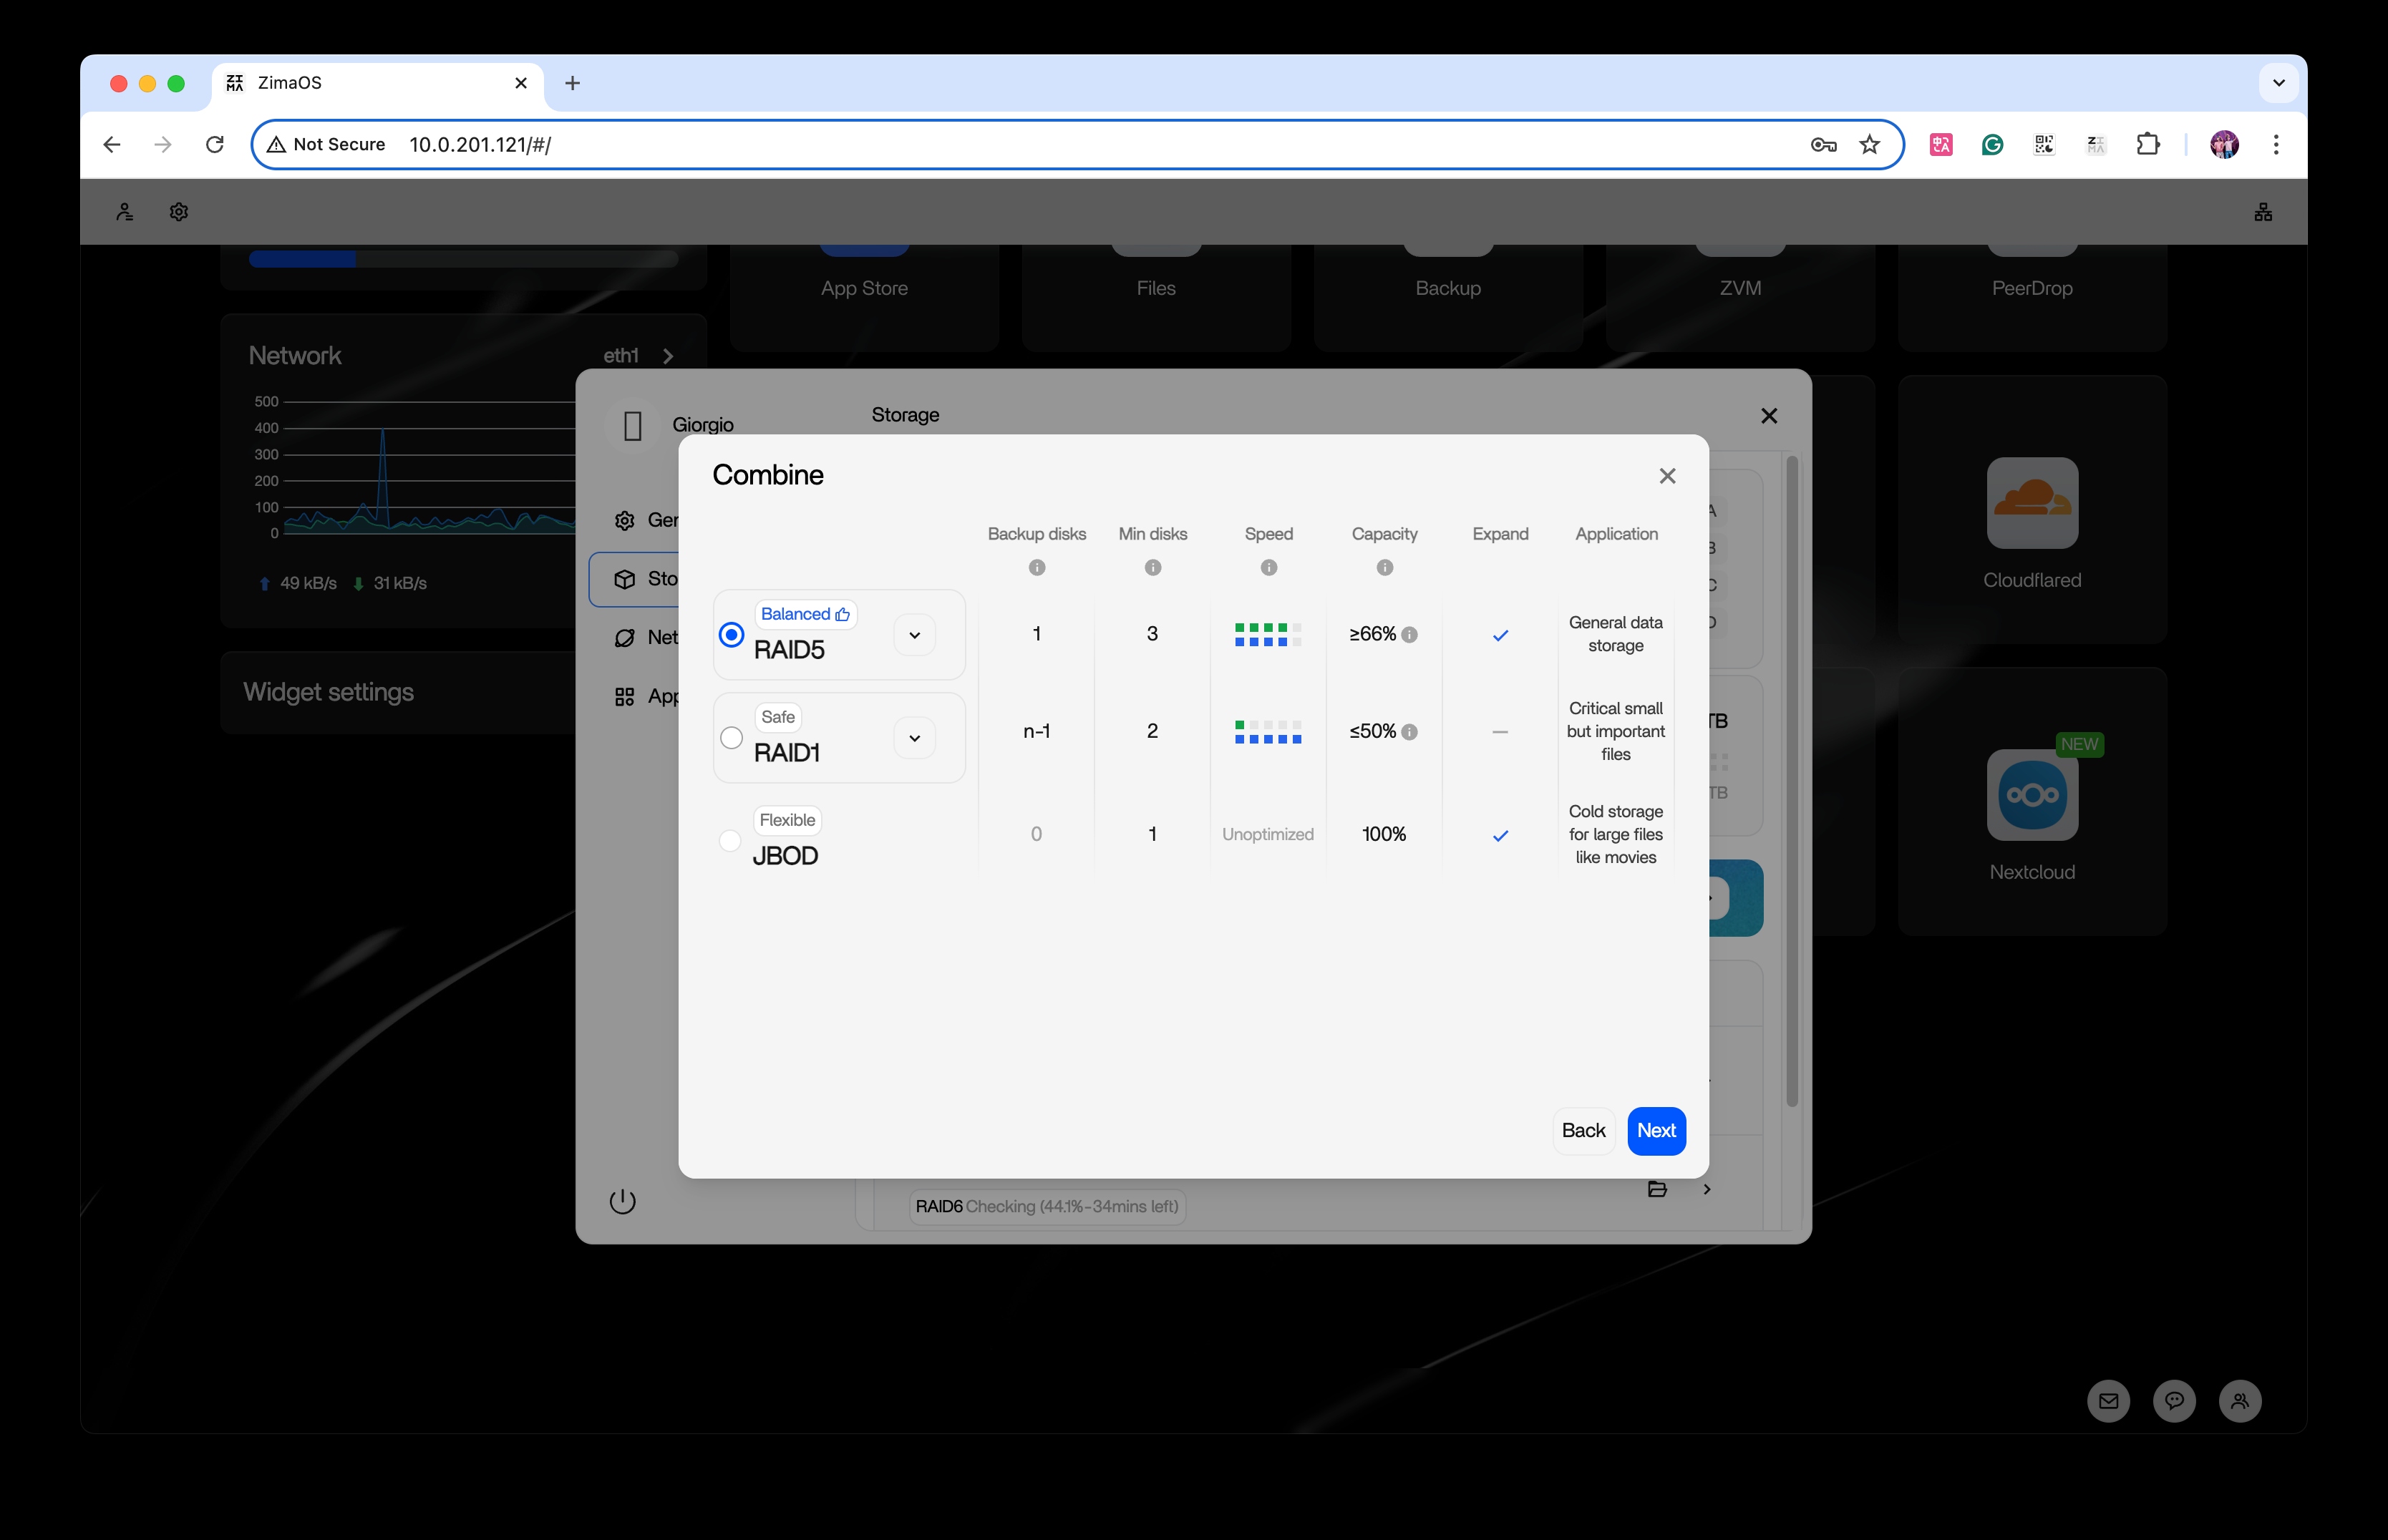
- Select RAID 5, then click Next.
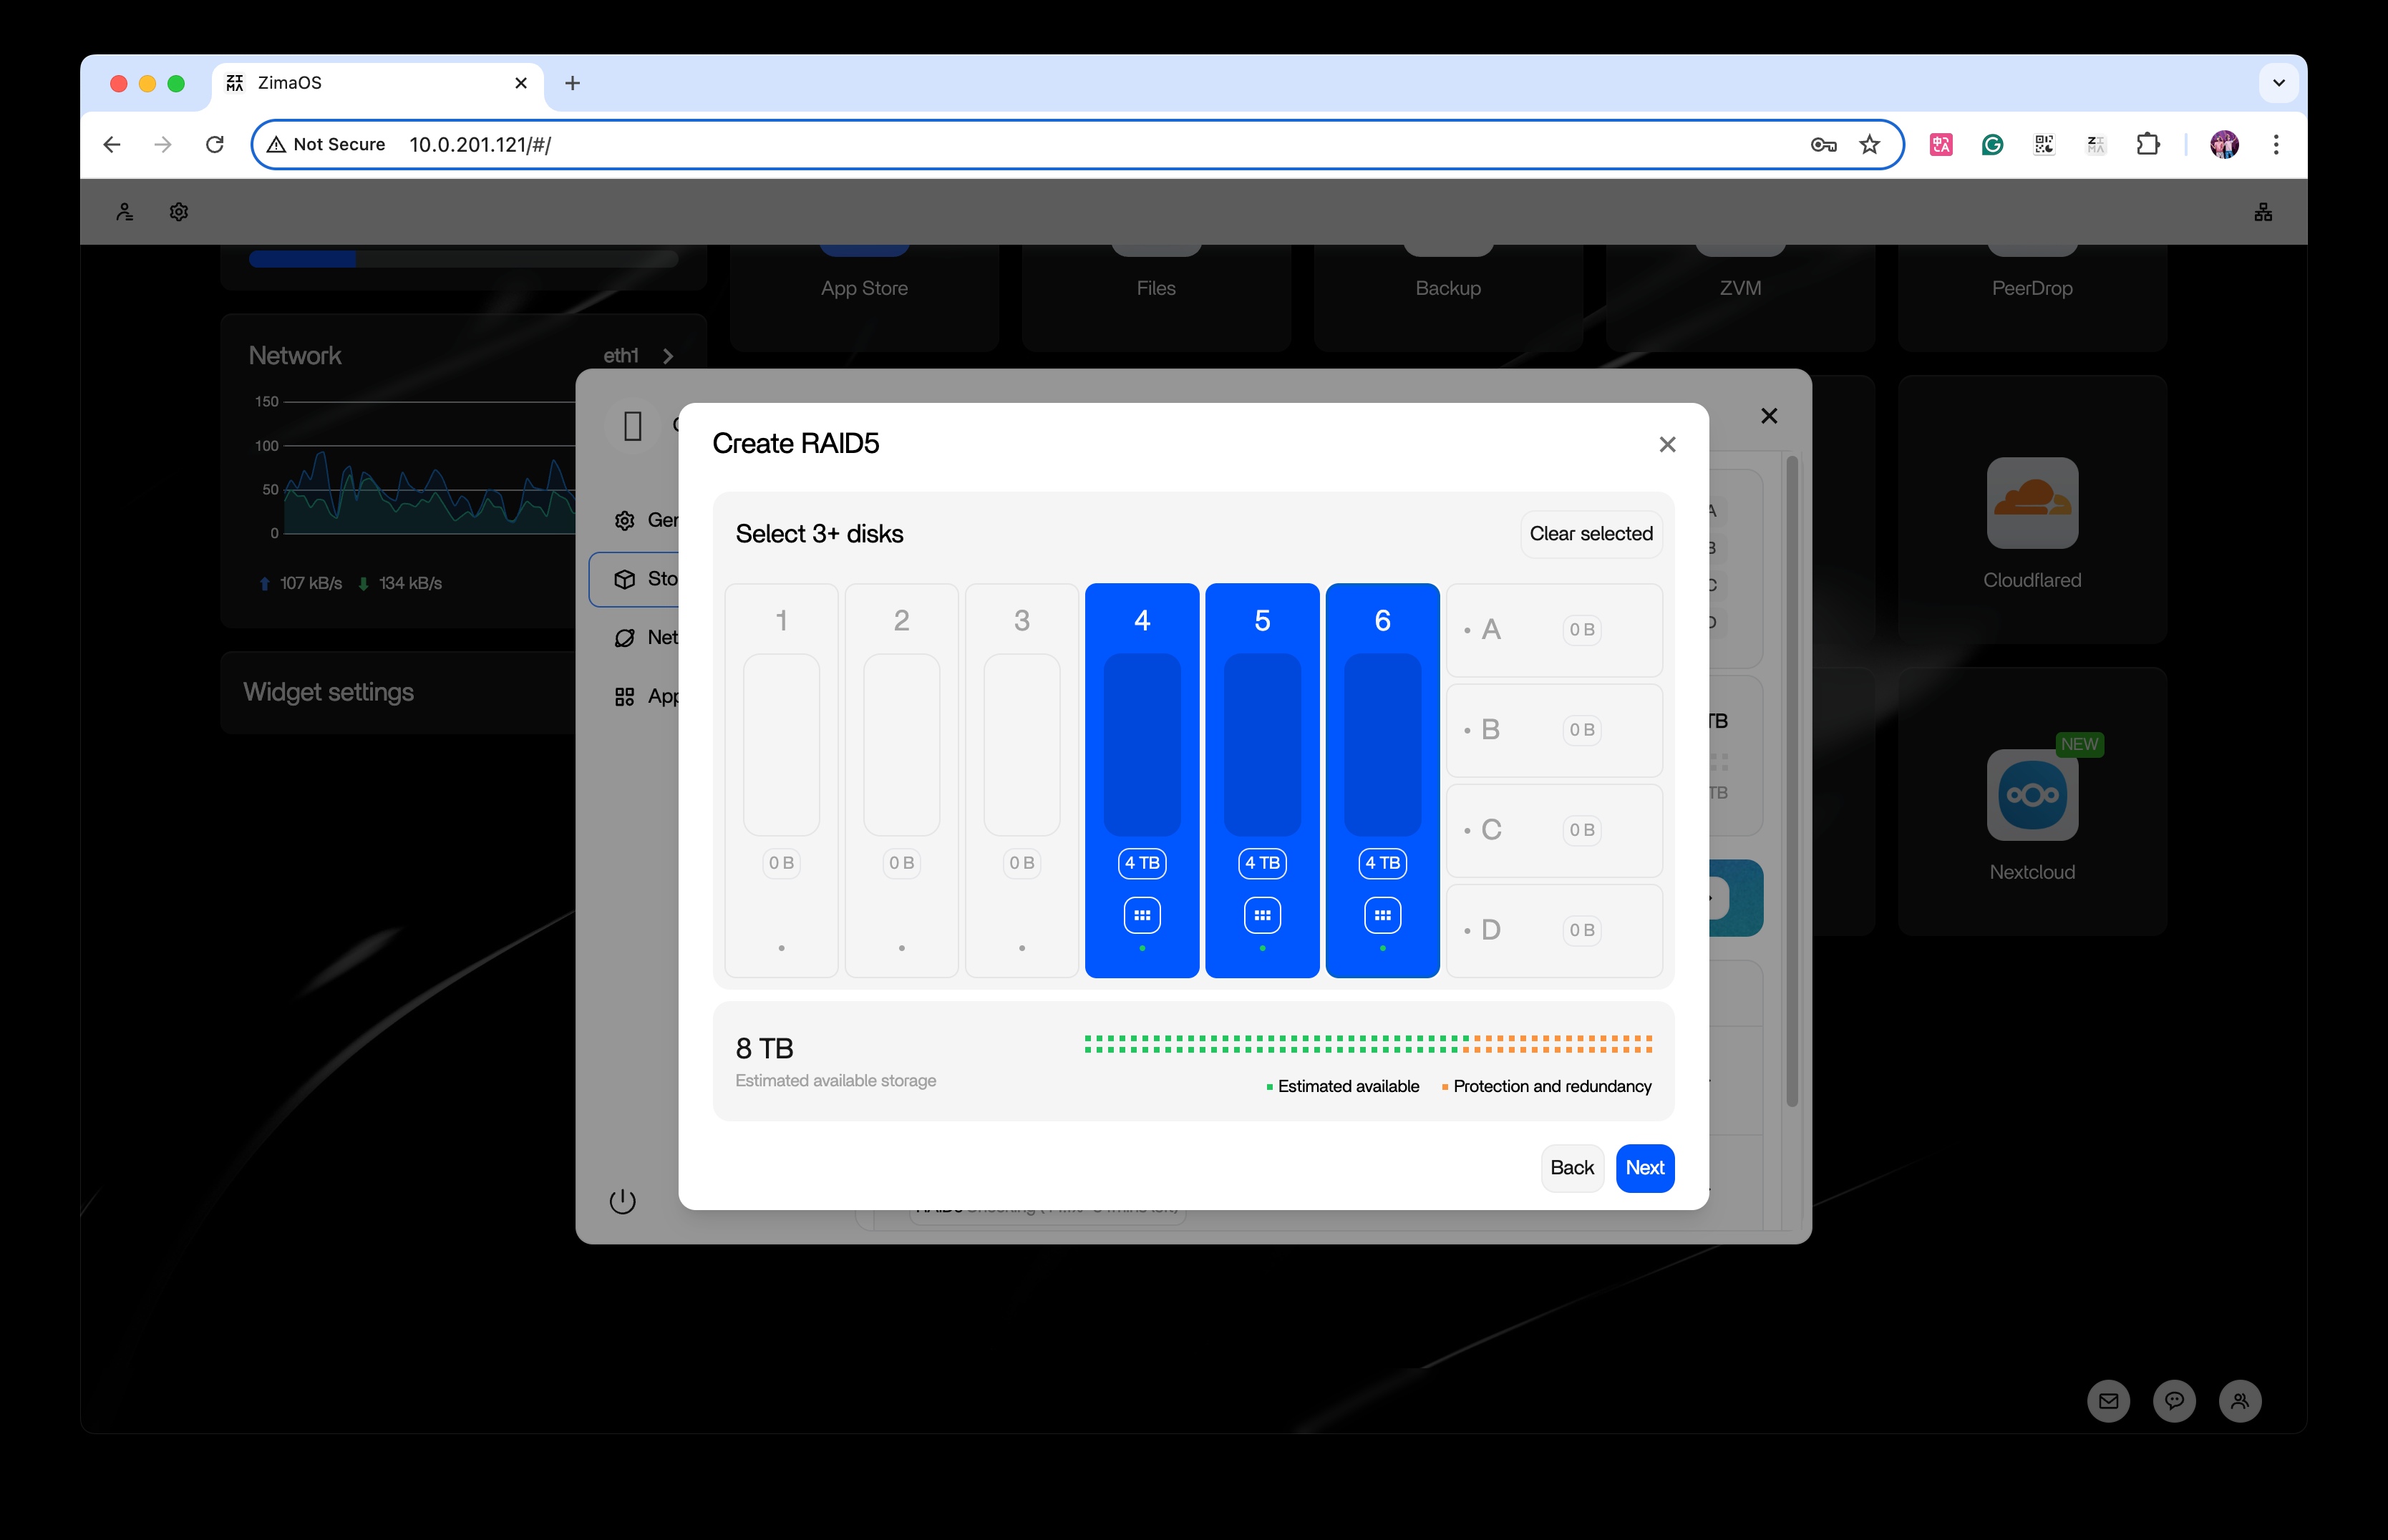
- Select three available disks. The system will calculate the estimated capacity, then click “Next.”
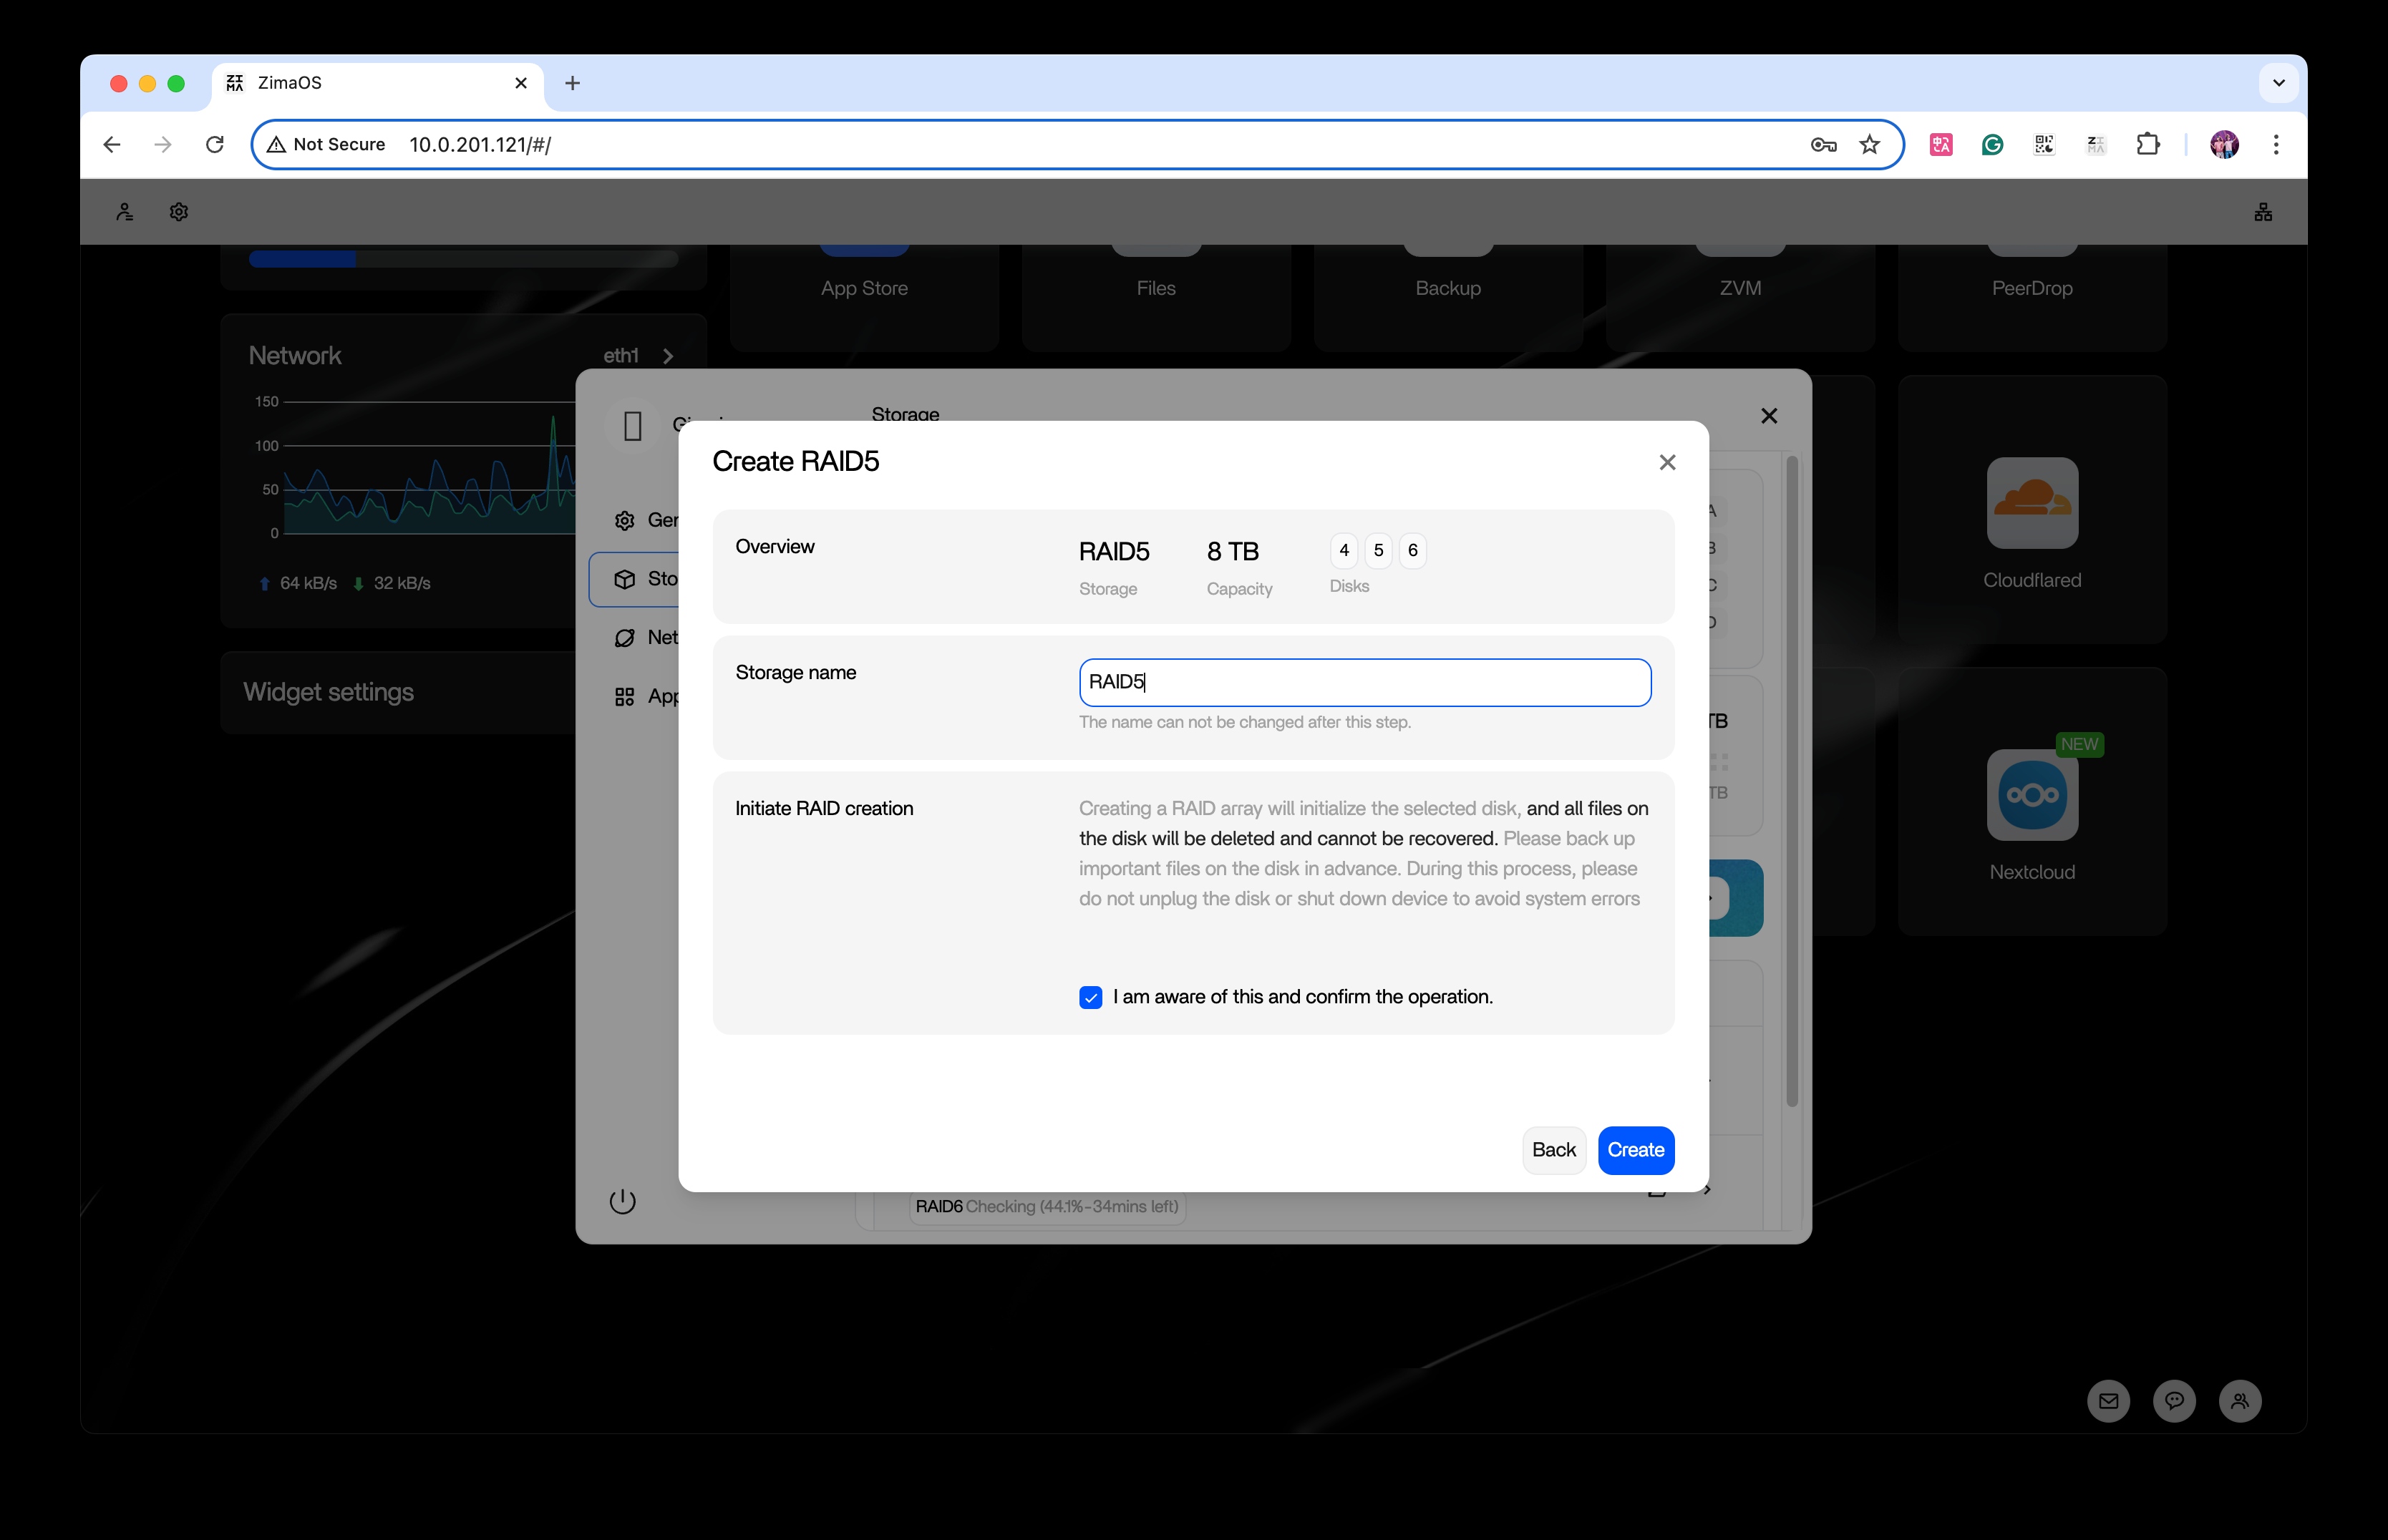
- Configure and name the array: Enter a name for the array (e.g., “RAID5”), check the desired protocols, then click “Create” to begin initialization.
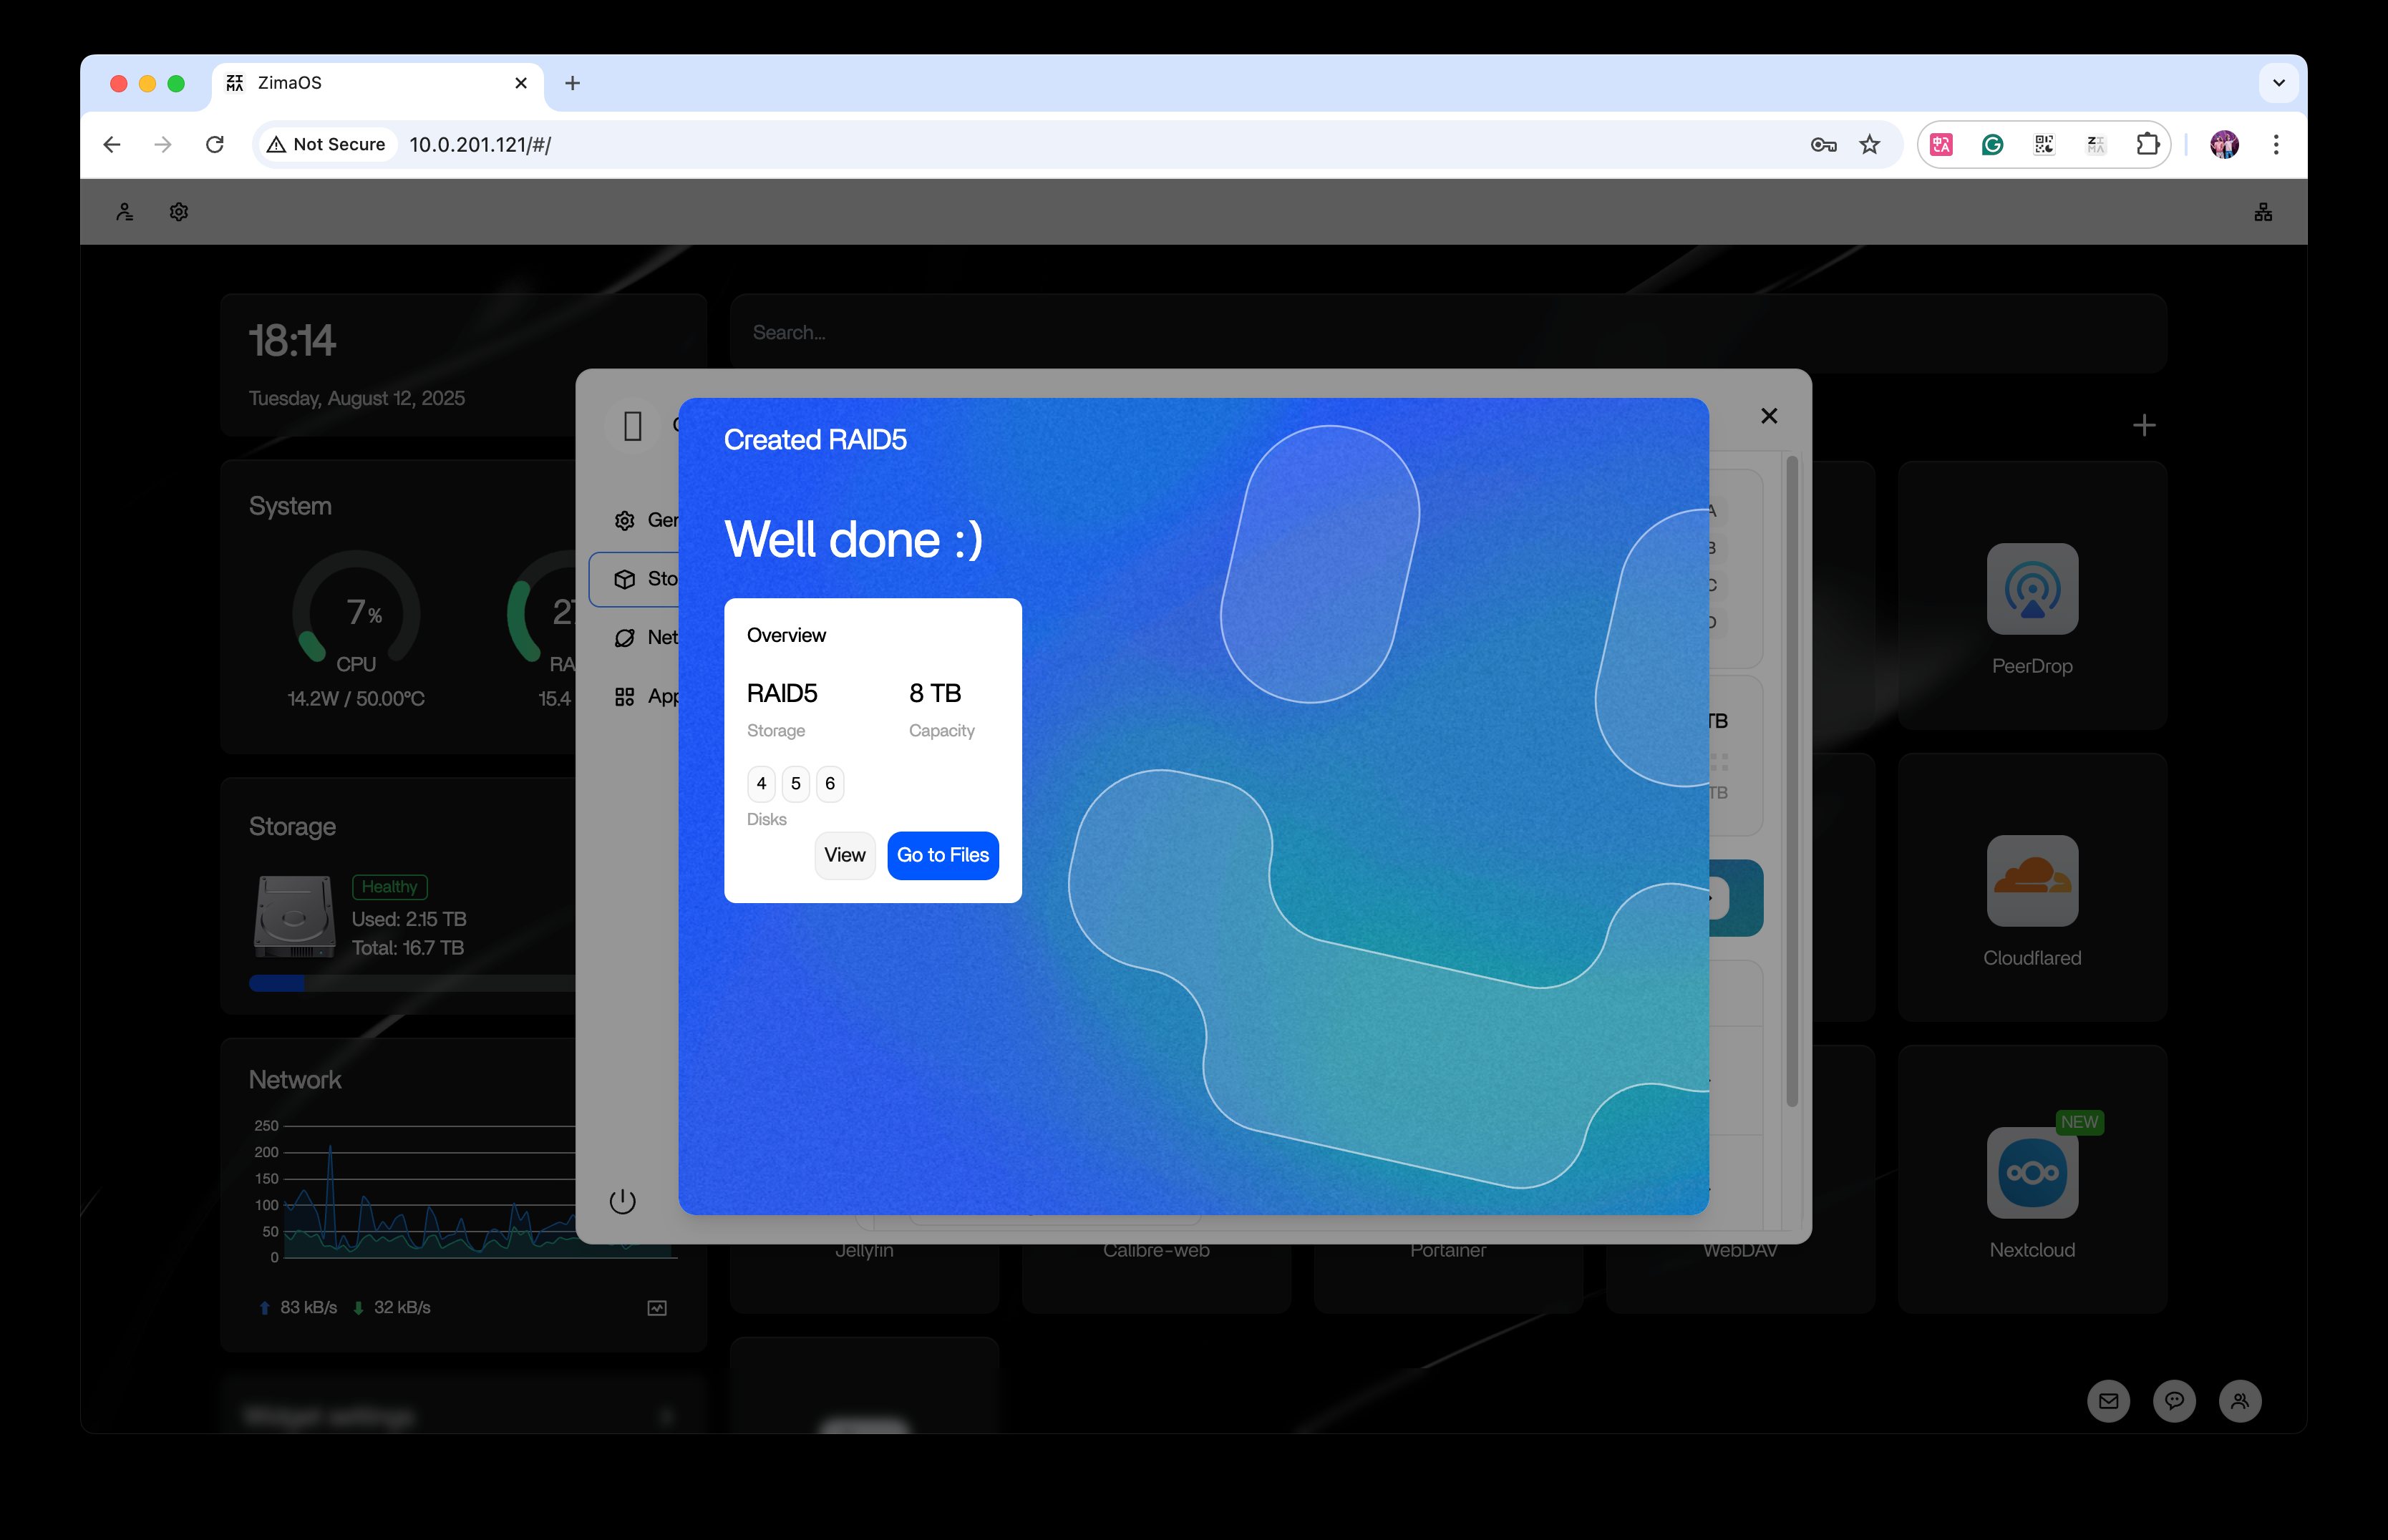
- Creation complete: The system will perform data striping, monitor the progress until finished, and display the array status as “Healthy.”
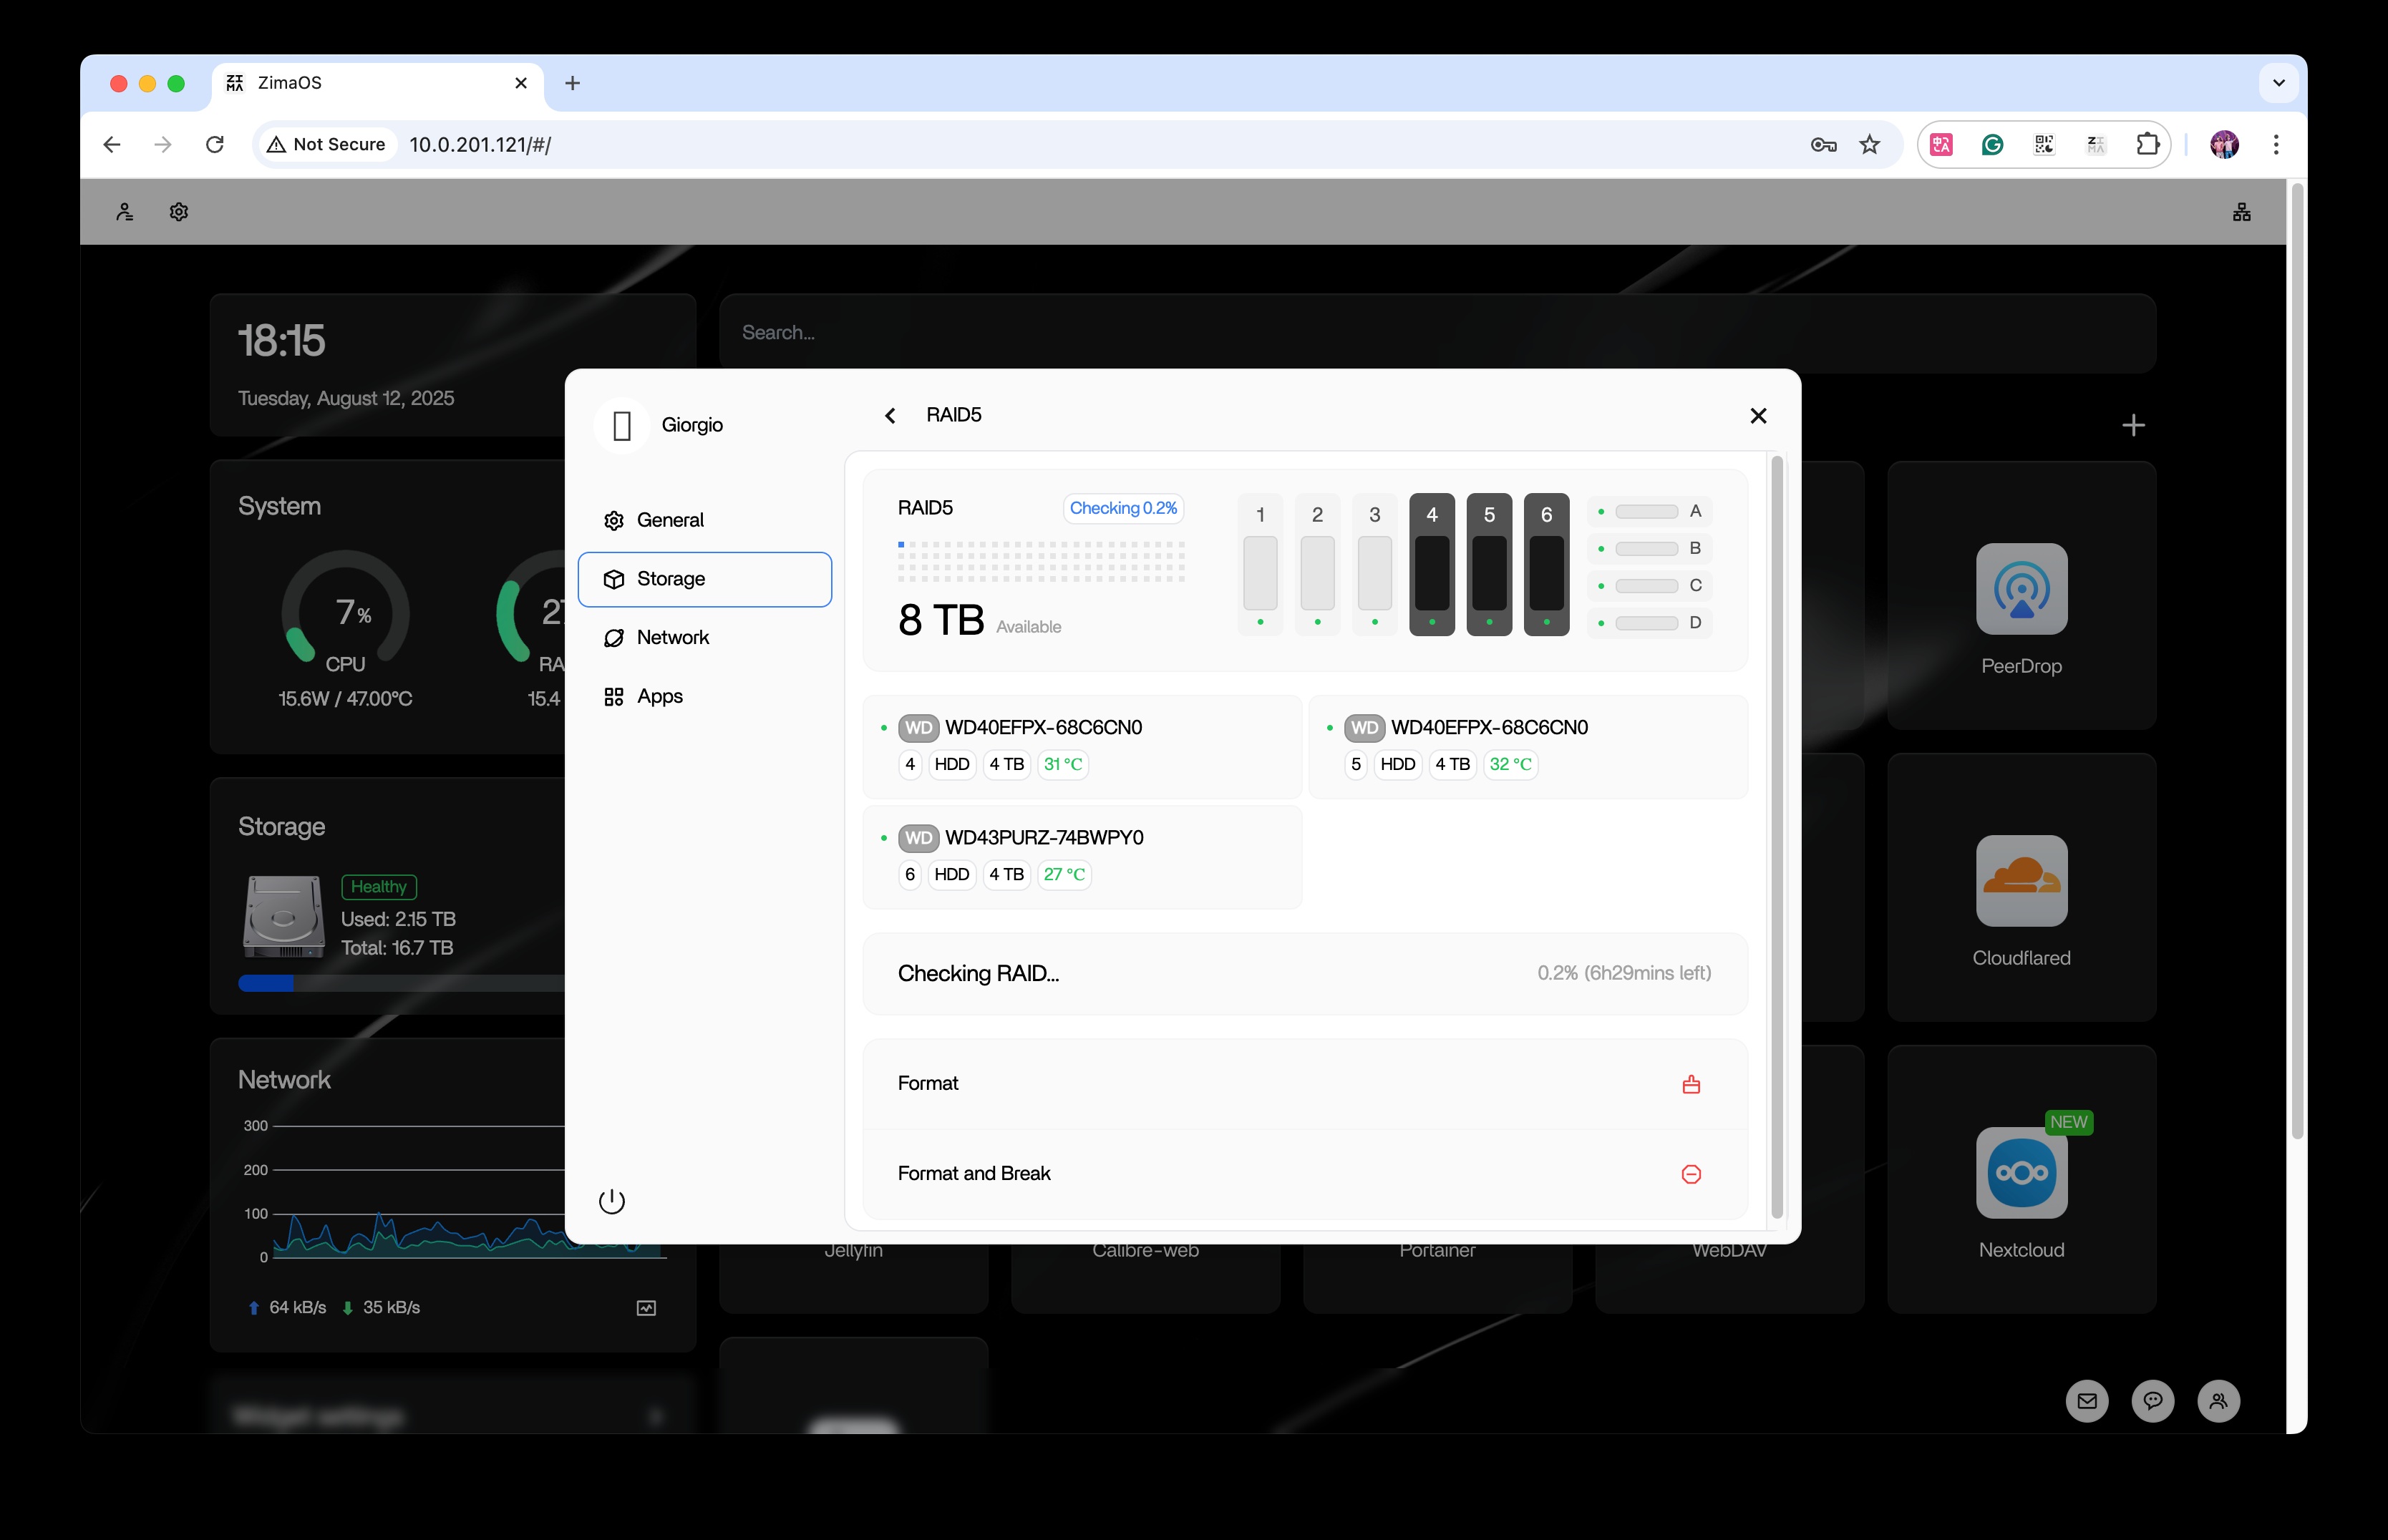
- You can now use RAID 5! After creation, parity will be enabled automatically. During this process, disk read speeds may be affected, but normal usage will not be interrupted.
Choosing a RAID Level
Still deciding? This quick reference summarizes the trade-offs.
For scenario-based recommendations, start with Storage Setup.
Other RAID Levels
The steps for RAID 0, 1, and 6 are the same, differing only in the selected option and minimum number of disks. RAID 6 requires at least four drives and provides dual-failure tolerance.
ZFS
ZimaOS also supports the ZFS file system for users who want snapshots, checksums, and advanced data integrity. See the ZFS Setup guide in the Dev section.
FAQ
Why does creating a RAID take a long time?
Initialization time depends on the capacity and speed of your drives. Larger drives take longer. The array remains usable during the process, though read speeds may be reduced until initialization completes.
Next
RAID protects against drive failure, not against accidental deletion or disaster. Pair it with the 3-2-1 Backup strategy for complete protection. And if you have not decided which setup fits your needs, start with Storage Setup.