
If you are on a Mac, Time Machine is the backup you already know. Point it at your ZimaOS device and every Mac in the house gets full automatic backups without an extra subscription.
Step 1: Set Up a Shared Folder on ZimaOS
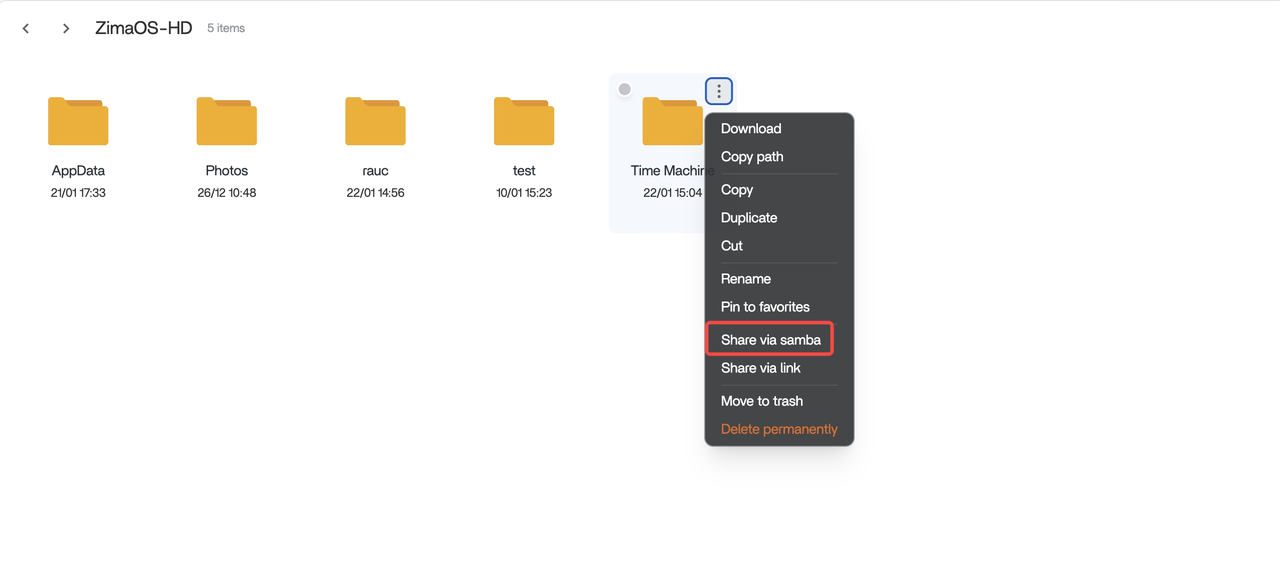
- Open the ZimaOS dashboard and go to the Files page.
- Find or create the folder you want to use as the backup destination, such as Time Machine.
- Right-click the folder and select Share via Samba.
- In the popup, confirm the folder name and location, and check Configure for Time Machine. Your default ZimaOS user is used for authentication. You can add other users too.
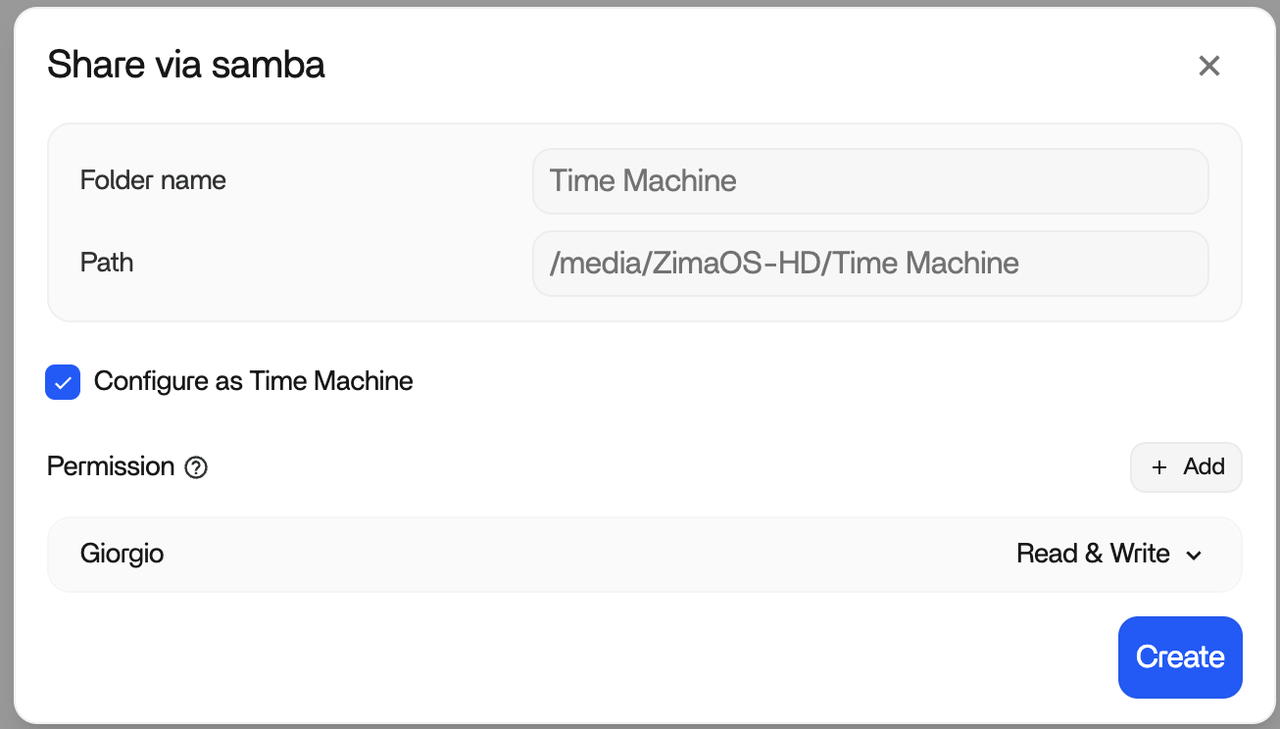
- Click Create.
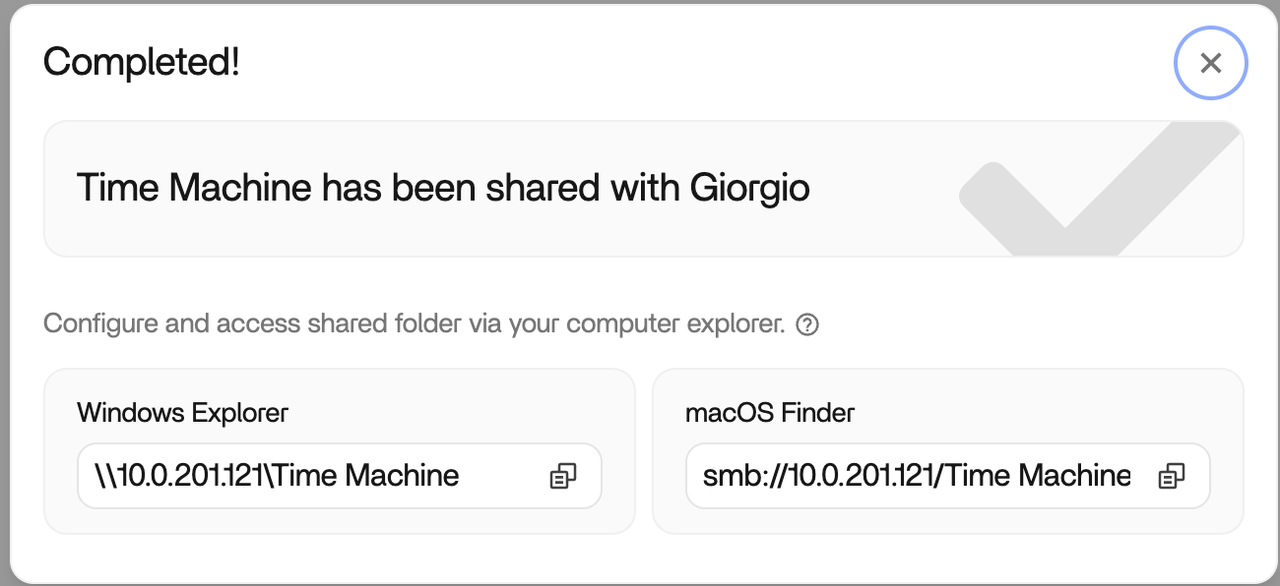
Step 2: Connect Time Machine on Your Mac
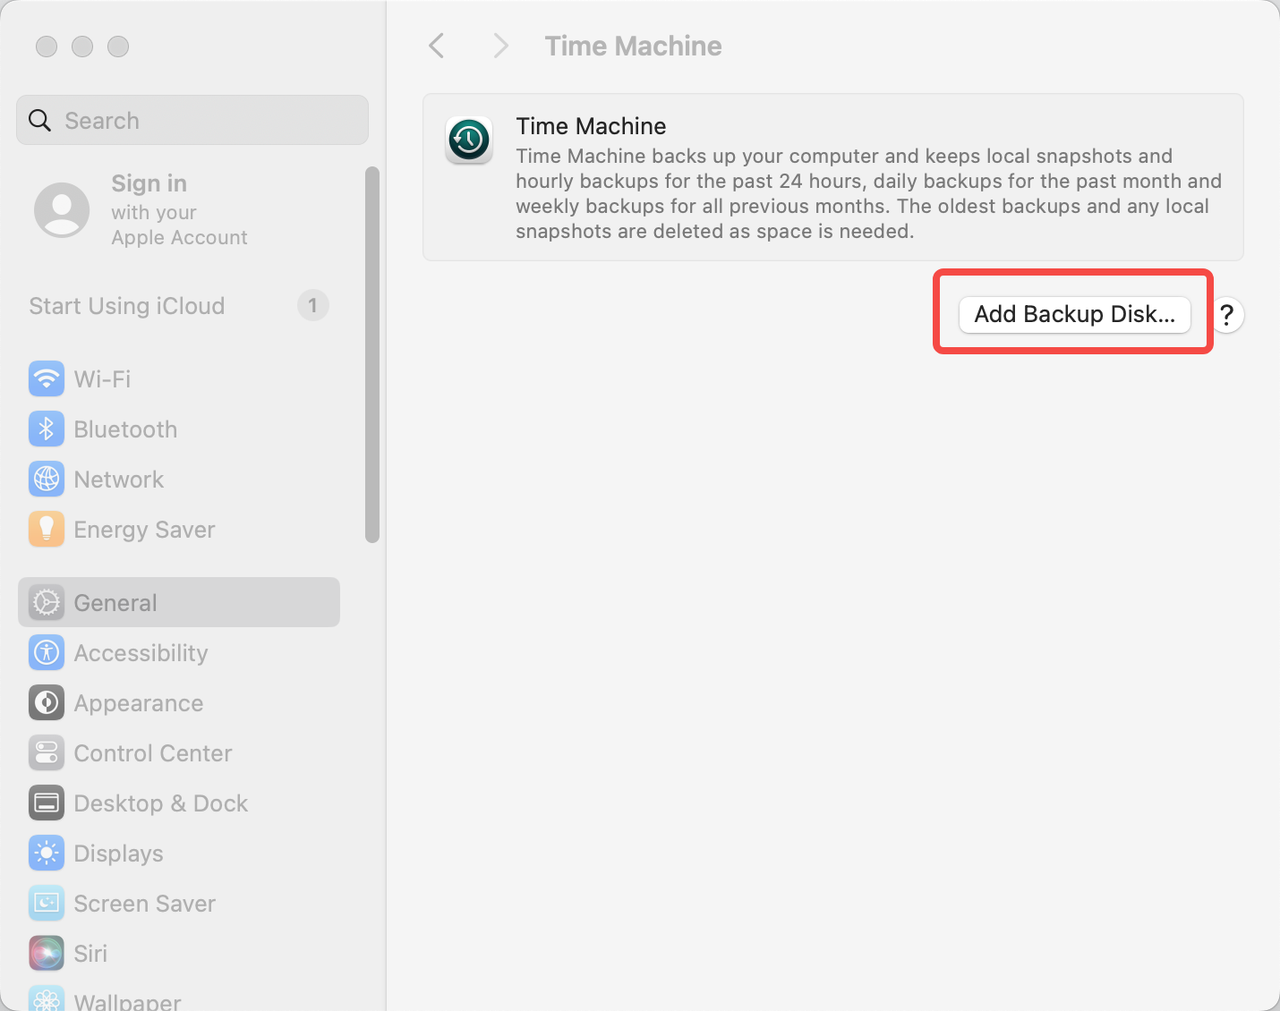
- Open System Settings and go to Time Machine.
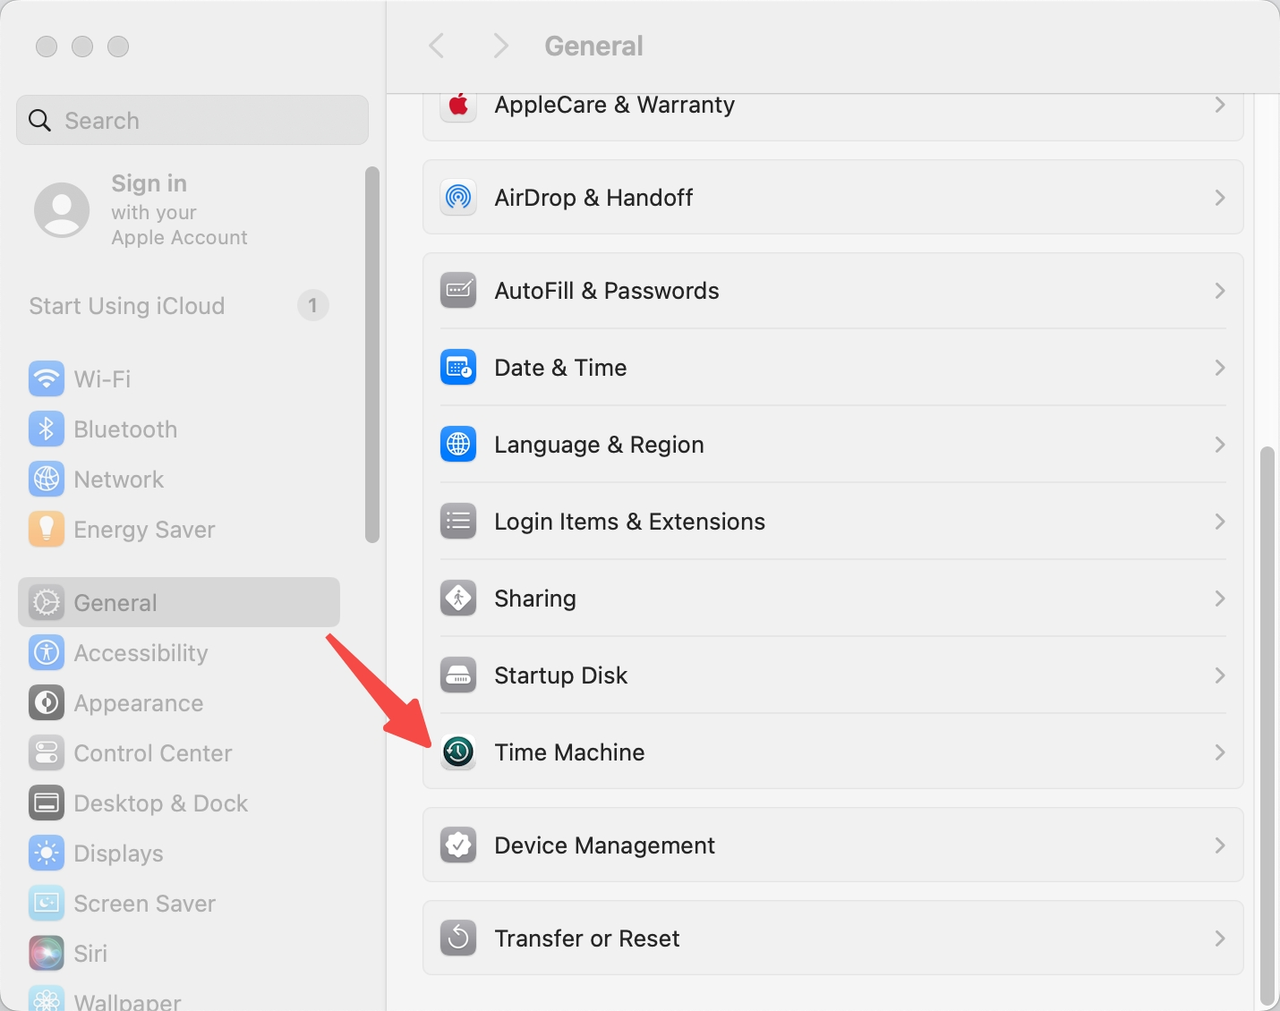
- Click Add Backup Disk.
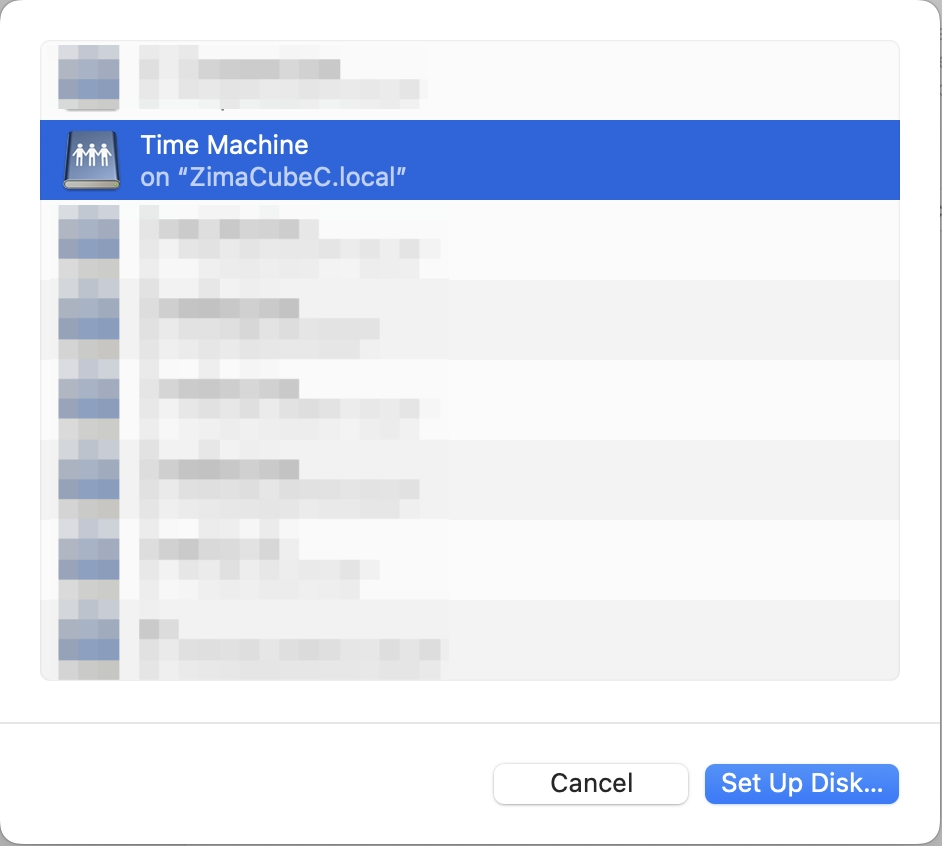
- Select the shared folder you just created on ZimaOS and click Set Up Disk.
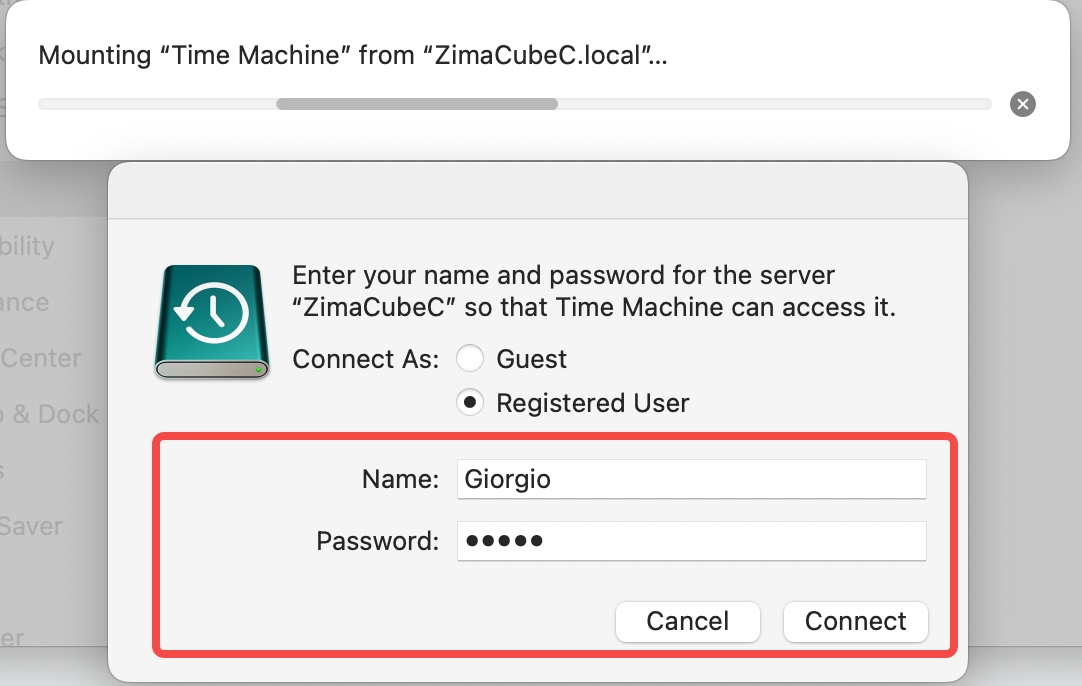
- Enter your ZimaOS username and password when prompted.
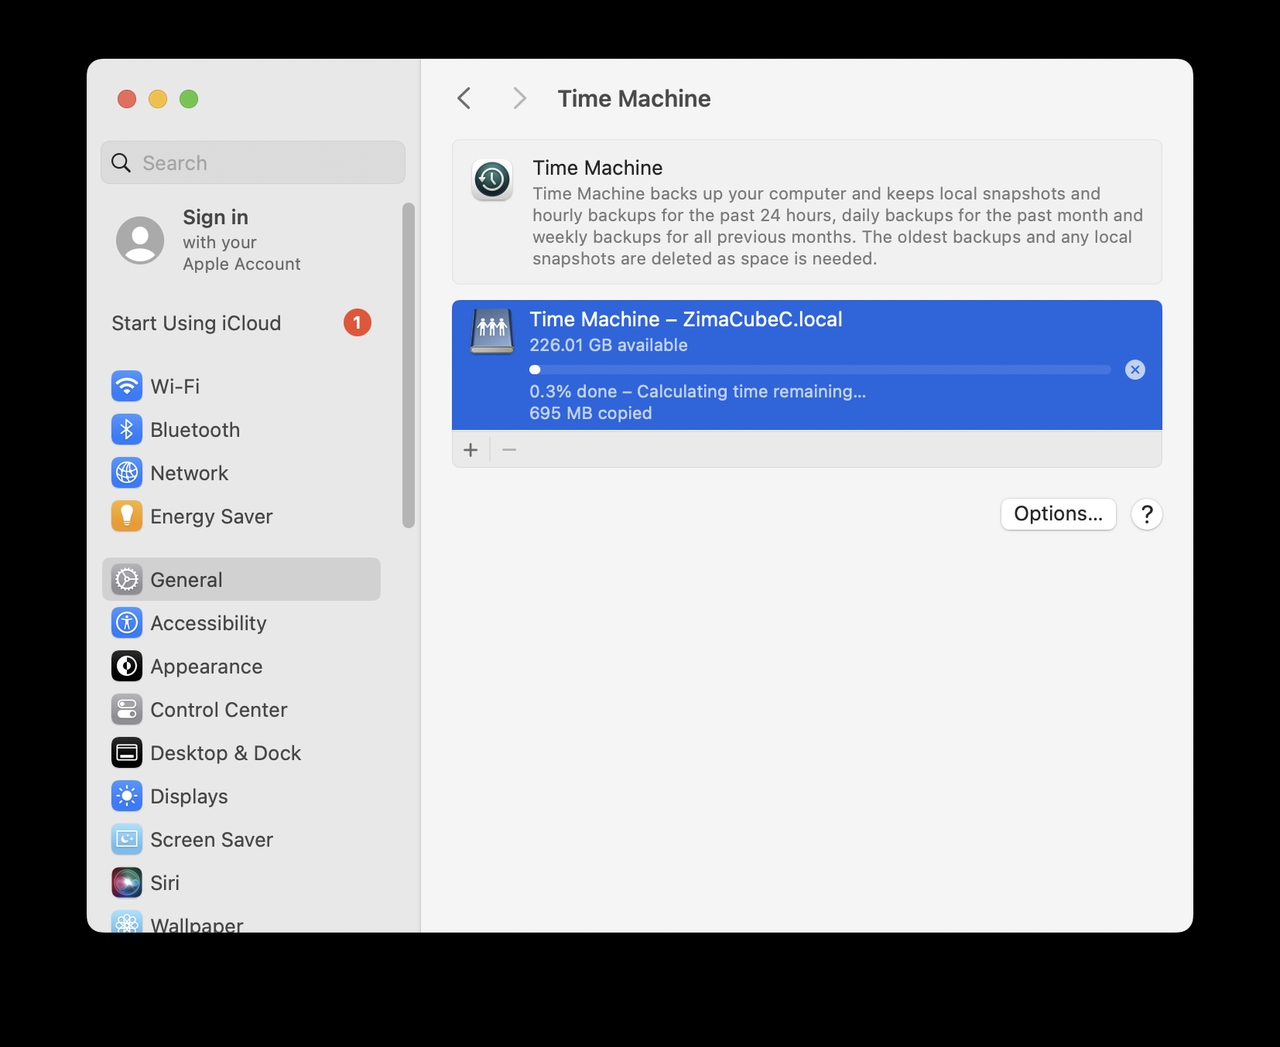
Step 3: Start the Backup
With your Mac and the ZimaOS device on the same network, Time Machine finds the target folder and starts backing up on its own.
TroubleshootingIf the backup fails, check the network connection and confirm that the SMB service is enabled on the device. When macOS will not let you type the password, click an empty area first and then click the password field again.
Restore Files
When you need a file back, restore it from the Time Machine interface. Apple’s guide covers it in detail: Restore items backed up with Time Machine on Mac.
Next
- 3-2-1 Backup Strategy — Time Machine is one ring of the plan; add an offsite copy
- Computer Backup — backup options for every computer in the house