
Cloud drives are good at what they do: they are everywhere, they are reliable, and other people already share files with you through them. Your ZimaOS device is good at the rest: speed on your own network, real capacity, and data that stays under your control. Connect the two, and you gain the flexibility to move data between them as your needs change. Take over part of your cloud data with the NAS to downgrade a subscription, or use the cloud as the encrypted offsite backup for your NAS. You decide where each piece of data lives.
Mount Cloud Drives in Files
The Files app connects to Google Drive, Dropbox, and OneDrive directly. Three steps, and your cloud folders sit right next to your local storage.
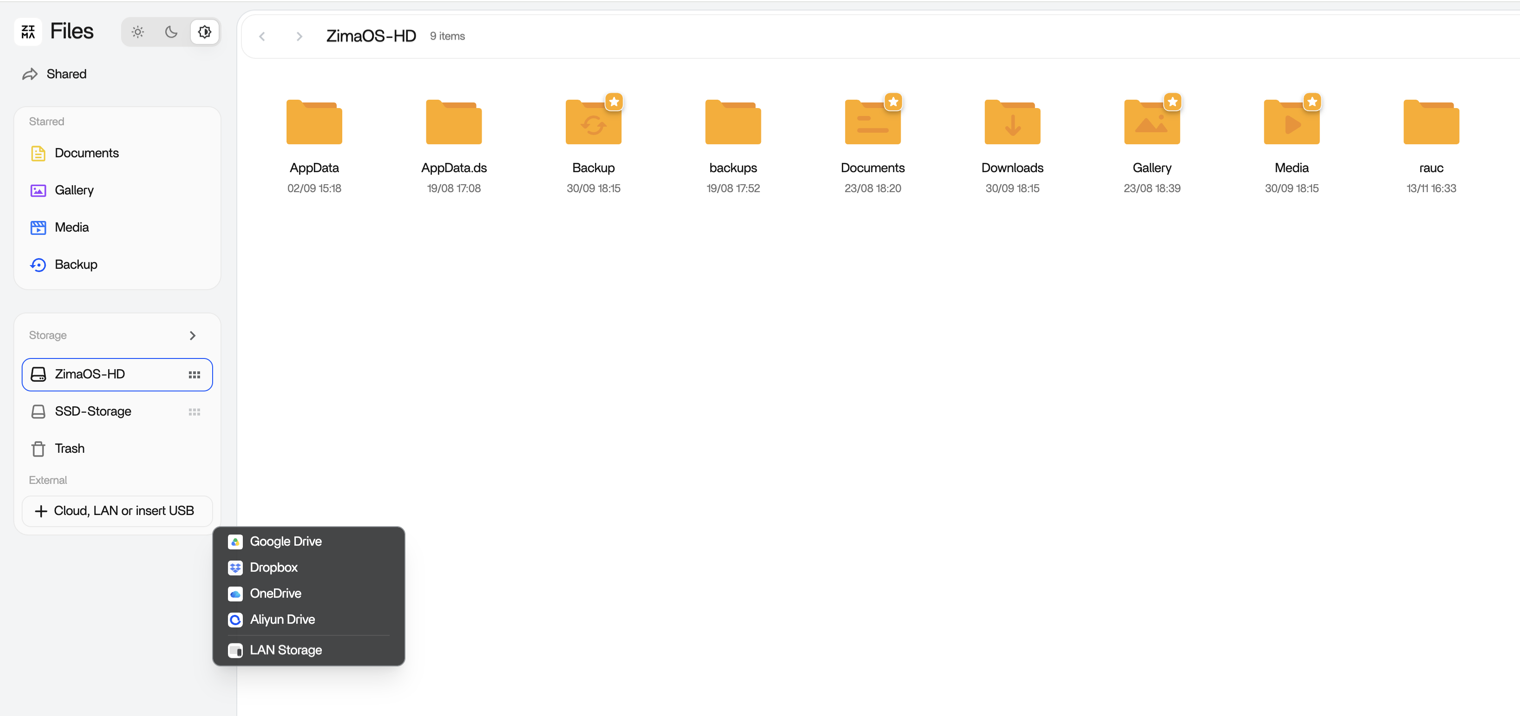
Step 1: Add a Cloud Drive
Open Files on the ZimaOS dashboard and add a cloud drive from the storage list.
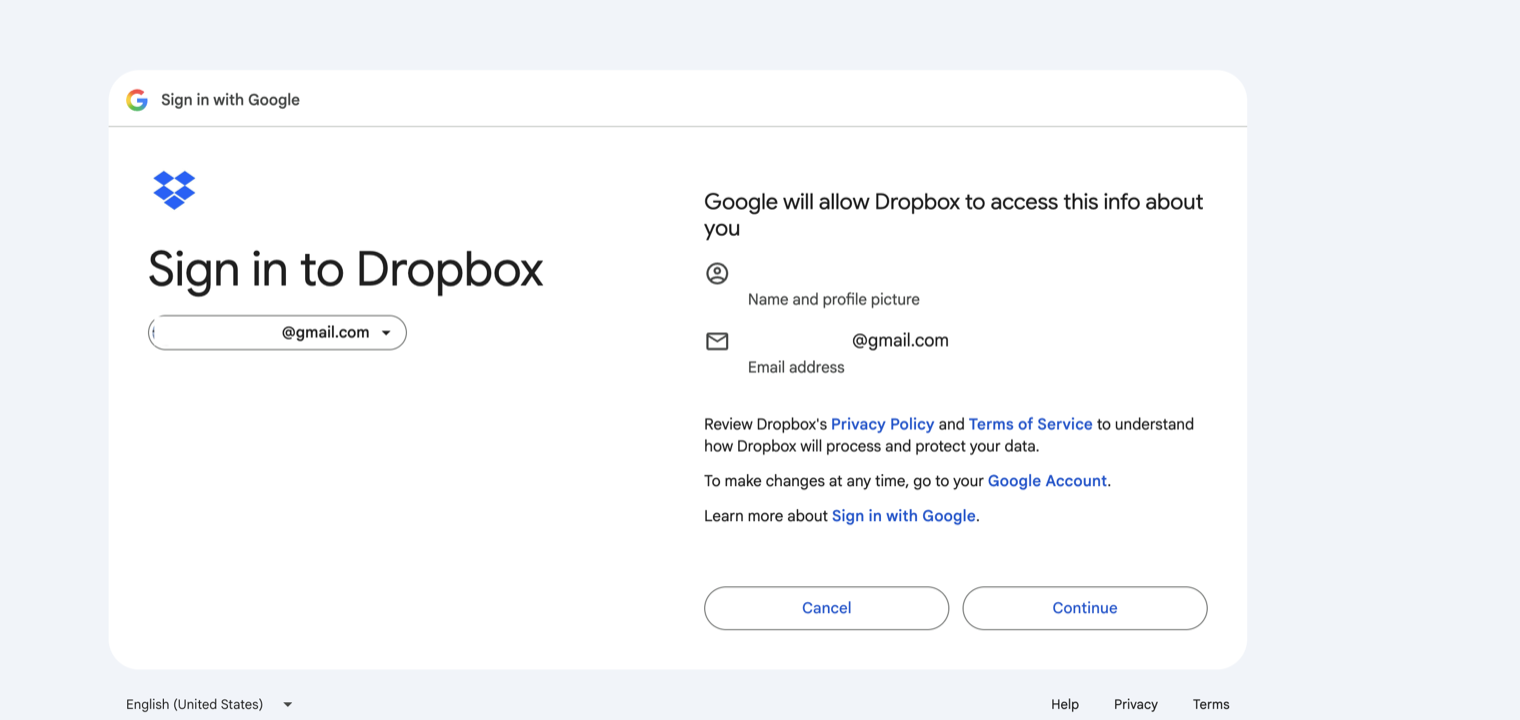
Step 2: Authorize Your Device
Sign in with your cloud account and authorize access. What you are authorizing is your ZimaOS device, not a third party. Every request starts on your own hardware and moves directly between your device and your cloud provider. Nothing passes through a third party, which keeps your privacy and access security in your hands.
Step 3: Manage It All from Your Device
Once connected, the cloud drive appears in Files next to your local storage spaces. Your ZimaOS device becomes the one place to manage everything across your clouds: automatic copy, batch migration, or direct access, all from a single dashboard.
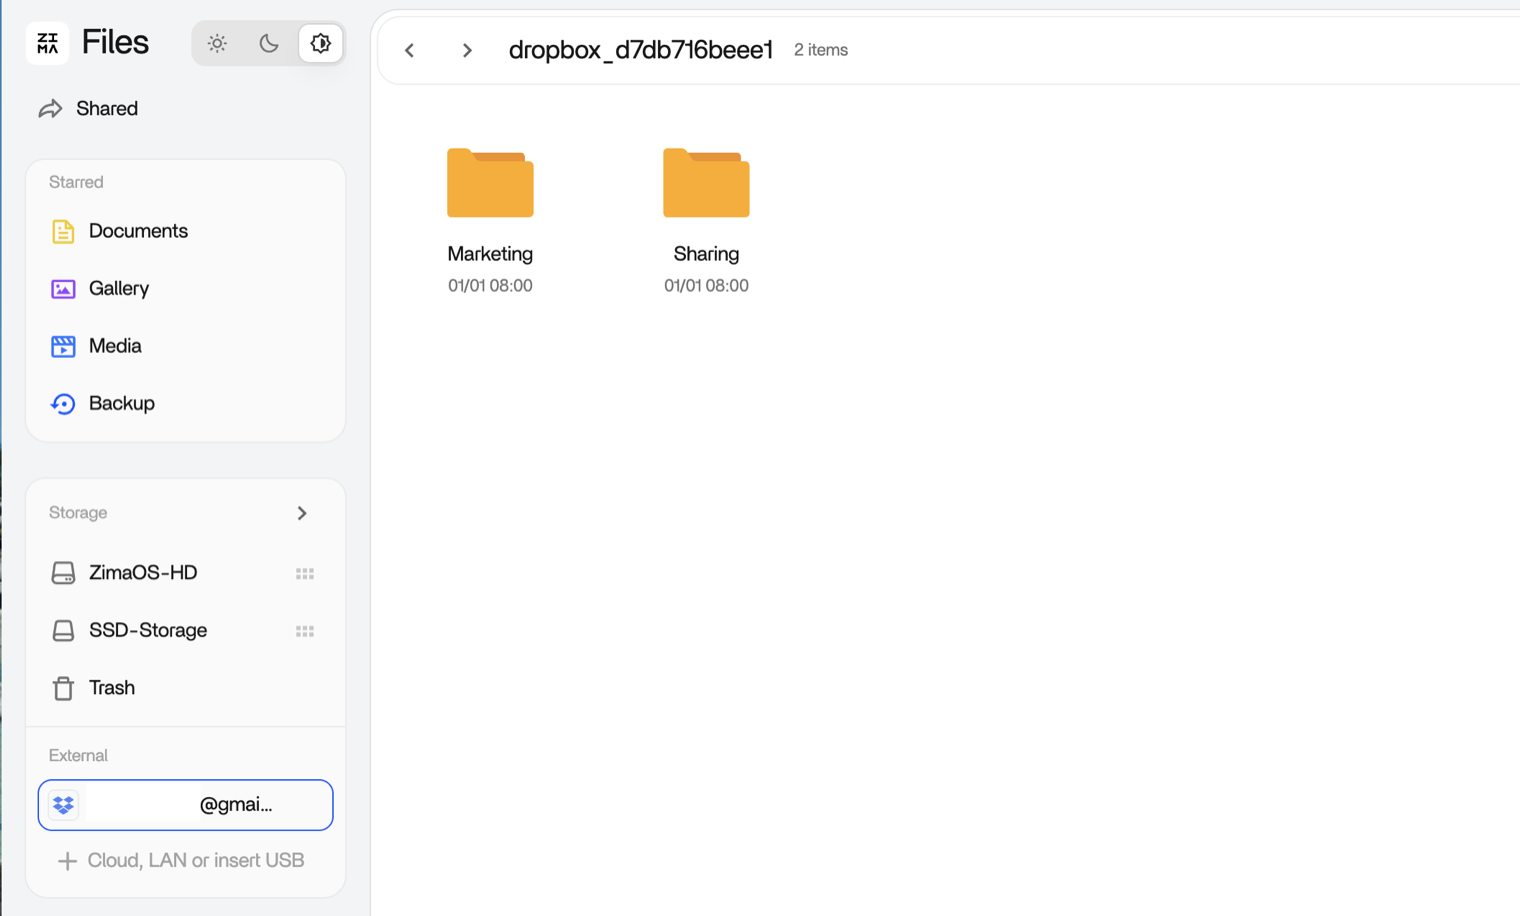
Work Across Local and Cloud
With the cloud mounted, moving between the two worlds stops being a project.
Open a file from the cloud, edit it, and save it back. Drag a local folder into the cloud drive when you want a copy somewhere else. Move enough data to your device and you can often drop to a cheaper cloud tier. The transfer runs in Files with verification, so a big move does not end with silently corrupted files.
Here is a move from a cloud drive to local storage, step by step.
Step 1: Select the Folder
In Files, open the cloud drive and select the folder you want to move.
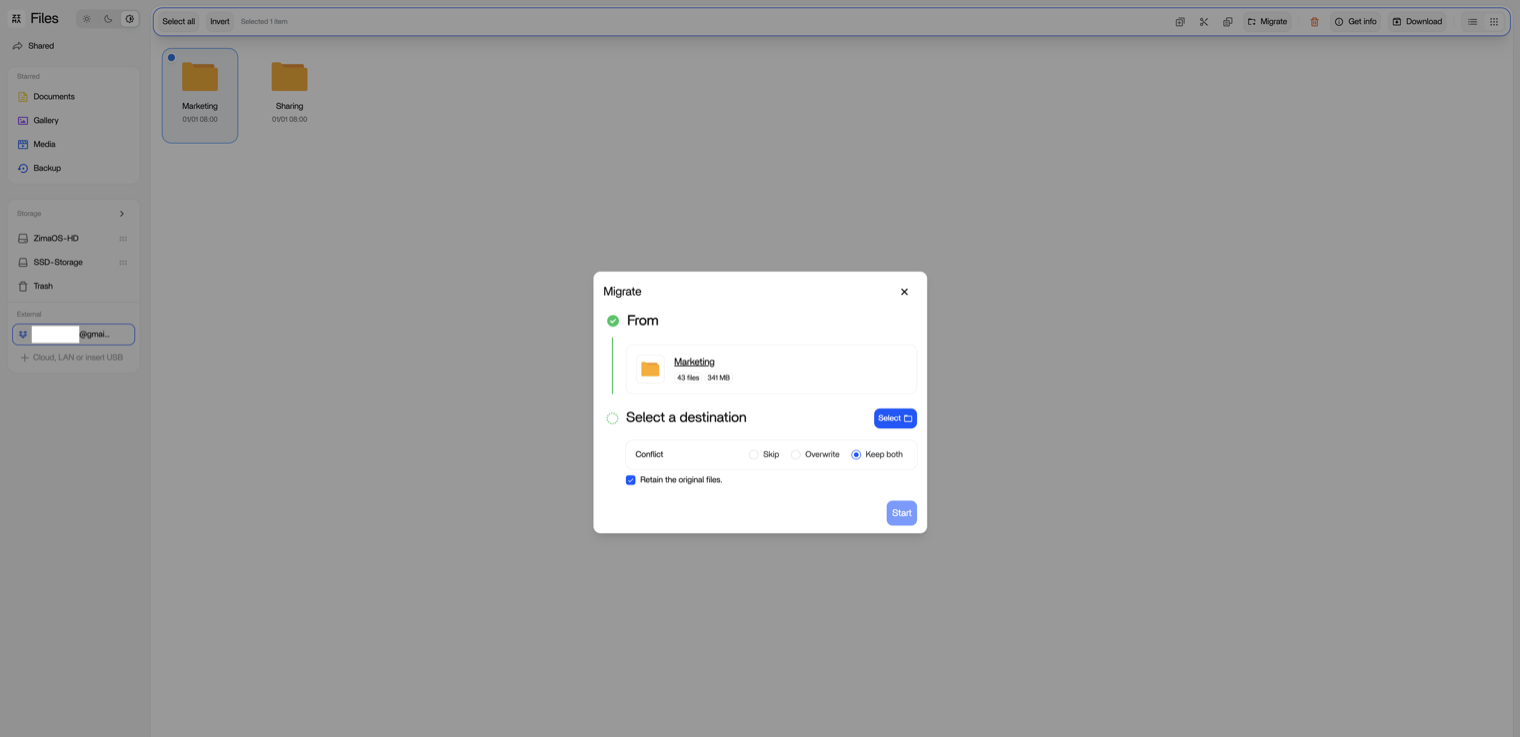
Step 2: Choose the Destination
Choose the destination storage space.
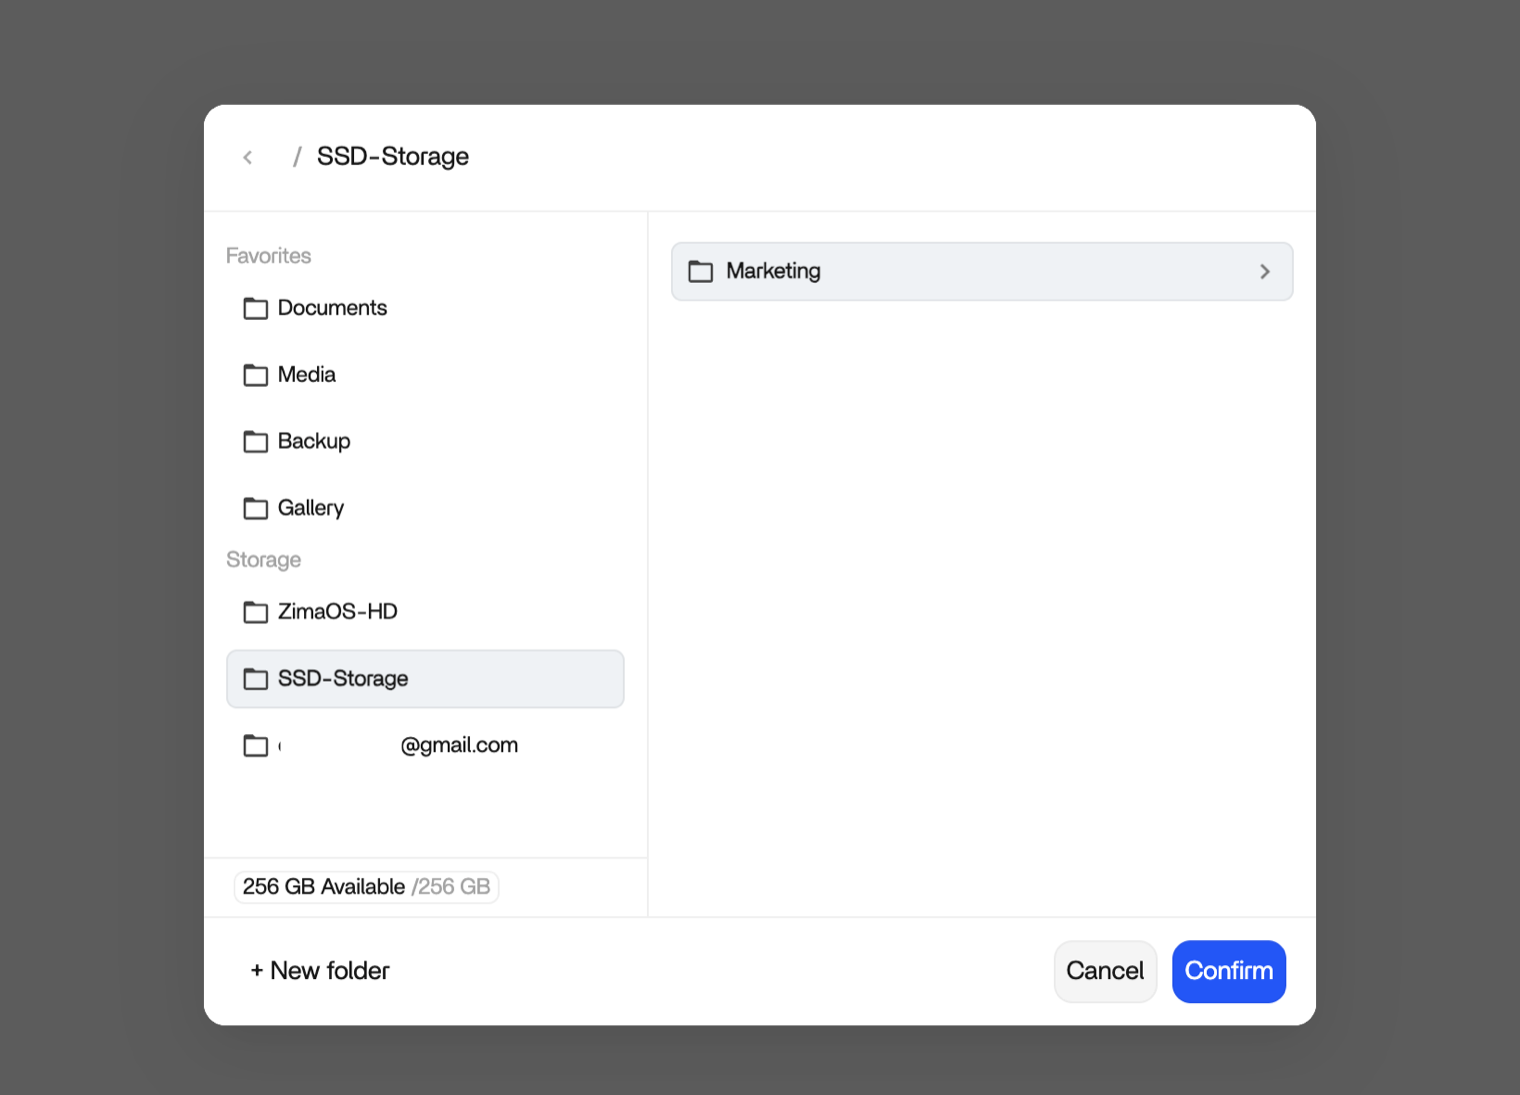
Step 3: Confirm Conflicts and Originals
Before the transfer starts, Files asks you to confirm two choices.
- Conflicts. When a file already exists at the destination, pick what happens: skip it, overwrite it, or keep both.
- Originals. Choose whether the original files stay on the cloud drive or are removed after a verified move.
Step 4: Start and Verify
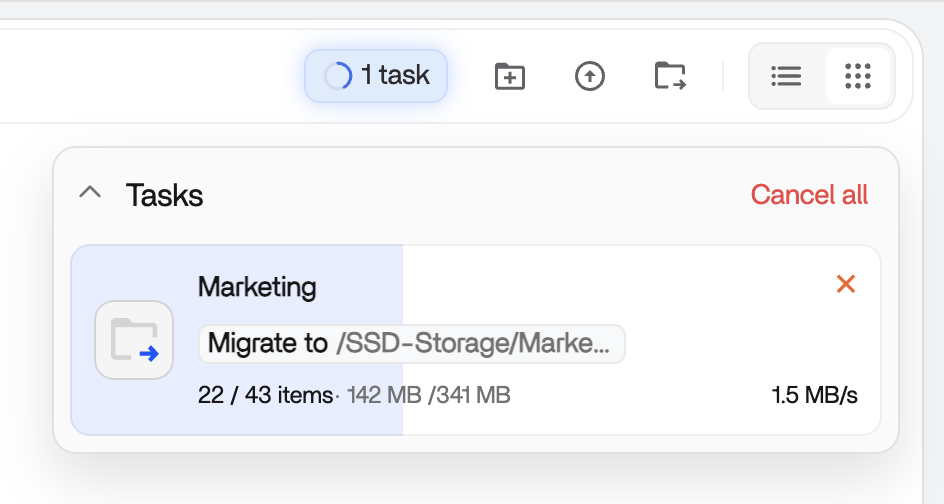
Start the transfer. Progress shows in real time. When it finishes, Files verifies the result and confirms the files are intact.

Multiple Accounts and Disconnecting
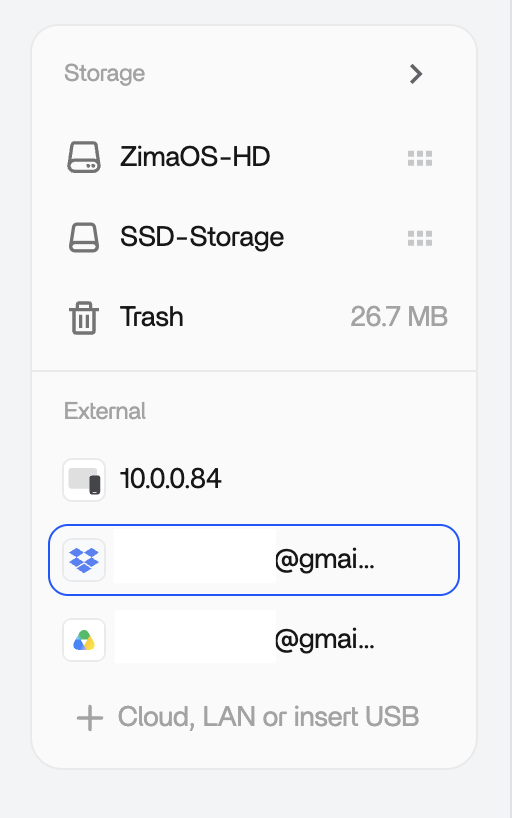
One account is rarely the whole story. You can connect more than one account from the same service, and each shows up in Files as its own entry. Two Google Drives or two OneDrives work side by side like any other storage spaces.
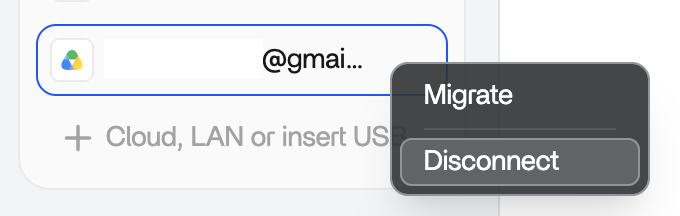
When a cloud drive has done its job, remove it from Files. The connection closes, and the cloud data stays where it was on the provider’s side. Anything you already copied to local storage stays local.
The Offsite Ring
A connected cloud drive earns a second job in your backup plan: it becomes the offsite copy in your 3-2-1 Backup Strategy.
Local storage holds the working copy, a second drive holds the local backup, and the cloud holds an offsite copy that survives a fire or a flood. It is the same cloud you already use, now doing the job it is genuinely great at.
Next
- 3-2-1 Backup Strategy — build the full backup plan
- Phone Backup — bring the phone data home too