
How you set up your drives depends on what you are building. A home media server needs different storage than an AI agent that runs all day.
Storage setup depends on how you use your device. Here are four common paths. You do not need to know what RAID is beforehand.
Common Use Cases
- Family data — start with RAID 1, grow into RAID 5 as the library expands
- App server — SSD for speed, RAID for the media library
- AI agent — a single reliable drive, backed up regularly
- Small business — RAID 5, balanced capacity with uptime
Family Photos, Videos, and Files
You want one place for everything the family creates. Photos from every phone. Home videos. Documents. The device sits in the living room and everyone in the house uses it.
Start with two identical drives in RAID 1. Your data is mirrored. If one drive fails, you lose nothing.
Connect Cloud Drives to add flexibility. Move large media libraries off Google Drive or iCloud to reduce subscription costs. Keep a third copy of irreplaceable files offsite as part of a 3-2-1 backup. Split shared projects between local storage and the cloud so collaborators can access what they need.
If your library outgrows two drives, RAID 5 with three or more drives gives you room to grow while keeping the protection.
App Server and Docker Host
You are running Jellyfin, Paperless, Pi-hole, and a few other apps. You care more about speed than redundancy for some data, and the opposite for other data.
A single SSD for app data gives you fast container startup and quick file access. Put your media and documents on a separate RAID 1 or RAID 5 array where redundancy matters.
AI Agent Server
You are running OpenClaw or Hermes. The agent runs around the clock, writing logs and memory. The data is mostly text, so capacity is rarely the issue. What matters is reliability.
A single SSD, a basic HDD, or even the system drive all work fine. The data is mostly text — logs, memory files, configs. Back these up regularly. If you are running multiple agents alongside other apps, RAID 1 on two SSDs costs a bit more but removes a single point of failure.
Small Business File Sharing
A few people in an office or studio need shared access to project files. Speed matters during the workday. Redundancy matters all the time.
RAID 5 with three or more drives balances capacity, speed, and protection. A single drive can fail and nobody notices. The biggest advantage: you can add more drives over time as your storage needs grow, without rebuilding from scratch.
How to Set It Up
ZimaOS handles the configuration for you. When you plug in a new disk, a notification will appear prompting you to set it up.

- Go to Settings > Storage.
- Click Combine to open the disk setup wizard.
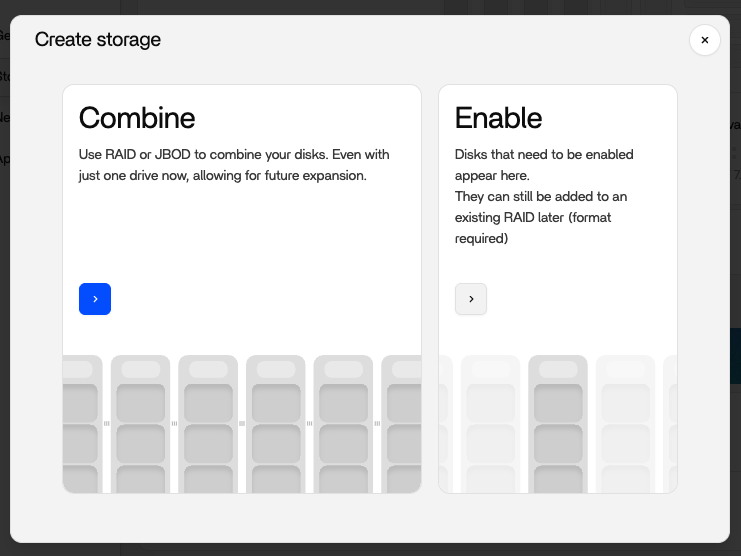
- Choose your configuration and select your drives.
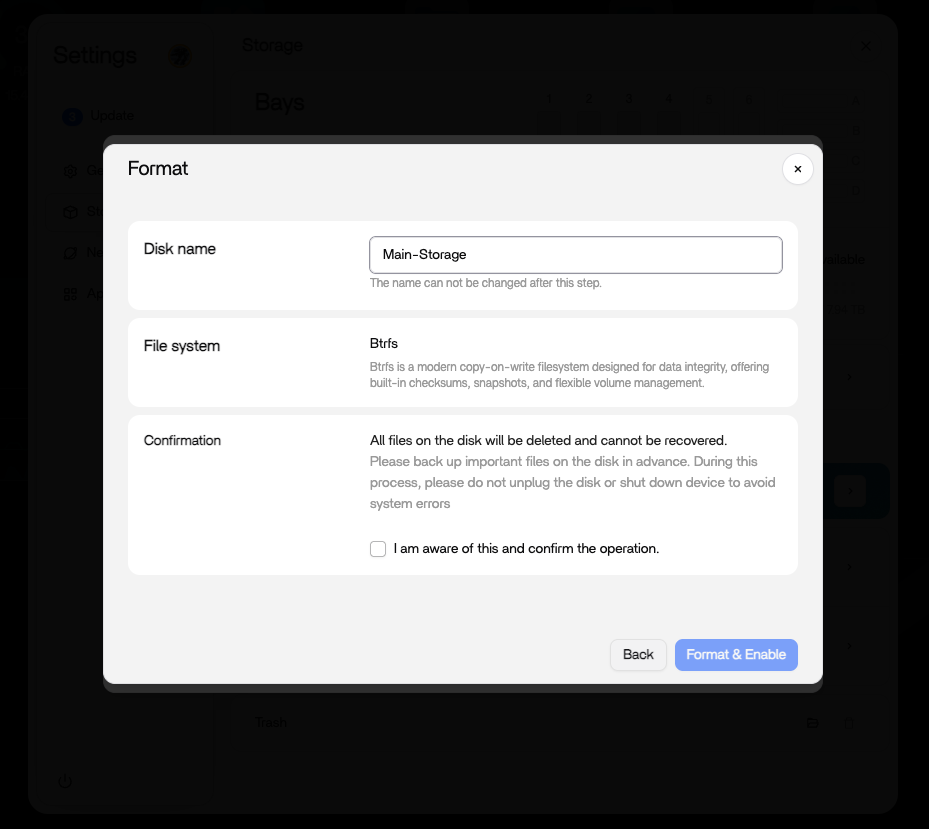
- Name the array and confirm.
After Creation
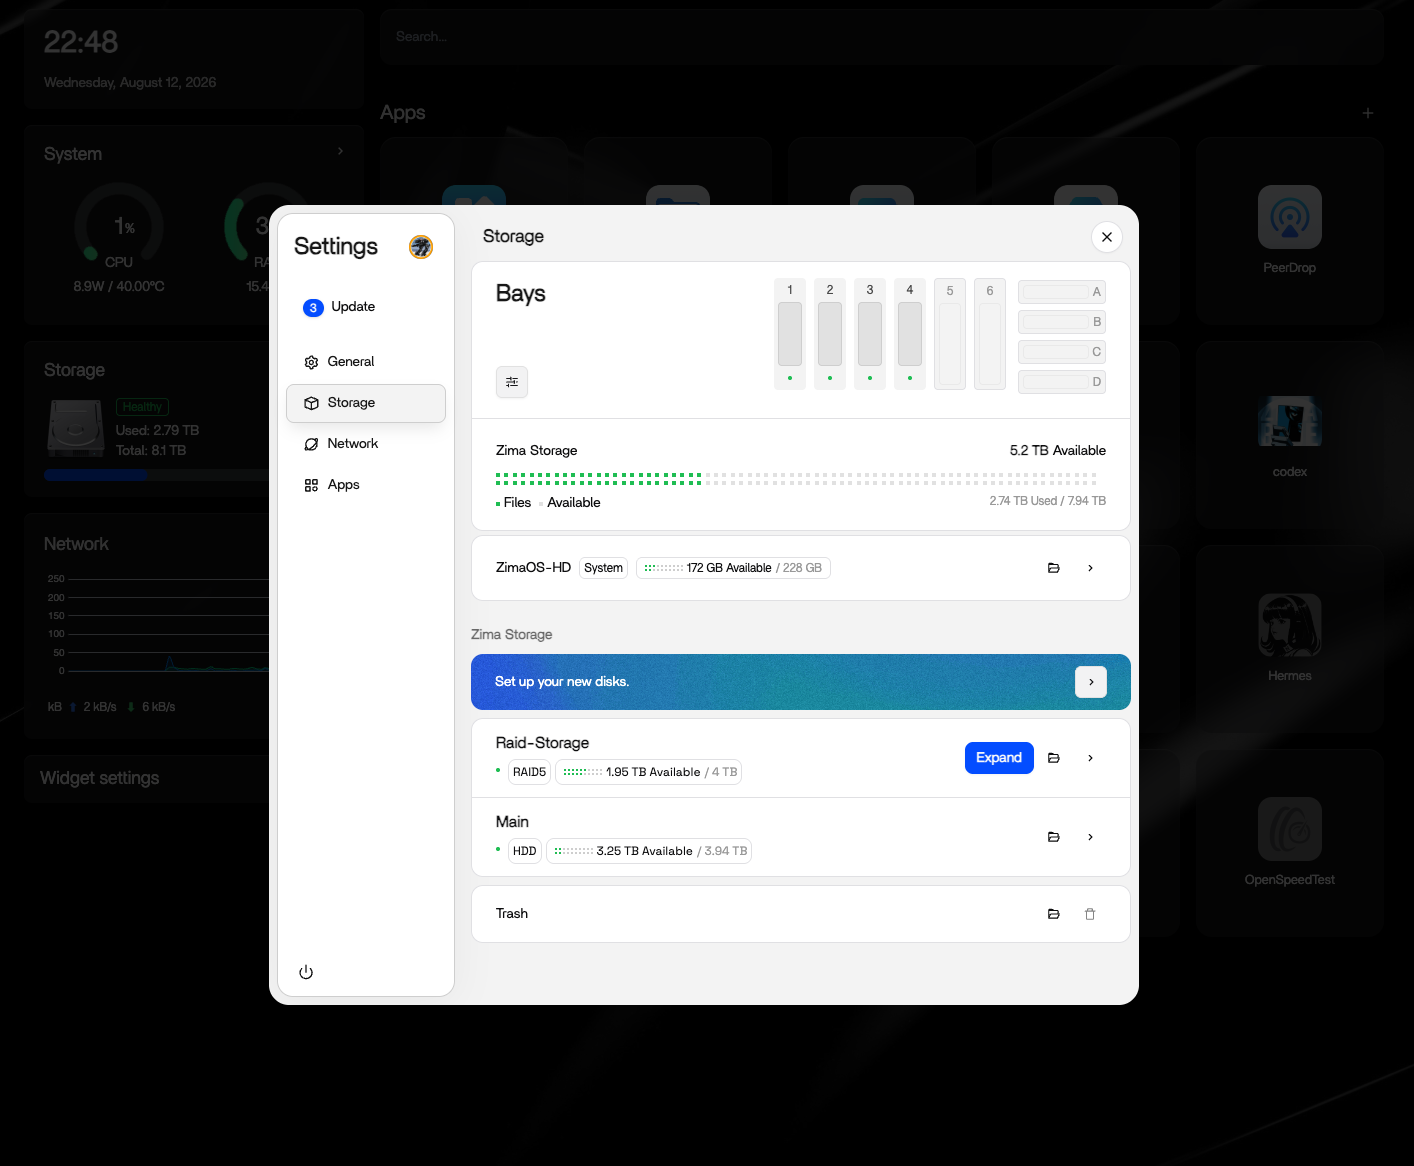
Once your storage is set up, you will see the array listed under Settings > Storage with its status. A healthy array shows a green indicator. You can check disk health, available capacity, and read and write speeds from this page.
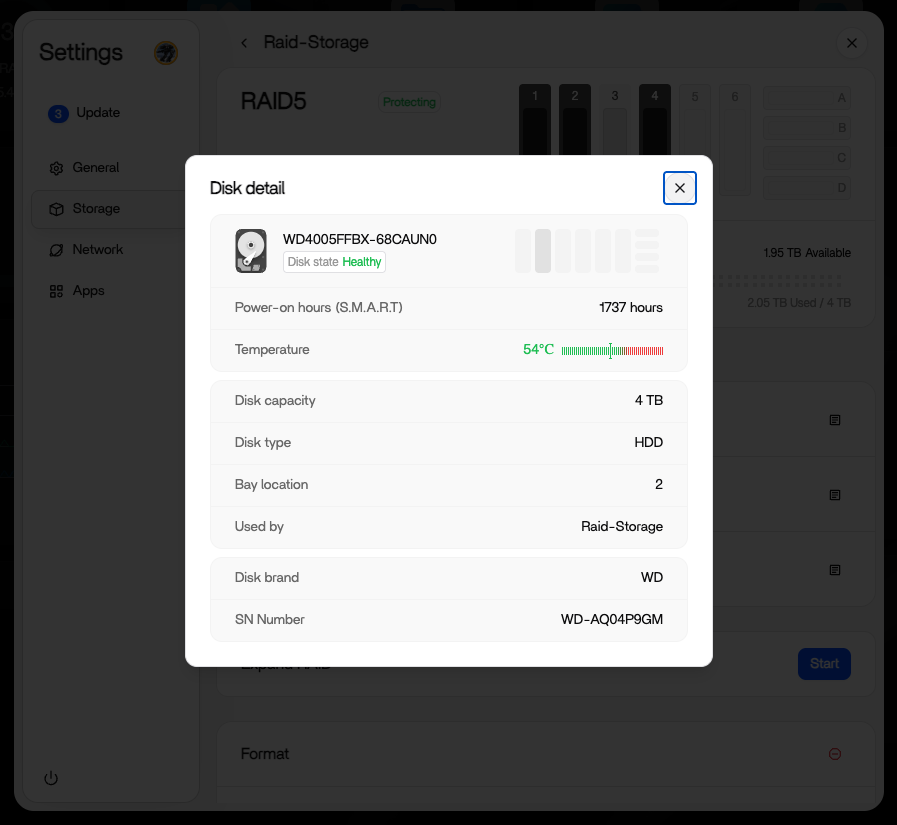
If a drive in a RAID array fails, the status will change to degraded. Your data stays fully accessible — reading and writing continues normally. Replace the failed drive and ZimaOS will guide you through the rebuild process.
Single disks and USB drives show a simpler status view with health and capacity. No RAID management needed.
USB drives follow the same logic as internal HDDs and SSDs — plug one in, and you can use it for storage, add it to an array, or expand your existing space.
For step-by-step details on each RAID level, see RAID Options. If you want ZFS for snapshots and advanced data integrity, the ZFS Setup guide in the Dev section covers it.
Once your storage is set up, the next thing is getting your data in. Phone Backup and Computer Backup cover the devices you use every day. Data Migration is there when a drive fills up. App Storage Paths lets you point each app at the right drive.